


This particular apron is great because it is so versatile. This pattern is the bread and butter of aprons ha!

This is going to be my everyday apron. It is much more sensible then the other aprons. Easy on easy off.

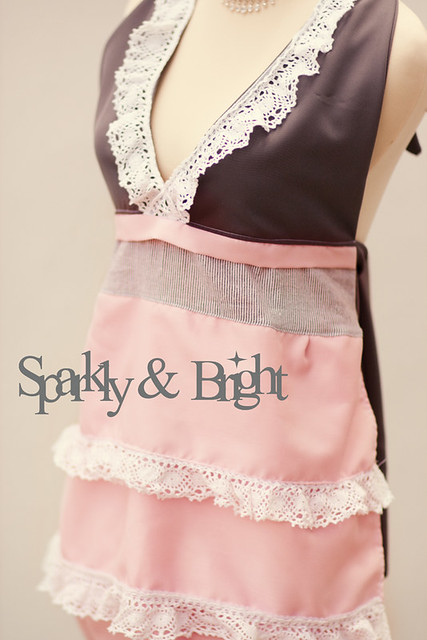
What is great is it is a cinch to make! If you like you can add embellishments to make it a bit more frilly like the Sparkly and Bright apron
What you will need
1/2 yard main fabric
1/4 yard for waistband
1/3 yard for ties
1/2 yard fabric for Apron bottom
The pattern can be found under the tutorials tab at the top of the blog
Once you have printed out the pattern grab your main fabric. In order to save on cute fabric I cut 2 from the cute fabric and 2 from white fabric. I used the white fabric on the back and cute fabric on the front. Once you have cut your 4 pieces out lay them right sides together and sew around the edges but not the bottom

Once you are done tune the pieces right side out and topstitch if you like

Take your two top pieces and overlap them slightly and pin them in place

Take the fabric you decided would be a cute waistband and cut it so that it is a little longer then the bottom of the 2 top pieces that are now pinned together. It can be as wide as you would like your waistband to be. Once you have cut it take your rectangle and pin it right sides together and pin all up the raw edge.

Now sew up the raw edge. Once you are done topstitch what you just sewed

I decided this time to cut long strips of fabric and just hem the sides. Once you have made ties pine them right sides together at the ends of your waistband

Once you are done flip out the tie and topstitch

Now grab the fabric you decided would look good on the bottom. Hem up both sides and the bottom the do a gathering stitch across the top. Gather it up until it is the same length as the waistband

Place the fabric pieces right sides together with the raw edges of the waistband and the raw gathered edge of the apron body are together. Sew across the raw edges. Once done topstitch what you sewed and you are done!!!
Super easy right? Now if you want to add some ruffles simply slide them in between your two pieces and THEN sew around the edges.

I will go over how to make the tiers on the apron bottom when I give the tutorial on the HMS Lollipop apron.


LOVE, LOVE, LOVE this apron!! I linked to your tutorial over at Craft Gossip Sewing:
ReplyDeletehttp://sewing.craftgossip.com/tutorial-razzelberry-apron-with-halter-style-top/2011/01/09/
--Anne
OMG! You just helped me make up my mind! I am taking the sewing class and bringing this pattern in to have them help me learn to sew!! I love this sew much! And it is exactly like the apron I have been ogling online for about $42 (!!!) with the added bonus of being able to say I made it myself AND I get to make it exactly the way I want it! thank you for sharing! its beautiful!
ReplyDeleteJenn Post
This is such a cute apron!! It looks like something out of Anthropologie...except maybe even cuter!
ReplyDeleteLove it Kelly! I did the "save fabric trick" when I did all the stuff for our portraits! Great minds think alike!! And while I was doing it I totally thought of you and the lack of fun prints over there! I was like "so this is what Kelly is dealing with all the time..."
ReplyDeleteLove and Hugs, Jess
Kelly,
ReplyDeleteI can't get over how gorgeous your aprons are!! I'll be featuring on Ucreate today! Thanks for sharing your creative genuis-ness with all of us!!
Beautiful! I love the colors you chose too! I might just have to make the time to make this :) SOON!
ReplyDeletethis is one of the most beautiful aprons I've ever seen!
ReplyDeleteWhere is the pattern for the top? I don't see it? Thanks! This is really cute!
ReplyDeleteHey there Kelly! I featured your apron tutorial on my blog today!
ReplyDeletehttp://theadventuresofroryandjess.blogspot.com/2011/03/apron-tutorial-round-up.html
Thanks for the tutorial and inspiration!
Jess
I love this apron. I am going to make it for a prize for a party I am having soon.
ReplyDeleteI made this apron today! It came out so cute. here is a link to the blog post. http://mylifeunzipped.blogspot.com/2011/04/pink-gardens-apron.html
ReplyDeleteyou made a gorgeous apron, love it! you give me an idea, bib apron shop have also cute and you can choose any designs you want.
ReplyDeleteThe pattern looks very beautiful.
ReplyDeleteiklan gratis