





Showing posts with label Misc.. Show all posts
Showing posts with label Misc.. Show all posts
Friday, October 29, 2010
Daring New Look
FINALLY we have internet again! Whoo hoo!!! Who knew a day and a half without internet connection could be so stressful ha! I am so excited to talk about the new look of the blog. First some background. When I started the blog a few months ago I promised the hubby it wouldn't end up costing mola. Well, I must admit I was envious of how good other blogs looked and I have NEVER claimed to be computer savvy so there was no way I could figure out how to spruce up mine. While in Rome I received a lovely email from Amy at Designer Blogs asking if in leu of material she could help out with a blog design. UM? OH MY GOSH! I was so excited. I knew I wouldn't be able to concentrate until I got home so Amy was kind enough to wait. Then the creative process started! Designer blogs is fantastic in that they allow you to pick images/ designs from HUNDREDS of stock images, or you can have a completely custom design made! Here is the amazing part. I have a horrible idea of what I like and have HUGE respect for interior designers or in this case blog designers who can reach inside your mind and pull out EXACTLY what you yourself could not articulate. I gave Amy so much garbledegook aka: "I like swirls and birds and muted colors and things that are pretty etc. etc." and with that tiny bit of guidance and looking at other blogs I sent her that I liked taddah!!! She came up with something I absolutely LOVE! Then she was crazy patient with me as I figured out how to use all the little bits and pieces. She answered all my silly questions promptly and kindly as opposed to "Seriously girl? First you need to turn on your computer" ha! What is wonderful about Designer Blogs is that they are sooooo affordable. I thought having a custom blog would be outrageously expensive but I think they realize they will get A LOT more customers (and return customers) if they keep their prices affordable. So if you need a stocking stuffer, or a halloween gift :) or a fresh new look for your blog to be thankful for hop on over HERE and check them out. Of course I HIGHLY recommend Amy but I am sure the other team members are fantastic too. I hope you love the new look as much as I do, and that things are a little more organized and more accessible!

Wednesday, October 13, 2010
Halloween Treat Bucket: A Potterybarn inspired tutorial


So I decided to make my own & I LOVE it soooo much I made another for both boys AND one for Addie as a thank you for being my model in a previous shoot. The pattern you will need can be found HERE.
Thursday, October 7, 2010
Sneaking in before the MADE post....
because they are just too cute not to post. This is Evie on our last night in Italy. It was the tinsiest bit cold so I jumped at the chance to put her in an outfit I bought her before she was born (and well before I knew we would be living in a hot climate year round)
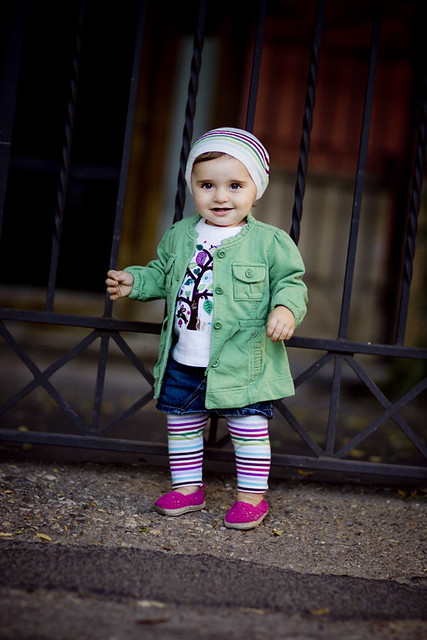

We sure do love her, even if she does spend the majority of her outside time chewing on rocks!
As much as I love Timor I have to admit it was hard to come back. I really miss thinking up an idea and being able to jump in the car and in one stop have everything I need, as opposed to scouring every "store" (or stand on the side of the road" and finding something sort of like what I need but not really. I do love it here and we are so blessed to be here in hundreds of ways. I knew the onset of fall would be tough for me. I just have to remind myself that if and when there is a major snow storm in DC I will be thrilled to be building sand castles and eating ice cream. Thanks for letting me sulk a bit and please someone eat a candy corn and mallow pumpkin for me.
Cheers!
Kelly
Tuesday, October 5, 2010
Dare to Design: My Dress Design for Shabby Apple Dresses
Is it odd that I am literally shaking as I type this? I don't know why I am so nervous to share this. Maybe because it took me FOR-EV-ER to figure this pattern out and then make the dress. Maybe it is because I am worried that it's cuteness won't translate to film? In any event I wanted to share the dress I made inspired by Shabby Apple Dresses (click on the hyper link to view their fabulous collection) I call it the "Bustling City" dress.

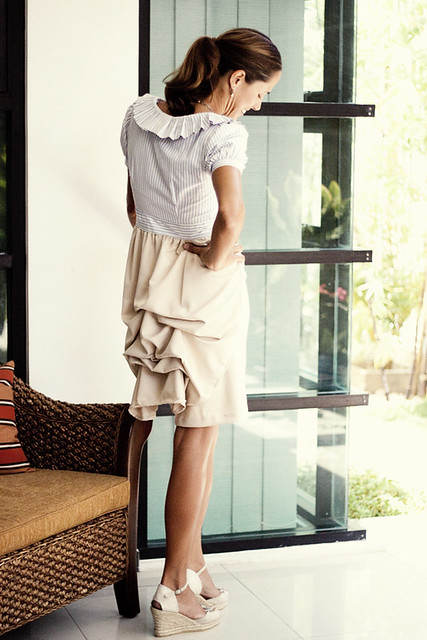
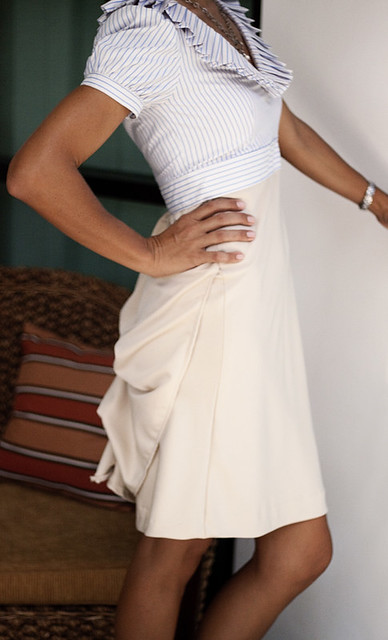
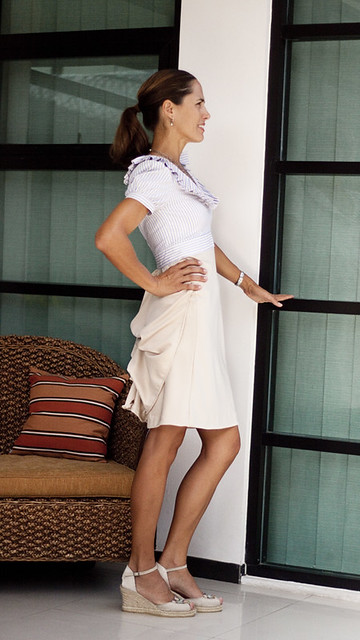

My wedding dress had a big bustle and I love it so much I never wanted to spread it out (much to my photographers dismay). Since then I have REALLY wanted a dress with a bustle, a practical bustle. This one isn't huge and doesn't make my bum look enormous. It is just a fun detail on the back, an area that is usually boring.
I love highish defined waists (hide my momma tummy) and clean straight skirts so I tried to do that in the front
It hits right above the knee so it is nice and modest for my embassy functions
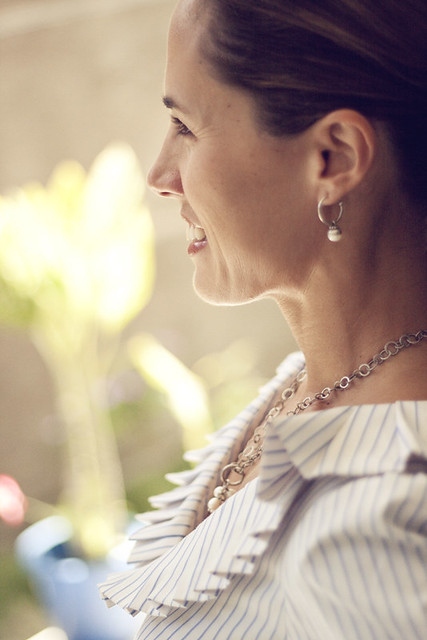
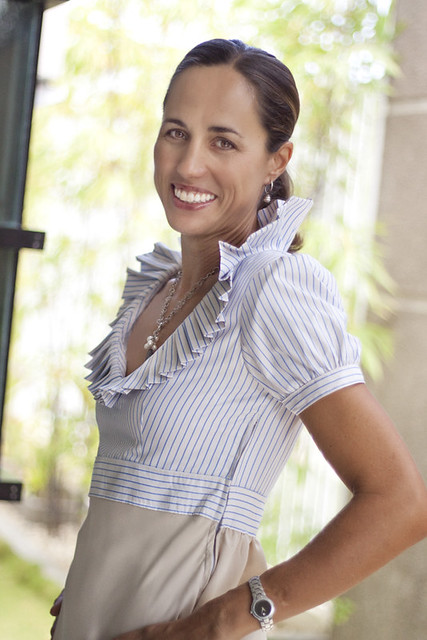
And of course those who know me know I am OBSESSED with collars so this one had to be fun and pleated like crazy.
Does it help that I had my gorgeous friend Nicola model it? Oh I think it does ha!
Oh and it has a little side zipper. That thing turned out to be the bane of my existence. I couldn't find my zipper foot (still) so I took the dress with me to Rome. My mother in law couldn't find her zipper foot so the two of us struggled and tore out and resewed it I don't know how many times ha! I really love the finished product and even though I am sure I won't win (guaranteed the gorgeous little lady behind the fabulousness that is Grosgrain will whip something up and crush me, she is just AMAZING) I couldn't let another year go by with out trying. AND if nothing else I am so excited to wear it to something fancy pantsie and be able to say "Oh thanks, I made it!" if I receive any compliments :) So let me know what you think. I am so nervous it is silly. Oh and I thought I would include one shot of me wearing it... you know just for kicks and giggles.
Cheers!
Kelly
PS I am working like a made women on a project I am SOOOO excited about for MADE's yellow month. The post will be up Thursday woo hoo!
Saturday, October 2, 2010
Tin Can Luminaries
I LOVE luminaries. I do not how ever really love the idea of fire in a paper bag. It always seemed a little wrong to me. I was mentioning this juxtaposition of feelings to one of my friends from London and she told me about the tin can luminaries she made while growing up. I thought this sounded like the cutest thing EVER! I made her give me all the details and am so excited to share it with you. I am very sad I couldn't do a better job with the pictures. After SCOURING the house I couldn't find my tripod anywhere grrrrrrrrrr. So, as I warned my night photography stinks, they are soooo cute and my pictures do not do them justice, try them, I swear you will love it!

What you will need:
An empty metal can (my boys eat Olives like there is NO tomorrow so I have lots of those lying around, but ANY can will do and I think it would be super cute to do them in lots of odd sizes. I am totally doing tuna cans for halloween with just polka dot holes... wow this was a long aside)
A small nail
A large nail
A hammer
A freezer
A printed template or drawing of Halloween items (I found mine on Martha Stewart.com)
Cello tape
Play "It's the Great Pumpkin" Charlie Brown special to occupy cuties and get you in the spirit
Let us begin:
Thursday, September 30, 2010
Waiting for the night
Is that a song? I swear it is. Anyhoo I am waiting to do some night photography for my olive can make over tutorial... getting warmer at a guess yet? But the kiddos are sleeping or at school and I was finally able to try and find some labels etc. for our christmas cards and I stumbled on a website and HAD to share it, Paperwink


I love how classic and clean their website is and their prices are FABULOUS! I have always wanted my own return label stamp but could never justify the outrageous prices, combined with the fact that we move every few years but this is TOTALLY worth not dooming my hand to arthritis. I think I am going to go with this one:
I originally wanted a more expensive one but then I saw their personalized notebooks and thought if I got a stamp on sale maybe I could sneak in the 3 pack of personalized notebooks.
I am ordering our cards this weekend and very happy that I won't be hand addressing them again. Now I can save my hand for hand written notes! Wish me luck with the night photography as I am AWFUL at it.
Cheers!
Kelly
Wednesday, September 29, 2010
Um, is it really 11?
I had such good intentions for our first day in Timor. I have tons of things I am dying to sew (Italy is an inspiring place) and I have one HUGE project coming up (think wood, saws, nails, lace, silk etc ha!!) When I went to bed last night my head was swimming and I couldn't wait to get up in the morning. Well Evie couldn't wait to get up at 2-4:30am and the boys felt the same way from 3-4am. This morning I rolled out of bed and opened my door to see bright sunlight on the water, uh oh. It was 11 in the afternoon!!!! All 3 of the cuties and I had slept in until 11!!! Finn had totally missed school and Sawyer was about to if I didn't get my bum in gear. I had to shake everyone awake and make a made dash lunch. After grocery shopping in the pitch dark (darn power cuts), throwing away the expensive food in our freezer we had airfreighted in from Aus due to a 9 hour power cut while we were gone and rounding all the cuties up again I didn't get a chance to get to anything, boo. And I was totally going to do a tutorial on how to make your hubby's these smashing outfits:
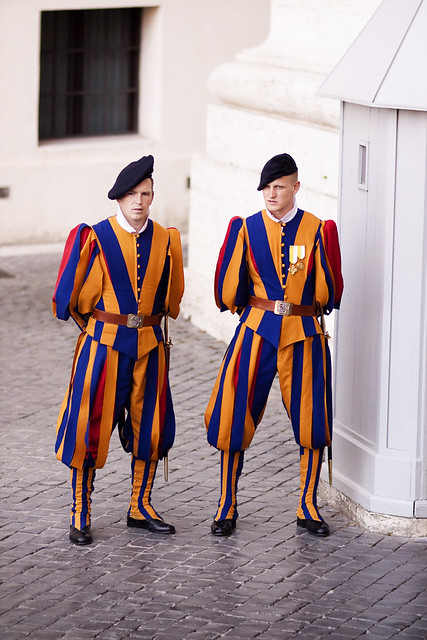



Ha! Okay I am totally kidding, those were two of the vatican guards. Da Vinci designed their uniforms, how cool is that? You are wearing art! I wonder if he would be a clothes designer if he were born today, seems like there is more money in that these days. With clothes like these:
I am sure Lady Gaga would be his number one client! Okay anyway sorry I just had you show you those :) And this one will help you get to know me a little better:
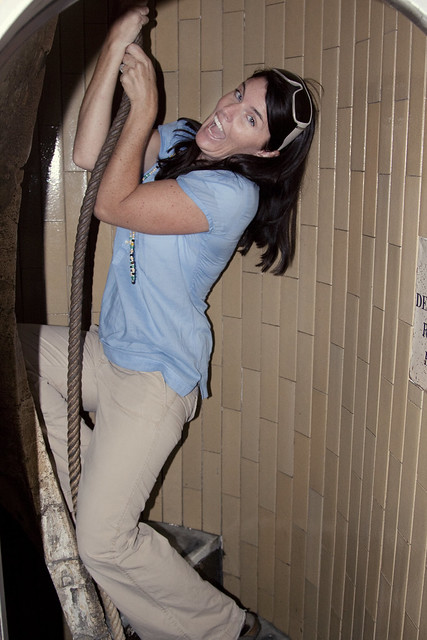
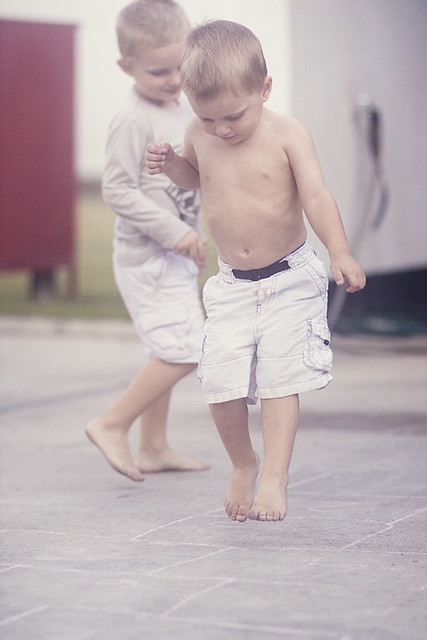
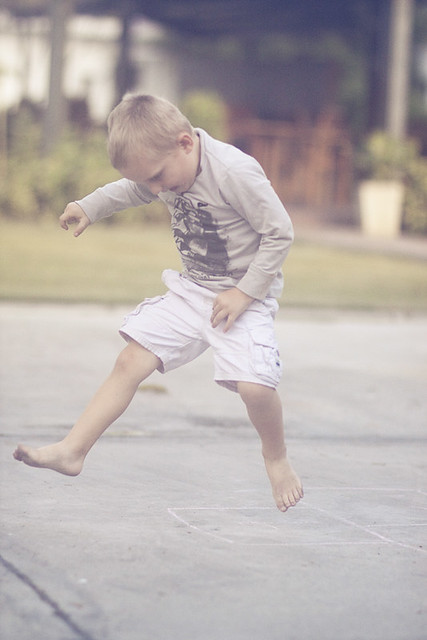
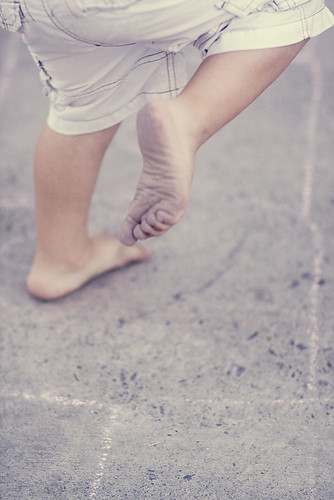
That is me climbing up the TINY staircase to the top of St. Peters Basilica. So tiny you need to haul your bum up a rope! I was dying laughing. The last time I did something like that I was 7 months preggers with Finn and carried Sawyer up the rope to the top of Blarney Castle. Aw man can you tell I am jet lagged I am totally babbling! Needless to say I have made everyone stay up super late tonight so that we are righted by tomorrow. Combine that with another rousing game of Hopscotch
I am telling you it was intense
AND turned into a brotherly brawl
and required a good scrubbing of the feet that nights
and possibly another hot chocolate tea party (smattered with my sarcastic comments about drinking hot chocolate in 90 degree heat) and I think it will be a fun day! Plus I have my first halloween tutorial to share with you, here is a totally obscure hint:
Cheers!
Kelly
Thursday, September 16, 2010
Whats in the bag?
I must preface this post saying I in NO WAY think I am a fabulous, trailblazing photographer. I think I do just fine and have fun editing my personal pictures in fun funky ways but I don't want people to think I am little miss know it all or anything. I just thought I would share how I sometimes do things since I have received several emails and post comments about it and I don't want to be rude and ignore them. I honestly believe the best way to improve your photography is to find a photographer you LOVE and attend one of their workshops. Ones I might recommend, but is NOT limited to (their names are hyper links to their sites):
Nicole Van in UT
Amelia Lyon in CA
Nicole Hill Gerulat travels around with Art Weekend
The Image is Found California (If there is anyone who wants to go halfsies and do a day together next summer while I am on Vaca in the states let me know!)
Simply Bloom Photography (South USA)
If Angie from Simplicity Photography ever does ANYTHING like that I would go in a heartbeat.
If you are like me and in a remote location the best option may be Nicole Van's Workshop in a box which has received rave reviews OR you can take great online courses at MCP Actions. I am trying to figure out how to take Jodi's Curves class with my unreliable internet... should have done it while in Italy. Literally JUST thought of that while typing it.. ughh. These ladies (and one gentleman) are fantastic and totally have the background to teach, this is just my tiny tiny half a cent, take it with as much weight ha! If you would like to see my photography you can check out my website HERE or at kcrawfordphotography.com (yes I had to pay fees for the songs, that is another subject ha!) my favorites are infants so be sure to check that out under children :) I really need to update it there are so many great sessions I haven't put on... darn you slow internet!
Okay, so what is in my bag. When I graduated highschool my parents knew I was really getting into photography so they bought me a Canon Rebel film. This was great because I actually had to learn how to take good pictures in only 24 shots. I couldn't shoot a hundred and know at least one would turn out. It was way to expensive for film and processing to do that. A few years later I moved up to a Sony DSLR they are a fairly cheap entry level DSLR and my hubby said before we "bought the farm" he wanted to make sure I would "really use it". It was WELL used. Then came the decision whether to go Nikon or Canon. To be honest I went with a Canon simply because I was familiar with it. I have no passionate feelings either way. Two of my other photographer friends use Nikons and love them so really you will have to research that on your own. The thing is, once you have decided you need to stick with it. Once you start having a few lenses it is way to expensive to switch. Now came the next decision, whether to spend more money on the body and go with the 5D Mark III and only have 1 lens or go less expensive body, the 50 D and buy more lenses. I decided the later. I now shoot pretty much exclusively with my
canon 50D

Nicole Van in UT
Amelia Lyon in CA
Nicole Hill Gerulat travels around with Art Weekend
The Image is Found California (If there is anyone who wants to go halfsies and do a day together next summer while I am on Vaca in the states let me know!)
Simply Bloom Photography (South USA)
If Angie from Simplicity Photography ever does ANYTHING like that I would go in a heartbeat.
If you are like me and in a remote location the best option may be Nicole Van's Workshop in a box which has received rave reviews OR you can take great online courses at MCP Actions. I am trying to figure out how to take Jodi's Curves class with my unreliable internet... should have done it while in Italy. Literally JUST thought of that while typing it.. ughh. These ladies (and one gentleman) are fantastic and totally have the background to teach, this is just my tiny tiny half a cent, take it with as much weight ha! If you would like to see my photography you can check out my website HERE or at kcrawfordphotography.com (yes I had to pay fees for the songs, that is another subject ha!) my favorites are infants so be sure to check that out under children :) I really need to update it there are so many great sessions I haven't put on... darn you slow internet!
Okay, so what is in my bag. When I graduated highschool my parents knew I was really getting into photography so they bought me a Canon Rebel film. This was great because I actually had to learn how to take good pictures in only 24 shots. I couldn't shoot a hundred and know at least one would turn out. It was way to expensive for film and processing to do that. A few years later I moved up to a Sony DSLR they are a fairly cheap entry level DSLR and my hubby said before we "bought the farm" he wanted to make sure I would "really use it". It was WELL used. Then came the decision whether to go Nikon or Canon. To be honest I went with a Canon simply because I was familiar with it. I have no passionate feelings either way. Two of my other photographer friends use Nikons and love them so really you will have to research that on your own. The thing is, once you have decided you need to stick with it. Once you start having a few lenses it is way to expensive to switch. Now came the next decision, whether to spend more money on the body and go with the 5D Mark III and only have 1 lens or go less expensive body, the 50 D and buy more lenses. I decided the later. I now shoot pretty much exclusively with my
canon 50D
Friday, September 10, 2010
A Very Merry Unbirthday!
Remember my post about Christmas cards and family pictures? And how I suggested Leah Miller as a photographer? Well today is her birthday (happy birthday girlie-friend!) and she is giving away a session!!!

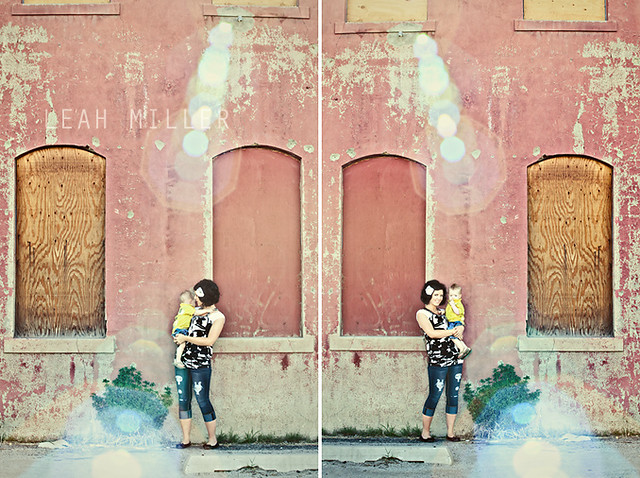
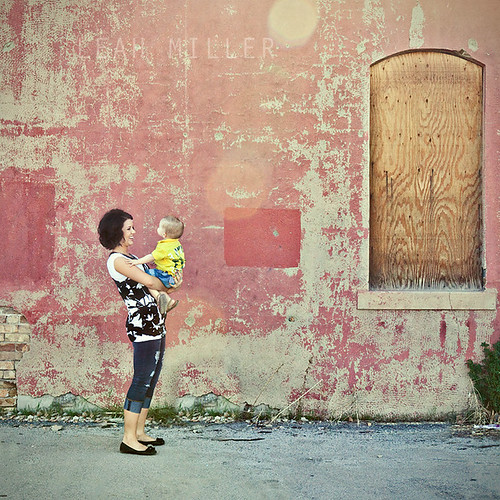
Hop on over HERE to see how to enter. I am totally jealous. I wanted to share the gorgeous picture she took of my niece when I won her first ever giveaway (and the love of her photography style began) but I can't find the proofs so instead here is one of my other favorite sessions she has done:
how cute is that mamma!
Cheers!
Kelly
PS My Dare to Design, Shabby Apple dress preview is this afternoon, please stop by and let me know what you think!
Friday, September 3, 2010
Whoooooo goes there? It's Mr. Door Owl
{A true Backyardigans fan would know that reference :) }
I thought while all the fun giveaway was going on a I should still post a tutorial right? If you are looking for the giveaway it is the previous post. Good luck!!
Evie's room is one of the family's favorites to play in. She has a wicked awesome kitchen and thanks to a friend enough food to stock a restaurant. The boys and I end up in there playing very masculine versions of tea party almost daily. The problem is it usually is interrupted by potty breaks, snake time, tag etc. and we will run out of the room quickly. Evie will usually stay and hang out until we come back (unless food is involved) unfortunately, her bedroom door slams shut very quickly (is our house on a slant?) I made a doorstop previously but my hubby told me it was creepy looking and would give her nightmares. Hiding my wounded ego (totally kidding) I tried again and created this little guy:


His head is full of fluff and the bottom filled with sand. He does the job beautifully, that is, when he is not being played with by someone. I think I may have to make more JUST filled with fluff.
You can find the pattern for our little Door Owl HERE. Feel free to improvise, make the pattern significantly bigger, add a pair of LONG skinny legs anything really.
What you will need:
Pattern
Fun fabric
Felt
Buttons
Needle and thread
Sewing machine
Scissors
Fluff
Clean Sand
I love this particular Amy Butler fabric. I used it to makes lots of the little birdies from the Spool tutorial to give away. In fact here is Sawyer giving one to a little boy who just came out of surgery.
Friday, August 13, 2010
Happy Do Day! A Personalized Birthday Banner Tutorial
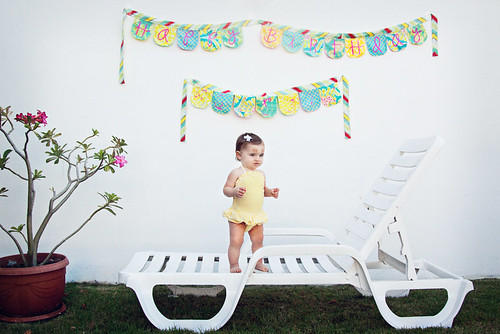
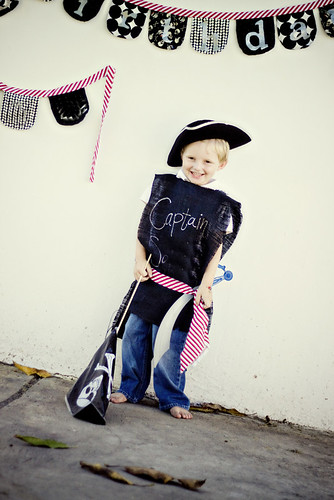
(coolest party EVER I am dying to share the details)
What you will need:
Freezer Paper
X-acto knife
Fabric Paint (I had none and used toll paint and it worked great!)
Paint Brush
Coordinating fabric pieces of your choice
Sewing Machine
Scissors
Pinking Shears
Several Paper Clips
I had the ABC song stuck in my head the entire time I did this :)
Sunday, August 8, 2010
Barely Sew and No Sew Tea Towel Apron for Children Tutorial
Right up front I must apologize if there are tons of errors in this post. Evie and I spent the whole day in the hospital here in Jakarta (she fell while I was at the dentist and had to have 11 stitch's in her cute chubby face, my poor friend who was watching her is beside herself.) We did not get home until super late and then being a mom I spent the whole night getting up to check her and make sure she was breathing because I worked myself up into a total tizzy over the general anesthesia. Anyway if there is some gibberish in here please excuse it! Luckily this is the easiest thing you will ever sew (or not sew) and it turns out sooooo cute! My friend was having a little chefs birthday party for her little girl and was talking about how fun it would be to have aprons for all the kids, but kids aprons are always expensive, and she doesn't sew so that option is out. Well I love a good challenge and came up with the Tea Towel Apron for Children for her. (Please forgive the horrible pictures of the boys, I was hesitant to post them because they were laughing so hard and being so crazy but oh well we all have our days right?)
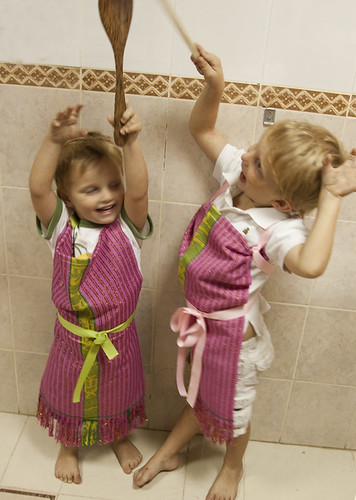
What you need:
A Tea Towel (these are longer and lighter then dish drying towels and usually cuter, like THIS one that I covet)
A spool of ribbon
Scissors
Sewing Machine (if you go the sewing method)
Thats it!
Friday, August 6, 2010
Just Melt it! White Chocolate wonders
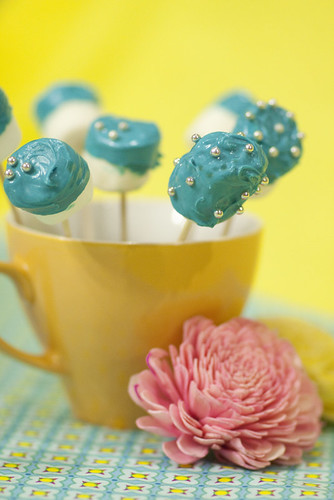
For Evie's birthday party I didn't want to do the run of the mill treats. But since there would be lots of little kids they had to be simple and easy to carry around. I wanted to keep within the color theme so I thought I would get some white chocolate and melt it all up and see what I could come up with that would yummy. The first is chocolate covered marshmallows on a stick and the second a homemade white chocolate ice cream dish. To complete both you will need:
Meltable White Chocolate
Good food coloring (I use wilton)
A double broiler (or one you make our of a pan and pyrex dish)
Spoon
Skewers
Nonpareils of your choice
A balloon
Alright so lets do the marshmallows pictured above first. Grab your skewers usually used for kabobs and stick a marshmallow on the end. Have as many as you would like to use prepared and sitting next to your stove. I also had a glass filled with sand ready to stick them into. This way they harden nicely without being flattened like they would on wax paper.

The white chocolate pieces I ordered that are made to melt never made it, I have no idea where they went but whoever has them I hope you enjoy them! My hubby was kind enough to go on the hunt in the Singapore airport and came home with several bars of this:

Belgian chocolate YUM! The downside it did not melt nicely. Tasted fantastic but kinda lumpy. So if you purchase the correct meltable chocolate the finished product will look a lot smoother and more professional. Grab your double broiler or make one like I did using a small sauce pan filled with about 2 inches of water and place a pyrex dish that will fit inside but not slip into the pan on top.

Break up the chocolate and place it in your pyrex, squirt in some food coloring.

Stir diligently making sure your chocolate doesn't burn.

Now take your skewers and dip your marshmallow into the liquid chocolate. You can do it however you like, covering it completely, half way just the top, it is fun to mix it up. Once you have dipped it immediately place your nonpareils where you would like them. Again you can put them all over or just a few its up to you!

When you have done that stick your skewers in the cup to set! How cute are these!
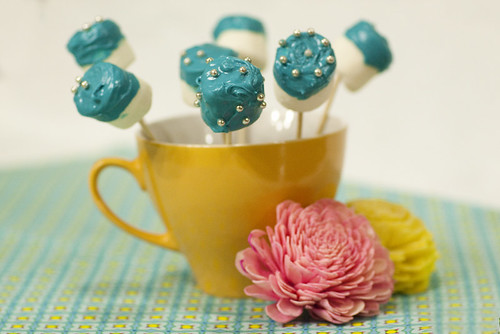
My boys LOVED these and waited very patiently for me to finish pictures before the goggled them all up. And they aren't even messy! Okay on to the second white chocolate wonder I made for her birthday the white chocolate ice cream bowl. With your chocolate still melted, lay out some wax paper and grab your balloon. Blow it up as large as you want your bowl to be. I kept mine relatively small for several reasons, if you go to big the hot chocolate will pop the thin latex and splatter chocolate all over you... not that this happened but take my word, okay it totally happened to my friend and I when we first tried this. Plus I wanted smaller serving sizes since the kiddos would be having lots of treats. Okay, once you have it blown up and knotted take a spoon and get a nice dollop of the chocolate and make a thick circle on the wax paper. This is going to be your base and what will hold your balloon upright

now roll your balloon in the chocolate attempting to keep the line nice and even. The chocolate needs to be thick so make sure to get plenty of it on there. (I tried putting painters tape around the ballon to get a nice straight line but it didn't work as well as I hoped) Once you have it coated place it on the base.

Now stick it in the freezer to set up. This is pretty quick but what is nice is you can do it a few hours before the party and just leave them in there. When you are ready for them take it out and using one of your straight pins pop the balloon. The air will come out very slowly because of it being so cold. When it gets down to where your chocolate is slowly and carefully pull it from the sides of the chocolate bowl.

Don't worry if a little breaks no one will notice and if they do tell them to go try and make perfect little chocolate balloon bowls ha! Now grab your ice cream, we went with homemade strawberry ice cream with strawberry syrup, and put a little scoop in the center of the bowl and serve immediately.
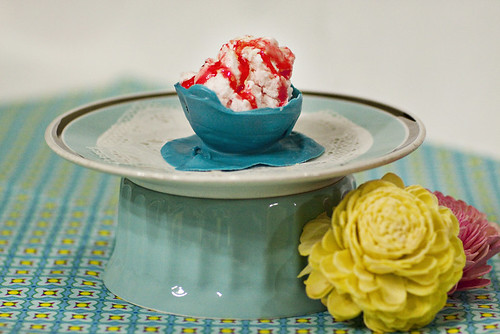
It is so yummy and the easiest clean up EVER! A little side trick? If you don't have a cake stand just make one out of a bowl and plate. The one pictured above is a blue ramekin turned upside down with a plate on top. For a bigger effect start with a large serving platter and place a large bowl upside down, place a normal diner plate on top of the bowl, now take a tea cup and place it upside down in the center of that and finish it off with a saucer on top. It looks soooooo cute, but of course I don't have a picture so you will just have to take my word for it!
Have a blast with your chocolate and make sure to eat all the left overs in the bowl!
Cheers
Kelly
Thursday, August 5, 2010
Dinner is Served! Burp Cloth to Baby Bib tutorial
Woo Hoo! I bought a card reader today and we actually have internet access! I am so excited... my mouth is still killing me from yucky root canal, but hey I need to drop a few pounds :) I feel bad that it has been so long since I posted so lets get right to it. Do you have a ton of burp clothes lying around and nothing to do with them? I received so many adorable burp clothes with each baby and I was kinda bummed when we didn't use them anymore then my mother in law taught me this cool refashion.

If you live in UT (I know there are several of you who do wink wink) or if you ever visit, there is a store called Down East Outfitters. They receive all of Potterybarn's cast offs and sell them at ridiculously reduced prices. You have to be very patient to search through the HUGE box's of randomly monogramed and personalized items but I have found every single member of our family stockings, easter baskets, backpacks etc. all with their names on it and never paid more then a few dollars. The reason I bring it up is you can also find the most adorably burp clothes usually for a dollar. I have one for every holiday and have turned most of them into bibs now. I use one that I purchased last winter and an adorable burp cloth I received at Evi's baby shower for this tutorial (some steps just show up better on each).
What you need
A burp cloth
A small amount of stretchy spandex fabric, color of your choice (mine was approximately four inches wide and 17 inches long)
Your sewing machine
Scissors
Tuesday, July 27, 2010
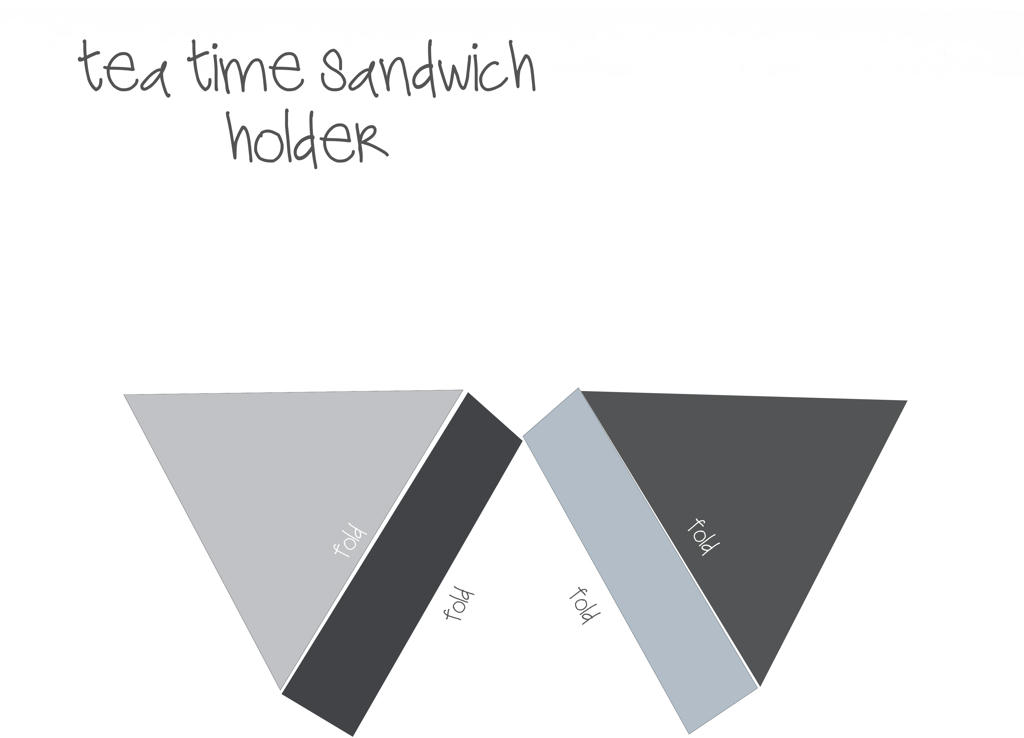
Why is A Raven Like a Writing Desk? Tea Time Sandwich holder tutorial
Birthdays are BIG events at our house (much to the hubster's wallet's dismay) First birthdays are even bigger deals and Evie's is this week. I decided for Abby I wanted to do a color theme and went with turquoise and yellow with a touch of pink. It is essentially based around Heather Baileys Pop Garden line. The adults are getting to eat BBQ Pulled pork sandwiches (we try to do VERY Americanized food at our events) but I knew the younger crowd would want something a little more palatable. Since we do have picky palates in this household I thought PB&J might be the best idea, and it meets my stipulation of being very American. I didn't just want to throw a bunch of messy sandwich's on the table though and thus the Tea Time Sandwich holder was born.

I created a template so you can simply print it out and start creating! It can be found HERE.
What you Need:
Tea Time Sandwich holder pattern
Scissors
Cute paper
Cello tape
Put on Alice in wonderland for the kiddos to get every one in a tea time mood.
Tuesday, July 20, 2010
Add some spark to your rain boots
While I finish up the Beach Picnic dress pattern I thought I would share a super quick fun little thing I did this weekend. It rains ALOT here in Dili. I have a great pair of rain boots but I felt like they were plain (something odd for me) I didn't want to put something super permanent on them because I liked that they could go with lots of outfits and they cost an arm and a leg so there was no way I was cutting, sewing etc. I came up with a quick fun easy solution, velcro on embellishments.

They are so fast and easy and I think they look pretty cute.

Friday, July 9, 2010
It's Raining Buckets
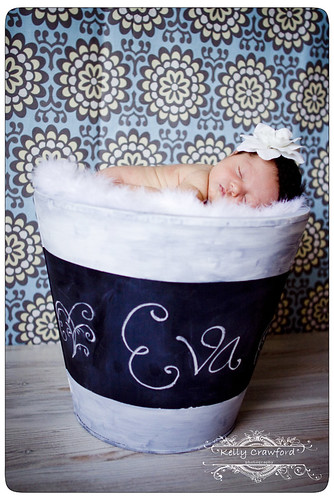
What you need:
One container, size of your choosing
One can spray on primer
One can spray on chalkboard paint
Some white paint
A cup of water
A paint brush or sponge (depending on the finish you are going for)
Painters tape
Some paper
A well ventilated area. (I did this on our balcony in DC and I don't think our neighbors were all that appreciative ha!)
Subscribe to:
Posts (Atom)