


It order to help me feel like I am a little more in control (and less like I have a zillion things I want to do and can't figure out what order I want to do them in) I decided to set specific dates for certain posts. We will see how long this last and if you as readers like it :) This will definitely be malleable and change according to what is going on in our crazy household. Right now I am thinking of the following:
Before I jump into my first Make It Monday I want to remind you lovely readers that each pattern I make is completely original and property of No Mans Land by Kelly Crawford. I have zero problem with anyone making and selling items made from my patterns but they are under no circumstance to be sold, re-offered on any other blog or reproduced in anyway. I also want to make sure that it is understood that while I try pretty hard to make the patterns perfect there may be some pieces that don't line up perfectly. If this is the case it will usually only be a minor misalignment that you can work around. As for sizing since I do not use a pattern making program I only offer the pattern in the size I make it. Unfortunately you will have to use a copier to enlarge or reduce the patterns. I am hoping to eventually purchase a pattern making program but am weighing the options of spending the mola ha! Alright now that all the small print is out of the way lets get to it!
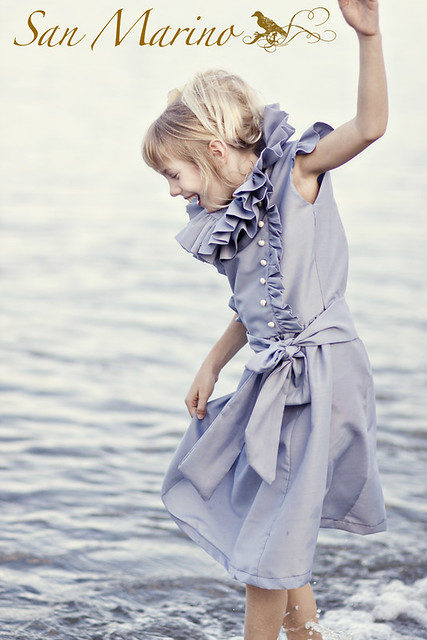
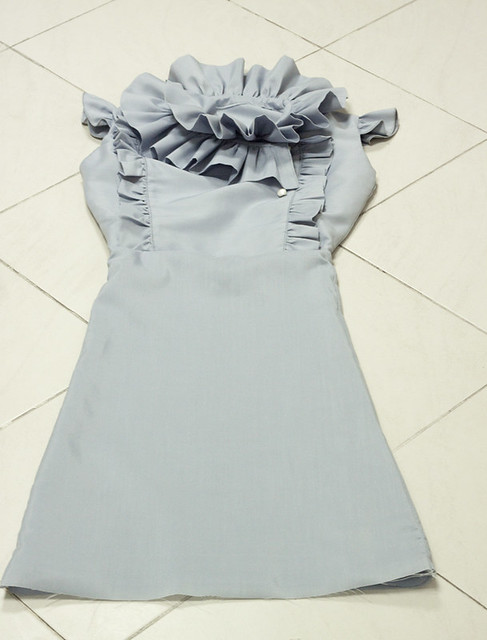
For my first Make it Monday we will be making the San Marino dress.
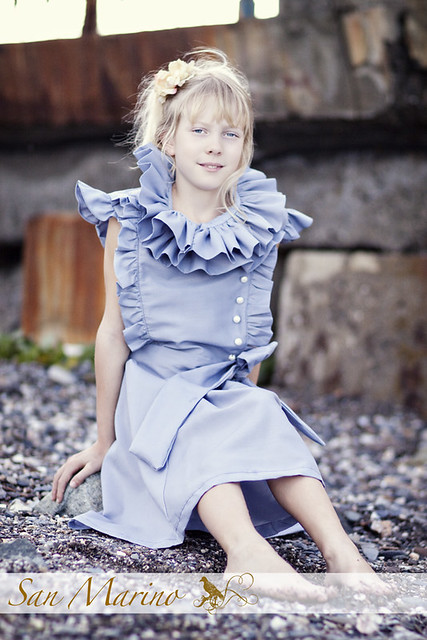
This was a MAJOR undertaking, making this dress. Really one of my most intense projects to date. I am very proud of how the dress turned out (even if it isn't fairing all that well in the competition ha!) It is a very well made dress ie. it isn't going to fall apart and has hardly and raw edges. It has tons of fun little details. Plus making an entirely new pattern is always a bit of a challenge (that I enjoy of course!)
The pattern can be downloaded and printed HERE. I was hesitant to offer it, as the dress itself did not receive much of a response so I don't know how much use the pattern will get. But I figure I took the time to make it so might as well get it out there :) It is 20 pages long... yeah, 20! As always the pattern pieces will need to be taped together and then cut out. I tried a new method this week. Some of the pattern pieces have stars that you line up, some of them letters. If you are going to make the dress and you download the pattern will you let me know which you like better? I want to make sure I make it as easy as possible. If you would like to sew a long I would love the company!


Make it Monday: A new Pattern and tutorial is debuted
Take a look Tuesday: I will show a project I have been working on that hasn't been on the blog
Whats cookin' good lookin' Wednesday: What I made for dinner lately and love
Tricks and Trades Thursday: Examples of how I photoshop pictures I took recently, camera settings I used and photography trade secrets I think might be helpful.
Foreign Service Friday: A post about what it is like working for the Foreign Service and living abroad
Saturday and Sunday are free days (I will most likely do a pattern and tutorial together on one of these days and take Sunday off)
Before I jump into my first Make It Monday I want to remind you lovely readers that each pattern I make is completely original and property of No Mans Land by Kelly Crawford. I have zero problem with anyone making and selling items made from my patterns but they are under no circumstance to be sold, re-offered on any other blog or reproduced in anyway. I also want to make sure that it is understood that while I try pretty hard to make the patterns perfect there may be some pieces that don't line up perfectly. If this is the case it will usually only be a minor misalignment that you can work around. As for sizing since I do not use a pattern making program I only offer the pattern in the size I make it. Unfortunately you will have to use a copier to enlarge or reduce the patterns. I am hoping to eventually purchase a pattern making program but am weighing the options of spending the mola ha! Alright now that all the small print is out of the way lets get to it!
For my first Make it Monday we will be making the San Marino dress.
This was a MAJOR undertaking, making this dress. Really one of my most intense projects to date. I am very proud of how the dress turned out (even if it isn't fairing all that well in the competition ha!) It is a very well made dress ie. it isn't going to fall apart and has hardly and raw edges. It has tons of fun little details. Plus making an entirely new pattern is always a bit of a challenge (that I enjoy of course!)
The pattern can be downloaded and printed HERE. I was hesitant to offer it, as the dress itself did not receive much of a response so I don't know how much use the pattern will get. But I figure I took the time to make it so might as well get it out there :) It is 20 pages long... yeah, 20! As always the pattern pieces will need to be taped together and then cut out. I tried a new method this week. Some of the pattern pieces have stars that you line up, some of them letters. If you are going to make the dress and you download the pattern will you let me know which you like better? I want to make sure I make it as easy as possible. If you would like to sew a long I would love the company!
What you need
3 yards of fabric
8 buttons
four rectangles of sew on velcro
Scissor
Sewing Machine
Iron & board
A really good play list because this us going to take a bit :)
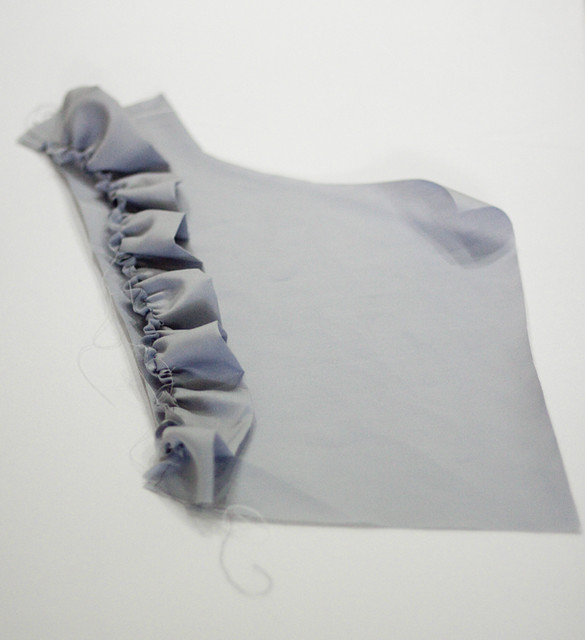
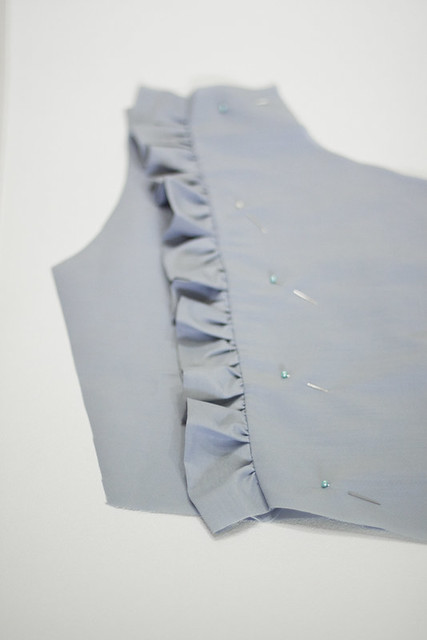
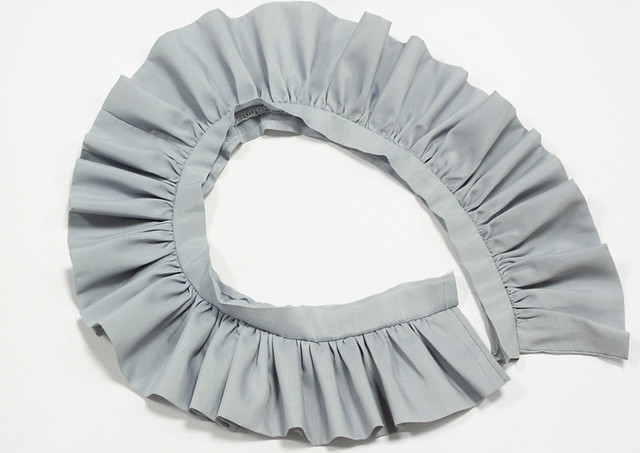
I am not going to sugar coat it, this pattern isn't a walk in the park. It isn't particularly hard, but be sure to THINK before you sew. I stopped so many times to just think before I stitched. It will save you time and frustration. Alright, once you have taped together and cut out your pattern pieces we are going to start with out with the pattern pieces labeled as Left bodice piece. You will only need to cut one of these. Once you have this cut, cut two of your front ruffle. Once you have them cut out take one and iron it in half so you have one raw end and one finished edge. Sew a gathering stitch along the raw edge and gather it up until it will line up with the longer edge of your "left bodice piece"
Once it lines up go a head and pin the raw edges in place. Once pinned sew up the raw edge.
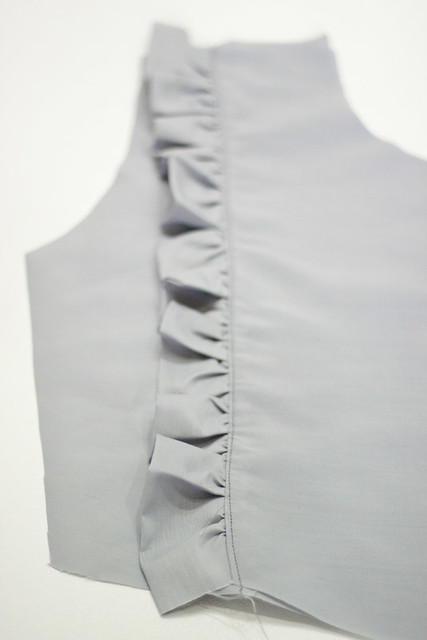
Take the piece back to the iron and iron open the ruffle.
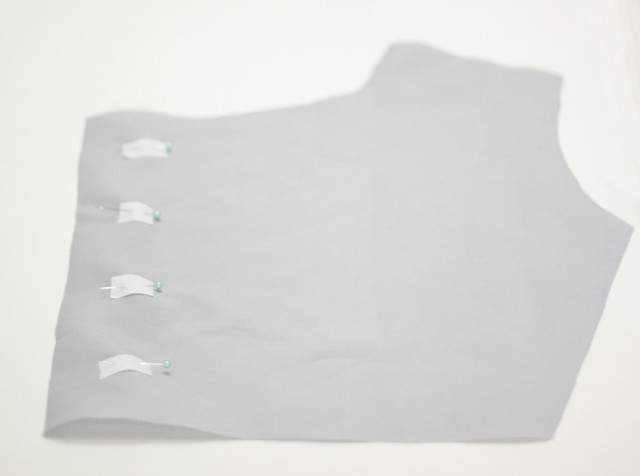
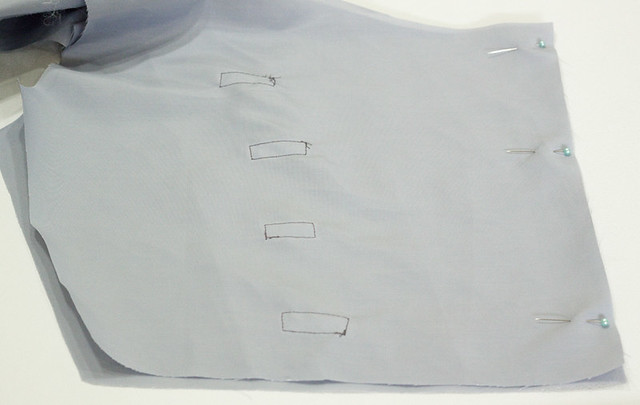
Now lets cut out the "main bodice piece" you will need four (4) of these. After cutting them out take one and also grab your velcro. Take the "scratchy" piece and cut it into four smallish rectangles. Pin the velcro to the wrong side along the shorter edge on main bodice piece.
Sew them into place. Grab your "left bodice piece". Line up the shoulders and match up the center raw edges. Once everything is lined up pin it in place.
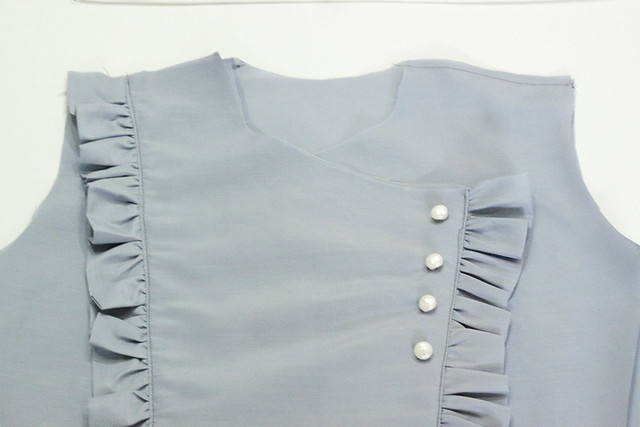
When you have it pinned, topstitch along the left bodice piece right next to the ruffle.
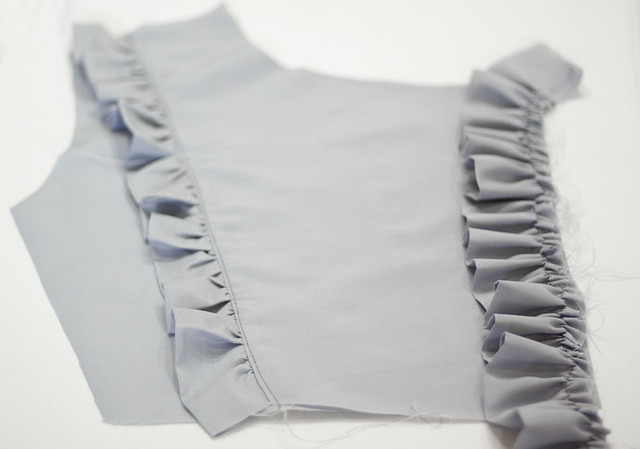
Grab a second piece of main bodice and lay it right side down, take the main bodice piece you just ruffled and lay it on top right side up. Match up edges. Now take your second ruffle piece and sew it up the exact same way you made your first one. (This one will be longer then you need but just trim excess). Pin to the short edge, raw sides together.
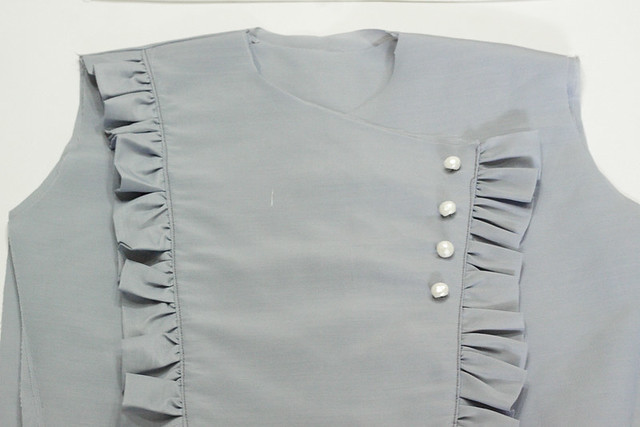
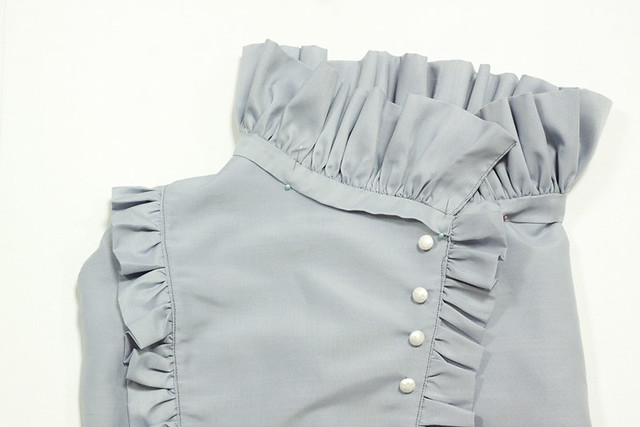
Once done now is a great time to sew on your buttons. I ended up with 8 buttons.
Grab your two other main bodice pieces. On one of them we are going to sew the soft velcro. I did this by laying the scratchy velcro right next to it to line them up.
Once you have attached them, flip the piece so that right side is down and line it up with the other main bodice piece so that right sides are together.
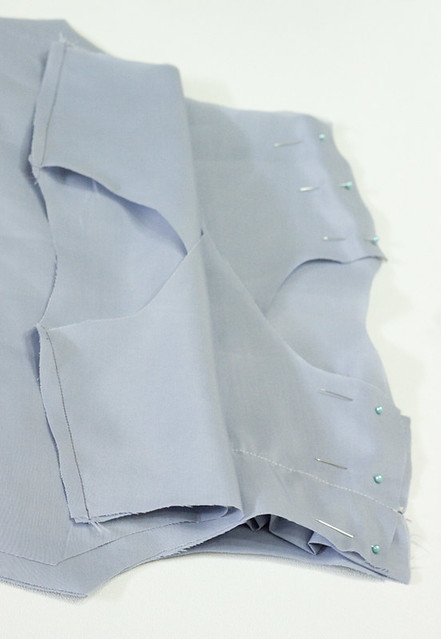
The only place you need to sew is along the edge where the pins are. Don't worry about sewing anywhere else right now. Once you have sewn here flip everything so that right sides are out. This next part is a little tricky but if you take your time and think about it you will get through it. Now were are going to attach the front pieces to the back pieces. Using your pattern piece cut 2 back pieces. We are going to separate the layers now and sew them together. Think about this essentially as a top piece and a lining piece. I first laid everything out so I could see how it was supposed to look
Now lay your front pieces right side up. Take one of your back bodice pieces and lay it right sides down. Sew up the side ONLY on your TOP main bodice piece. Now lay down your second bodice piece, right side down and sew it to the second layer of main bodice pieces. Now we need to do the shoulders. You are going to do the exact same thing just this time on the shoulders.
Once you are done flip everything so it is right sides out and make sure everything looks good.
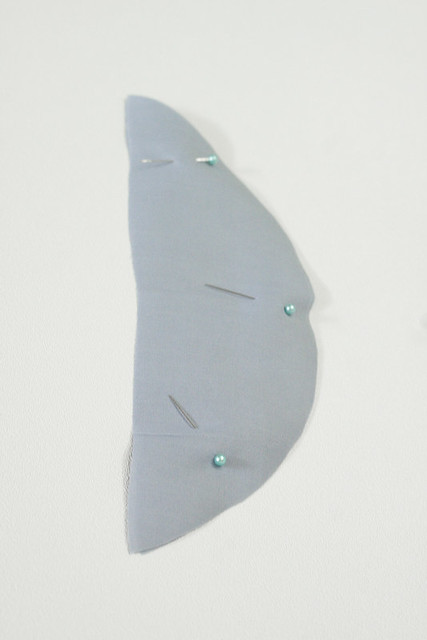
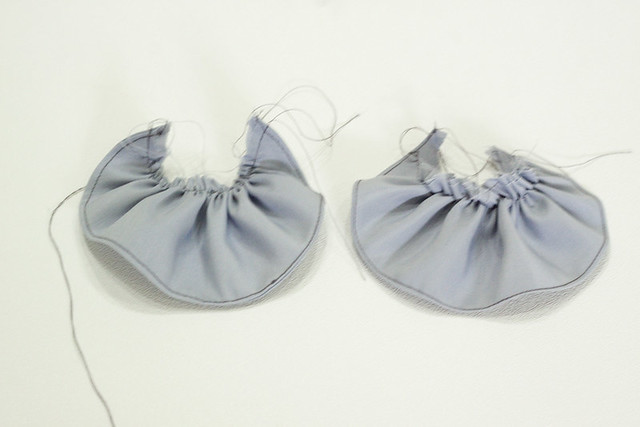
Set this aside and grab your little half moon "shoulder ruffle" pieces. There should be four (4) of these. Separate them into two sets and lay them so that right sides are together and pin in place,
Sew a gathering stitch across the arch and gather it up.
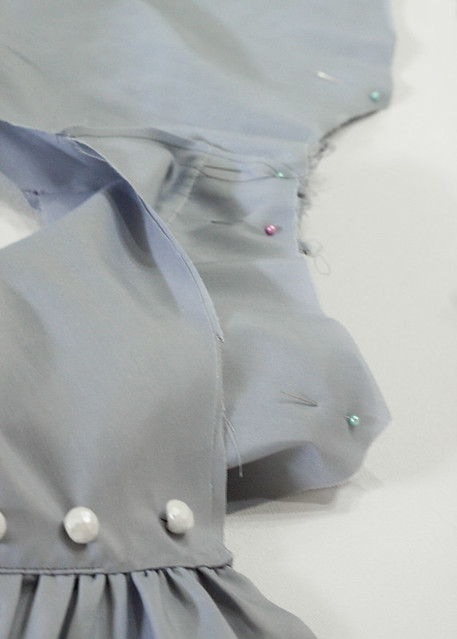
Now, flip your top bodice so that it is inside out. Line up your arm pit pieces. Find the center of your gathered sleeve pieces and match it up with your shoulder seam. Pin the ruffle in between the two layers so that the raw edges line up. Pin in place.
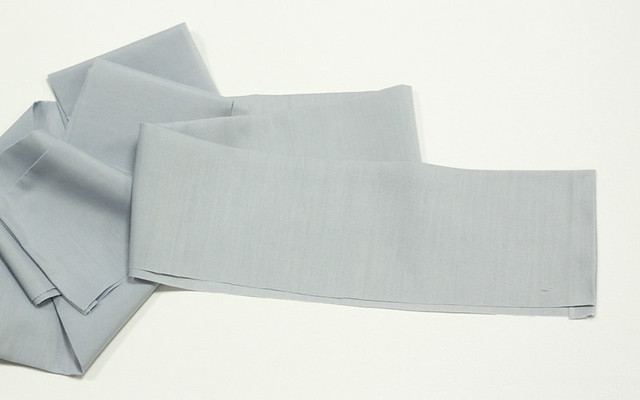
Sew from one side to the other. Now grab the LONG ruffle piece you cut out.
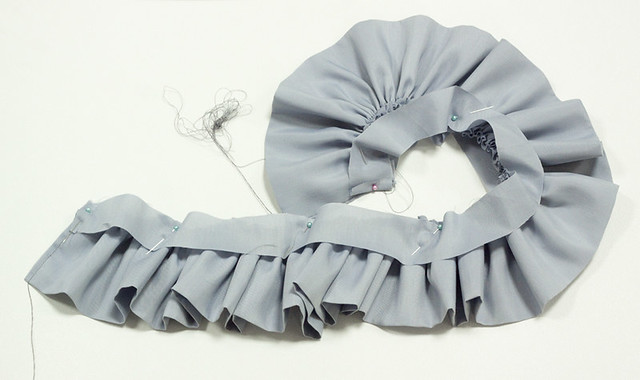
Take it to your ironing board. You are going to first iron over both ends so that they are nice and finished. THEN iron the entire strips in half. Once done gather it up with a gathering stitch. You want it to be the same length as your neckline. Once done take your two neck band pieces and pin them right sides together on either side of the ruffles raw edge. Pin into place.
Sew all the way along, then flip the band so that right sides are out. go back to your ironing board and iron UP both raw edges of the neck band so you have a nice finished edge
Slide the neck line into this little pocket and pin in place.
Once in place topstitch all the way around. Oh my goodness you are totally done with the hard part!!! Noe take your skirt bottom pieces. HEADS UP!!! I would HIGHLY suggest making these larger then they are Mac is a TINY girl and when we tried this on her friend who was the same age we could get it over her head ha! So give your self some leeway and cut a larger rectangle. Once you feel comfortable with the size cut two on the fold. Lay the rectangles right sides together and stitch up the sides. Keeping the skirt wrong sides out slide it up over the top of the dress and line up the raw edges (if you made your rectangle larger you may need to do a gathering stitch across the top). Once the raw edges are line up, pin in place and sew all the way around. Turn the dress right side out.
Now all you have to do is hem it and make yourself a belt. I just cut a SUPER long piece of fabric, folded it on itself and stitch along the ends and one side leaving a little space to flip it inside out. How long and wide it is depends on your taste. That is it!!! I hope the instructions were clear. This one was a dousey (spcheck?) to think up. My little sister requested I make her one and I think I am going to make a nice emerald green one for her. She is 19 and I will probably enlarge the pattern by copying it at 130%. She is an avid Irish dancer and TINY. We'll see how it turns out ha! Happy sewing friends!


I think it's very 'cool' of you to put it out there that you don't mind if people make and sell from your patterns. Very generous!
ReplyDeleteI love your lineup, I think your photos are just gorgeous and would love to learn from you!
Thanks for offering it! I love the dress and voted for it myself. I'm usually intimidated to take on any project that requires more than a yard of fabric though! :)
ReplyDeleteI totally voted for this dress on Project Run and Play because it was my favorite! I really love it! Thanks so much for putting up the tutorial! You are so talented!
ReplyDeleteSo if I wanted to make a smaller version in like an 18 months, how much fabric would you suggest?
I really like this dress. I am thinking about trying it for my daughter, but using less ruffle around the neck.
ReplyDeletethis dress is truly gorgeous. I am in love with it. And the pictures you took compliment and show it off in a way that is simply beautiful.
ReplyDeleteI think it brilliant..I want one for me...seriously
ReplyDeleteI think having a format or schedule for your blogging will really help you & think it's a great idea!
ReplyDeleteI absolutely love this dress! I even love all the big ruffles around the neck. I can't wait to make this for my lil' girl.
I think you should get to a place that you do end up opening a shop & start selling your patterns. I'm not complaining about the free patterns by no means but I know you work hard on them & I almost feel like your getting robbed by giving them away. i would buy them. Just my 2 cents.
Love the dress. I think that it just got shoved to the top of my project list! My daughter will look adorable in it.
ReplyDeleteAlso, my parents and sister work for the FS. My parents are in Yemen currently. All of their posting have been in third world countries: Delhi, Nepal, ulan baataar, Kiev, la Paz. My sister just left norway. My family loved that lifestyle. It's cool to see other families trying it. Good luck with the bidding!
I love the dress! Wish I could sew so I could make one for my little girl!
ReplyDeleteLove the proposed format:) Looking forward to it! Also...love the darling dres and voted for you...hoping you pull ahead!
ReplyDeleteLove the line up...Is there a general rule of thumb as fas as how much you should enlarge or make smaller for each size????
ReplyDeleteI just want to say that you are truely amazing. I love your tutorials, they give me hope that one day I'll learn to sew for real.
ReplyDeleteYour schedule looks great :)
Love
Estee
So pretty! I'm excited to see your emerald green version too! :)
ReplyDeleteI love the dress. :) I'm glad you posted this.
ReplyDeleteI can't wait for Fridays! While being apart of the military liason office will be a bit different, I can't wait to find out a little about embassy life!
ReplyDeleteI love this dress! I wish I had a niece instead of five nephews to make this dress for!
ReplyDeleteI am just crazy about this dress! Thank you for the pattern!
ReplyDeleteI thought as usual your dress was lovely, and your pictures were stunning. The voting confused me a lot over at project run and play, I wouldn't worry about not being well received, you did a fabulous job! Keep up the good work! You are one talented lady!
ReplyDeleteSooooo.... could you help me with sizing? I want to make it 4t. How much would i need to shrink it by? I am not sure how it works.
ReplyDeleteAlso, you say that there are 20 pages but there are actually only 19. Is one missing or was that a misprint?
ReplyDeleteI expected the voting on it to be higher...it's a stand-out!
ReplyDeleteLove it.
A good source for Sew On Velocro
ReplyDeleteHow Lovely!! Thank you for sharing :)
ReplyDeleteThere is a page or 2 (or 3) missing, I think. When I download the pattern, it is missing the MAin Bodice 1 piece. (The A part)
ReplyDeleteI am almost ready to cut out...can you help me with this piece?
Mikel
mikelcondiecurry@gmail.com