Tuesday, August 31, 2010

This is going to be GOOOOOOOOOD!

I have been trying to organize myself these past few days, slow down and figure out which tutorials I want to post while here and which while gone. It has been nice. That has meant posting less, so as a reward for being patient I have a REALLY good give away. Well, as long as you like ridiculously high priced designer items it is good. Lets just say my friend has a family member who sends her samples from a company they work for that rhymes with flurberry (apparently I am a magnet for their stuff?).
_MG_0819
Heads up though you can only enter to win if you are a follower and have left a comment on a post (so if you haven't you might want to now wink wink) Details manana when the internet allows me to upload pictures. For now here is one from this weekend of Evie in between rock gnawing sessions (talk about your organic teething ring).
_MG_0777proof
I attempted to take some of the boys but they were to busy posing with the hordes of locals that come running to take pictures whenever we hit the beach in front of our house.

Monday, August 30, 2010

Christmas Cards, Let the Saga Begin

I know you are puking right now at the mention of Christmas cards.
CFam9proof
But consider this, I am a photographer hence Christmas cards are a favorite part of my year. I love sending them and I REALLY love getting them (Oh please oh please pop one in the mail for me I would LOVE to have one) As far as I know I am the only family/ portrait photographer on the island, I could be wrong but I am fairly sure. I am not that good with a tripod, nor do I really like that stoic of pictures (don't anybody move until the red light goes off!!! ha!) So my one shot is while we are on vacation in a bigger city. Add into that it takes six Weeks for us to get mail (on average) and then six weeks for it to go back to the states.
KellyLiamproof
That is a 12 week turn around, not including the wrist breaking amount of time it takes to address, write notes etc. So we are 15 weeks to make Christmas cards. I know crazy huh. So, here is my questions for you:
Do you like receiving cards with a letter or no letter?
Do you like one single simple picture or a collage of the crazy things you have done
Do you appreciate a little hand written note or do you just want a card so you can add to your collection on your fridge/door/ strand of ribbon holding cards?
There are no wrong answers here I am genuinely curious. Maybe it is my innate need to please but I want people to enjoy the Christmas card they receive from us, not gag at our letter thinking we are bragging, or squint at pictures or think the one picture is totally pretentious... maybe I am over thinking this.
CFam5proof
Now for you fun friendly readers in the great state of UT. If I could get my family Christmas pictures done by someone there it would be hands down Leah Miller. You can check out here website HERE. I am telling you this girl is a GEM!!! She is crazy cheap with her prices (I keep waiting for her to bump them up, I swear it is not going to be long) She is responsible for the photo in my profile and the one in my header. I know she will start booking up with family sessions so I would jump soon! When I couldn't figure out what to give my little sister for graduation I thought BING! A session with Leah for she and her friends! (You can check out the results HERE). This is totally not a {paid} advertisement, I have paid full price for all my sessions and will do it again as soon as we are back in the states, she is just that awesome to work with. For you fellow budding photographers she does lots of cool tutorials on her blog teaching post processing etc. The pictures scattered through out this post were done by my very talented friend Nicole, here site is HERE. She is located in Williamsburg VA and is already booked clean through the holidays. I thought I would include them because they were our Christmas card the year before last (Didn't do one last year, to frazzled, and it did NOT include the one of just me ha!). So, let me know what you think because crazy as it sounds I gotta get going!
Cheers
Kelly

Friday, August 27, 2010

Ruffled Tummy toddler dress tutorial

I don't know about you but I LOVE my one year olds gigantic tummy. It is always so cute sticking way out over her short little legs. I am jealous that hers is considered adorable while mine is a topic of possible plastic surgery ha! Anything to accentuate that tummy in a cute way is great so I came up with this little dress this morning.
_MG_0723proof
You can't see it in that picture very well but there is a cute ribbon that goes around and ties in the back. You can see it in this one a tiny bit
_MG_0704proof

Thursday, August 26, 2010

Falling Leaves Dress Tutorial

My little sister starts college tomorrow. Wow. I am really excited for her, and a big ole ball of nerves even though I am a bagillion miles away from her. I mainly just want her to have as fun a time as I did. I have been thinking about her a lot and also mulling around wether or not to enter the Shabby Apple "Dare to Design" contest. I wanted to practice making my own dress completely from scratch, zero pattern. I was perusing a certain website and found this dress


I really liked it but there was NO WAY I was going to fork out the $158.00, nor could I wear wool ha! I wanted to make one for myself but also for my sister. I did a rather poor job photographing Claire's which is MUCH more like the one pictured above. But believe me if you are brave you can totally make one! Mine cost $4.25 and that includes new thread and a zipper! The fabric cutting guy even matched them all perfectly for me. I think it is because he loves practicing his english with me and gets a kick out of my pathetic attempts at Tetun. Anyway, I made Claire's out of the gorgeous "Banana Republic" fabric.
_MG_0636

Monday, August 23, 2010

The "Taking Notes" Skirt tutorial

,!!! Update!!!! This pattern is available on the new Sewing In No Mans Land website: sewinginnomansland.com The link below is no longer active. Thank you!
I am actually not a HUGE fan of the high waisted style. And, I am usually so behind on trends it is probably out this season anyway ha! I love how it looks on tall bone thin girls but since I am short and leaning more towards "big boned" they usually make me look a little chunky. But I couldn't get this idea out of my head. It is actually an adaptation of an apron I saw on a much-to-expensive-to-ever-buy-any-of-it website. I was of course worried about the high waist thing but LOVE it.
_MG_0498proof
Or, a better picture of the actual skirt up close
_MG_0511
I loved it so much I had to make one for Evie so we could be matchie matchie in Rome... okay we totally won't wear them on the same day but hers turned out super cute as well.
_MG_0515proof
You can find both patterns HERE it is listed under "Taking Notes Skirt". What is great is how super easy this is! There is actually only one piece to the pattern. The rest is up to you. How long you want the skirt, how gathered, how wide and long the ties are etc.
What you need:
3/4 yard of fabric
1/3 yard of light interfacing (I used up the last of my interfacing and it was heavy ugh)
Sewing machine
Maybe a zipper (it is up to you)

Friday, August 20, 2010

Anthropologie Scarf Tutorial

This project is so easy you will just die. I swear, sooooo easy. I have been waiting for this scarf to become available.


I love it, but really wanted to have it for Rome. I thought I might be able to make something that looks as good so I gave it a go and honestly, I love it! (My fabric is totally grey but because I did pics at 10pm at night with awesome lamp light it looks green).
_MG_0330proof
I will also teach how to make the little fabric covered balls to sew on but do not have the correct beads to do it, so, it will be a walk through without pics, I hope thats okay.
What you need:
_MG_0312

Thursday, August 19, 2010

Always Late But Worth The Wait: Summers Eve Dress Tutorial

I am soooooo sorry this took so long to get up. They have been installing a new internet tower ON our compound and we are so excited. Totally worth having super slow internet for a few days. Plus, it allowed me lots of time to do a fun photo shoot for this:
_MG_0276bproof
The Summers Eve Dress, pattern to be found HERE. (I am totally lame and was thinking, "aw man summer is coming to a close it is Summers Eve".... totally named it that, published the pattern and then realized Eve means the night before right? So ignore my silliness ha!) The dress above is a variation of this dress which is SOOOOOOO simple. I will sort of combine the two in this tutorial and hopefully it isn't to confusing. :) As always please email me with Q's. I was so grateful one of my fantastic readers emailed me and let me know there was a problem downloading one page of the pattern so I am working on fixing that. I always appreciate it!
What you need for easy version for a 2T dress:
1/2 yard fun fabric for bodice top
1/2 yard coordinating fabric for dress bottom
Remnants of either for LONG bow
Elastic
Safety pin
Scissors
Sewing Machine
_MG_0248bproof
What you need for more involved older girl dress (Haven, pictured above is 7)
3/4 yard fabric for skirt
1/2 yard corresponding fabric for top (more if you like it to be the same color as the top)
1/3 yard fabric for Bow/ Waist band if you would like it to be different from top
I also added an extra contrasting dark, longer skirt, that pokes out the bottom under the printed skirt fabric. I used about a half a yard.
Elastic
Scissors
Safety Pin
Sewing Machine

Sunday, August 15, 2010

Summers Eve Dress: The Pattern

The pattern for the dresses featured earlier is up woo hoo! If you would like to print it out and be all ready to go when I publish the tutorial feel free to print it HERE, or go to my list of free patterns on the side bar :) This weekend has been nuts, lots of photo shoots, helicopter rides and documenting miracles in process. Now my family is heading out to the Mercy to attend church (outside our living room) for the first time in seven months, we are so excited! I hope your weekend is shaping up to be just as wonderfully busy! In other news we have started to prepare for our MUCH needed R&R in Rome. We will be gone for almost 3 weeks! (We are leaving the kiddos with Grandma and Grandpa for a few days while we jump over to Egypt for some much needed Mommy/Daddy time, we haven't had a night alone in over four years!)


(Lots of that will be going on ha! To much Info? Sorry...check our Simply Bloom HERE)
I was hoping that there may be some fabulous readers out there who wouldn't mind being a guest blogger during that time. I will be doing posts (I have already started some cool "on the road" projects) If you have a fun tutorial you would like to share please email me! Photo shoot tomorrow morning for the dress so fingers crossed the tutorial will be up by the afternoon.
Cheers!
Kelly

Friday, August 13, 2010

Happy Do Day! A Personalized Birthday Banner Tutorial

_MG_0856proof
I LOVE anything personalized, which may seem a bit odd since I am very protective of my cuties identities (hence the photoshoped out name on "Evie's" bunting). I also love items that can be used over and over and over. The fabric birthday banners that have become so popular fit both these requirements! AND bonus it doesn't take very much material woo hoo! It does take some patience (are we seeing a pattern here in No Mans Land lately? Ha!) If you have a boy you can totally do it in fun fabric for him. You can see Sawyers in the background of this pic from his pirate birthday party. My friend Elizabeth made it for him and I believe she makes them to order in her Lil' Abner Etsy shop.
captsawyer
(coolest party EVER I am dying to share the details)
What you will need:
Freezer Paper
X-acto knife
Fabric Paint (I had none and used toll paint and it worked great!)
Paint Brush
Coordinating fabric pieces of your choice
Sewing Machine
Scissors
Pinking Shears
Several Paper Clips
I had the ABC song stuck in my head the entire time I did this :)

Morning on The Mercy

This morning I headed out to the USNS Mercy to take pictures for the Embassy of local school children taking a tour.
_MG_0644proof
They were giddy they were so excited. I would venture a guess that none of them had been on a boat let a lone a HUGE military ship. It was amazing! I kept tearing up seeing all the beautiful children receiving such desperately needed surgeries. This little guy had JUST come out from surgery and was so sweet.
_MG_0684proof
Like this little 3 month old that had his cleft pallet repaired
_MG_0698proof
He was so cute I could just snuggle him up!
IMG_0701proof
This sweet little girl just stole my heart.
_MG_0686proof
Look at those eyes! She had been there a few days healing up from her surgery so she was bouncing all over the place.
I came home had a quick lunch with the cuties, painted a few fabulous pictures with them and now I am off the the orphanage but I wanted to share my favorite dresses that I made to give away:
Gotta love Joel Dewberry
_MG_0636
Of course my favorite, Amy Butler
_MG_0640
And this fabulous orange Amy Butler that Evie also has a dress made out of:
_MG_0718proof
I only had a few scraps of it so I had to piece it together. Aren't they cute! I can totally upload the pattern I made for them if you are interested and do a quick tutorial. I haven't forgotten about the birthday banner. It is coming up later today! Hold onto hour hats folks the next few weeks are going to be nuts!
Cheers
Kelly


Thursday, August 12, 2010

A Much Needed Lift

This week was a LONG one in Jakarta. We had a HUGE sagga with Evie falling and needing 13 stitch's, having to be put under anesthesia, missing flights, loosing luggage and on the way home having my wallet stolen out of my bag in Bali. Needless to say after making reports, sobbing to my husband on the phone and getting to our room at midnight Evie and I zonked until out second wake up call at 7:15 reminded me we had to catch our final flight home. I didn't even get to enjoy THIS hotel that we stayed in which was hands down the most gorgeous place I have ever stayed. By the time I got off the plane in Dili I thought there was NOTHING that would drag me out of my current funk. Then my boys met me at the gate with welcome home mommy signs. They smothered me with hugs and kisses and started talking a mile a minute about our unintentional week apart and I was lifted. Then I got home and my cute hubby tossed a flat rate envelope in my lap and when I opened it my gasp stopped everyone in my house. The contents of the enveloped TOTALLY merited this sort of attention:
stackfabric
Oh my gosh my head immediately began SWIMMING with projects. I had to draw myself back from la-la land to read this incredibly sweet letter from Jess at The Planner and the Procrastinator and her Etsy store Chirpy Designs.
letter2
(I just about DIED when I saw this one and have the cutest idea for it! Stay tuned, I know you mommies with love it)
I was floored. When Jess originally contacted me and asked me to choose some fabric from her shop I checked out her blog and after seeing what she did knew she had stellar taste and it would be more fun if she picked (I also felt this gave her an easy out if things came up, you know how life is, and she wasn't able to send it. I NEVER want ANYONE to feel obligated to send ANYTHING). I never imagined how much fun it would be to receive a bunch of surprise fabric in the mail and the creative ideas it would induce! It also could NOT have come at a better time. We start going to orphanages on Monday with the Mercy and I wanted to make some modest girl dresses for the little girls at the Muslim Orphanage and was in dire need of some fun fabric so these girls didn't get solid plain 'ole dresses. Thanks Jess for giving me a much needed boost! Tomorrow I am excited to show you how to make your very own personalized fabric birthday banner. Your going to love it!
Cheers!
Kelly

Wednesday, August 11, 2010

Patience Pays Off: A Pettiskirt tutorial {UPDATED}

(I received a few emails with questions so I thought I would update the tutorial with them)
Alright, now that you are sufficiently prepared for the work that is ahead I want to go over a few things. What makes these skirts so fluffy is the ruffles and the fact that they have TWO layers of them. Everything I write about doing you will basically have to do twice.
pettiskirt19
(the second layer of Evie's purple skirt) I decided to cover my seams by topstitching ribbon onto them. This is 100% optional, the purple is actually the only color I have ever done it with.
If you want your pettiskirt crazy HUGE fluffy,


you are going to need more then 3 yards of Nylon Chiffon. My favorite that I have made, was made with 6 yards of red nylon chiffon. I thought my fingers would fall off by the end but my sister in law (who's little girl I was making it for) was awesome and sat next to me chatting the whole time so it was fun and totally worth it. Her little girl looks FABULOUS in all those red ruffles! Stay tuned and read all the way to the end for a funny surprise and a little bit about what to pair a pettiskirt with (it is hard then you think).

Tuesday, August 10, 2010

The Pettiskirt: An Intro

(image by Flora Bella, if you are a photographer her actions are AMAZING and can be found HERE)

Two summers ago I was introduced to these fluffier then fluffy skirts. My nieces all wanted them but they are CRAZY expensive in UT where they live (I am talkin' 90 dollars expensive as seen HERE) I have seen cheeper ones other places but they are not near as soft and fray pretty badly. Now you may look at this fluffy wonders and think OH MY GOSH that looks like a crazy hard thing to make and I promise it totally isn't. What it is, is a time sucker. These are SUPER easy but take a LONG time and A LOT of patience. I don't say this to discourage you but to prepare you. The other heads up I wanted to give was that what makes these skirts so amazingly soft and cute (and really to be able to make them at all) is a product called Nylon Chiffon. I looked EVERYWHERE in Northern VAand in UT and never found it in stores, ever. Most people gave me a blank stare or showed me to the Chiffon section (do NOT even attempt to make these with chiffon, I did before I new what they were made of and literally ended up crying at my sewing machine as it fell apart in my hands after crazy amounts of work). You want to know something ridiculous though? These skirts, that retail for close to or over 100 dollars, can be made for a little over 6 dollars. Yup, totally not joking. I buy my nylon chiffon HERE at AFC-Express. They have the most amazing colors and it is on sale rightnow $1.59 a yard. You need roughly 3 yards to make your skirt, bringing the total to $4.77!!! I know!!! I just about died when I figured all this out. The people at AFC are fabulous to work with, the shipping is a bit steep but I just order enough to make it worth it. vint

If you need some inspiration color wise check out the AMAZING gallery of photos HERE. Once you have picked out your nylon chiffon you are going to need a nice fabric for the top. There really is no SPECIFIC fabric you have to use but I like to go with one that has quite a bit of stretch like Satin Charmeuse. You will also need some fairly strong interfacing, ribbon, elastic, a safety pin and did I mention before? A whole lot of patience, but remember it is all straight stitching and you can TOTALLY do it! So gather what you need, go get inspired, and met me back here for a fun tutorial!

Cheers

Kelly

Sunday, August 8, 2010

Barely Sew and No Sew Tea Towel Apron for Children Tutorial

Right up front I must apologize if there are tons of errors in this post. Evie and I spent the whole day in the hospital here in Jakarta (she fell while I was at the dentist and had to have 11 stitch's in her cute chubby face, my poor friend who was watching her is beside herself.) We did not get home until super late and then being a mom I spent the whole night getting up to check her and make sure she was breathing because I worked myself up into a total tizzy over the general anesthesia. Anyway if there is some gibberish in here please excuse it! Luckily this is the easiest thing you will ever sew (or not sew) and it turns out sooooo cute! My friend was having a little chefs birthday party for her little girl and was talking about how fun it would be to have aprons for all the kids, but kids aprons are always expensive, and she doesn't sew so that option is out. Well I love a good challenge and came up with the Tea Towel Apron for Children for her. (Please forgive the horrible pictures of the boys, I was hesitant to post them because they were laughing so hard and being so crazy but oh well we all have our days right?)
teatowel8
What you need:
A Tea Towel (these are longer and lighter then dish drying towels and usually cuter, like THIS one that I covet)
A spool of ribbon
Scissors
Sewing Machine (if you go the sewing method)
Thats it!

Friday, August 6, 2010

Just Melt it! White Chocolate wonders

_MG_0254proof
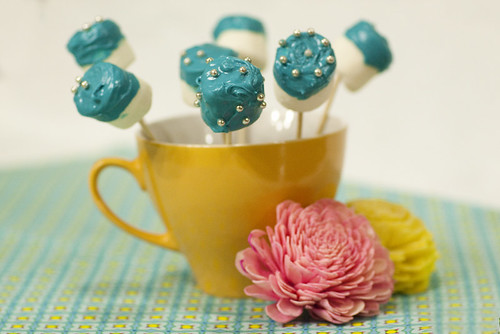
For Evie's birthday party I didn't want to do the run of the mill treats. But since there would be lots of little kids they had to be simple and easy to carry around. I wanted to keep within the color theme so I thought I would get some white chocolate and melt it all up and see what I could come up with that would yummy. The first is chocolate covered marshmallows on a stick and the second a homemade white chocolate ice cream dish. To complete both you will need:
Meltable White Chocolate
Good food coloring (I use wilton)
A double broiler (or one you make our of a pan and pyrex dish)
Spoon
Skewers
Nonpareils of your choice
A balloon
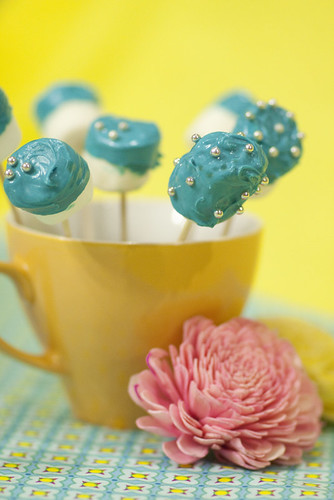
Alright so lets do the marshmallows pictured above first. Grab your skewers usually used for kabobs and stick a marshmallow on the end. Have as many as you would like to use prepared and sitting next to your stove. I also had a glass filled with sand ready to stick them into. This way they harden nicely without being flattened like they would on wax paper.
_MG_0244proof
The white chocolate pieces I ordered that are made to melt never made it, I have no idea where they went but whoever has them I hope you enjoy them! My hubby was kind enough to go on the hunt in the Singapore airport and came home with several bars of this:
_MG_0237
Belgian chocolate YUM! The downside it did not melt nicely. Tasted fantastic but kinda lumpy. So if you purchase the correct meltable chocolate the finished product will look a lot smoother and more professional. Grab your double broiler or make one like I did using a small sauce pan filled with about 2 inches of water and place a pyrex dish that will fit inside but not slip into the pan on top.
_MG_0239proof
Break up the chocolate and place it in your pyrex, squirt in some food coloring.
_MG_0240proof
Stir diligently making sure your chocolate doesn't burn.
_MG_0241proof
Now take your skewers and dip your marshmallow into the liquid chocolate. You can do it however you like, covering it completely, half way just the top, it is fun to mix it up. Once you have dipped it immediately place your nonpareils where you would like them. Again you can put them all over or just a few its up to you!
_MG_0252proof
When you have done that stick your skewers in the cup to set! How cute are these!
_MG_0265proof
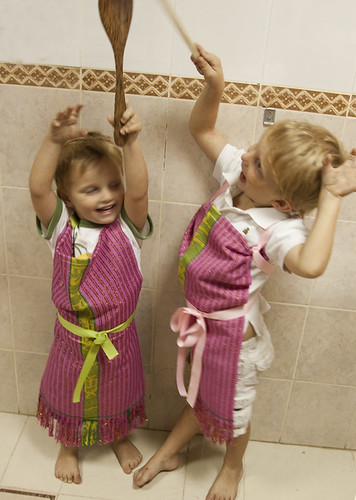
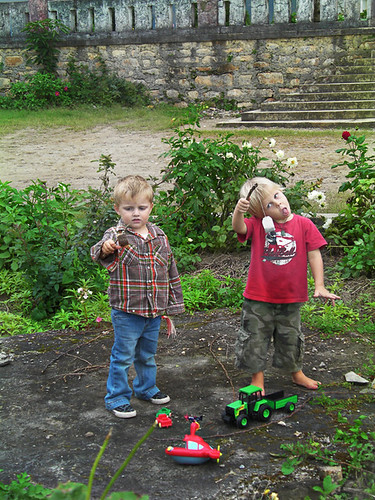
My boys LOVED these and waited very patiently for me to finish pictures before the goggled them all up. And they aren't even messy! Okay on to the second white chocolate wonder I made for her birthday the white chocolate ice cream bowl. With your chocolate still melted, lay out some wax paper and grab your balloon. Blow it up as large as you want your bowl to be. I kept mine relatively small for several reasons, if you go to big the hot chocolate will pop the thin latex and splatter chocolate all over you... not that this happened but take my word, okay it totally happened to my friend and I when we first tried this. Plus I wanted smaller serving sizes since the kiddos would be having lots of treats. Okay, once you have it blown up and knotted take a spoon and get a nice dollop of the chocolate and make a thick circle on the wax paper. This is going to be your base and what will hold your balloon upright
_MG_0242proof
now roll your balloon in the chocolate attempting to keep the line nice and even. The chocolate needs to be thick so make sure to get plenty of it on there. (I tried putting painters tape around the ballon to get a nice straight line but it didn't work as well as I hoped) Once you have it coated place it on the base.
_MG_0243proof
Now stick it in the freezer to set up. This is pretty quick but what is nice is you can do it a few hours before the party and just leave them in there. When you are ready for them take it out and using one of your straight pins pop the balloon. The air will come out very slowly because of it being so cold. When it gets down to where your chocolate is slowly and carefully pull it from the sides of the chocolate bowl.
_MG_0267proof
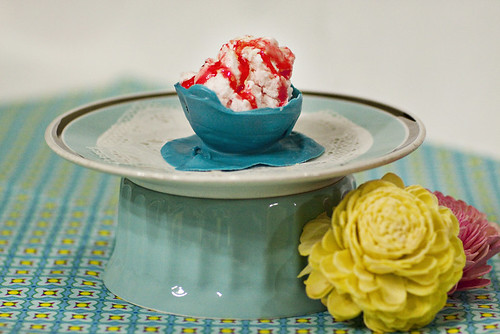
Don't worry if a little breaks no one will notice and if they do tell them to go try and make perfect little chocolate balloon bowls ha! Now grab your ice cream, we went with homemade strawberry ice cream with strawberry syrup, and put a little scoop in the center of the bowl and serve immediately.
_MG_0268proof
It is so yummy and the easiest clean up EVER! A little side trick? If you don't have a cake stand just make one out of a bowl and plate. The one pictured above is a blue ramekin turned upside down with a plate on top. For a bigger effect start with a large serving platter and place a large bowl upside down, place a normal diner plate on top of the bowl, now take a tea cup and place it upside down in the center of that and finish it off with a saucer on top. It looks soooooo cute, but of course I don't have a picture so you will just have to take my word for it!
Have a blast with your chocolate and make sure to eat all the left overs in the bowl!
Cheers
Kelly

Thursday, August 5, 2010

Dinner is Served! Burp Cloth to Baby Bib tutorial

Woo Hoo! I bought a card reader today and we actually have internet access! I am so excited... my mouth is still killing me from yucky root canal, but hey I need to drop a few pounds :) I feel bad that it has been so long since I posted so lets get right to it. Do you have a ton of burp clothes lying around and nothing to do with them? I received so many adorable burp clothes with each baby and I was kinda bummed when we didn't use them anymore then my mother in law taught me this cool refashion.
burpc1
If you live in UT (I know there are several of you who do wink wink) or if you ever visit, there is a store called Down East Outfitters. They receive all of Potterybarn's cast offs and sell them at ridiculously reduced prices. You have to be very patient to search through the HUGE box's of randomly monogramed and personalized items but I have found every single member of our family stockings, easter baskets, backpacks etc. all with their names on it and never paid more then a few dollars. The reason I bring it up is you can also find the most adorably burp clothes usually for a dollar. I have one for every holiday and have turned most of them into bibs now. I use one that I purchased last winter and an adorable burp cloth I received at Evi's baby shower for this tutorial (some steps just show up better on each).
What you need
A burp cloth
A small amount of stretchy spandex fabric, color of your choice (mine was approximately four inches wide and 17 inches long)
Your sewing machine
Scissors

Tuesday, August 3, 2010

What a world what a world

Evie and I had a very long and stressful travel day today, which included but is not limited to: a late starting flight making us miss our connection, told it was somehow OUR fault for scheduling our flights too close together, had to purchase a same day ticket, lost luggage, engine malfunction, stewardess feeding Evie spicey curry which then induced vomiting and screaming for an hour and a half. Yeah, it was that bad. And you know what is funny? I sitting here for the first time in 6 months with high speed internet and I can't upload anything because what I need is in my luggage, probably never to be seen again.... ugh. This is doubly frustrating as I made sure to have a tutorial ready to go for every single day of the trip. That was a lot of work, two 1am bedtimes in a row to be exact. Okay enough whining from me though. Instead I will tell you what I will post ASAP. I thought it would be fun to post all the things I love to do that are soo sooo easy you will just die. So this is what you can expect:
Children's no sew/ barely sew apron
Best Bib EVER (seriously so cute, comfy and most importantly they can't pull it off!)
Keyper (you will never loose your keys again)
White chocolate wonders
Birthday Banner
Pettiskirt (The same day I asked about this tutorial UCreate posted a link to one so I didn't know if ya'll wanted me to still do it? And yes they belong in this soo soo easy section ha!)
I can share with you a few pics from out Maubisse trip. It was at this OLD OLD place called the Poussada. It was a huge gorgeous manner when the Portugeuse controlled Timor. We stayed in the servants quarters as opposed to the main house and the kids had such a blast! I accidentally left my camera sitting on the couch so all of these were taken with our video camera in camera mode, they aren't all that bad.
SANY0096proof
Evie on the steps leading up to the main house
SANY0088proof
Finn and Roman making fishing poles out of sticks and tea bags (this is what happens when you purposely don't bring toys!)

Related Posts Plugin for WordPress, Blogger...