


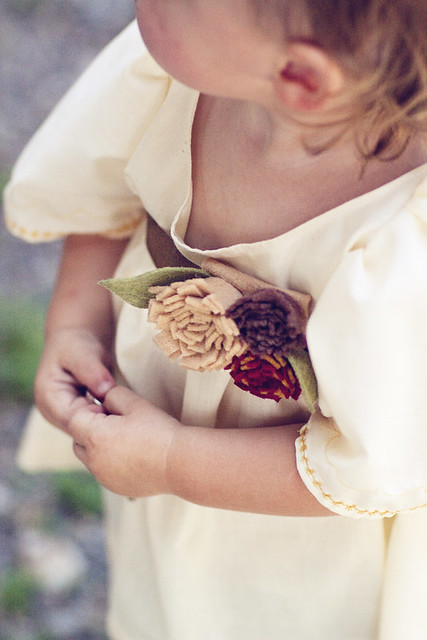
The pattern for her tunic can be found HERE and if you would like to see how to make the awesome little belt around her waist you can check it out at I Am Momma Hear Me Roar. I LOVED that tutorial. I mixed it up a tiny bit by making a flower two colors and really liked how it turned out. This is a super easy little shirt and I think it would look great in rich fall colors (I just don't have any in stock ha!) I also think I will pair it with her little denim vest from our family pictures to make it look more casual. How ever you wear it here is how you make it!
What you will need:
1 yard of fabric
scissors
thread
sewing machine
straight pins
Autumn Bloom Belt from above mentioned link
Once you have cut out your pattern grab your four bodice pieces (2 front, 2 back). Lay your pieces right sides together and line all the edges up

Now you are going to sew along the neckline (and only the neckline). When you are done, flip your fabric so that right sides are out and topstitch what you just sewed.

(sorry there is not a huge difference in the pictures, it is hard to get it when the fabric is cream and so is the thread ha!) Okay, now grab the back "skirt" portion of fabric. You are going to sew a gathering stitch along the top. Once done gather the skirt until it is the same length as the bottom of the back bodice piece. You can lay it down to make it precise

Now flip the fabric so that right sides are facing each other but those edges are still lined up. Now sew a straight stitch across the top along the raw edges thus connecting the two pieces. Once done flip them so that right sides are facing out and topstitch what you just sewed. Repeat this process on the front bodice and front "skirt" pieces. You should end up with two pieces that look like this:

Now take those two pieces and lay them right sides together, matching up the seams you just created. Sew up both sides and across the two shoulder pieces. When you flip them right side out you should have what resembles a little dress:

Now for the sleeves. First you will need to hem the ends (the less curved portion). Because it is bell shaped I would HIGHLY recommend ironing your hem before you sew it. It makes a HUGE difference and I never regret taking the time to do it.

I decided I wanted to spice my sleeves up a bit so I hauled out my awesome but VERY old hand me down Bernina.

At this point I had 3 sewing machines plugged in, you know I mean business when that happens ha! I decided to do a little embroidery with a burnt yellow thread.

It actually ended up being sort of a pain and I wondered if it was going to be worth it but it turned out okay. This step is obviously TOTALLY optional I just hadn't done anything like it in a while. Once you are done fold your sleeves so that right sides are together and sew up the short edge so that when right sides are out it looks like this:

Now starting at the base of the arch run a gathering stitch up the arch and down. Then gather until it will match up nicely with the arm hole on your dress.

Now flip the sleeve out so that the wrong side is facing you. Slide it over your dress matching up the seams. They should now be right sides facing each other. Pin all the way around.

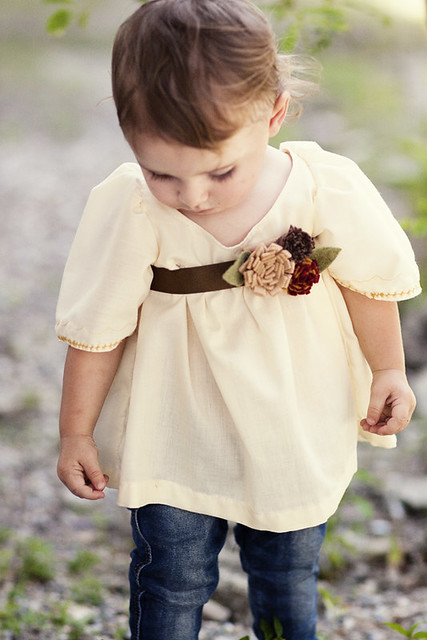
Now sew all around the raw edge connecting the sleeve to the shirt. When you are done remove the pins and flip everything right side out. Now you just have to hem your shirt. I took a good chunk of length off (it was looking more like a dress, which could be super cute but not what I was going for today).

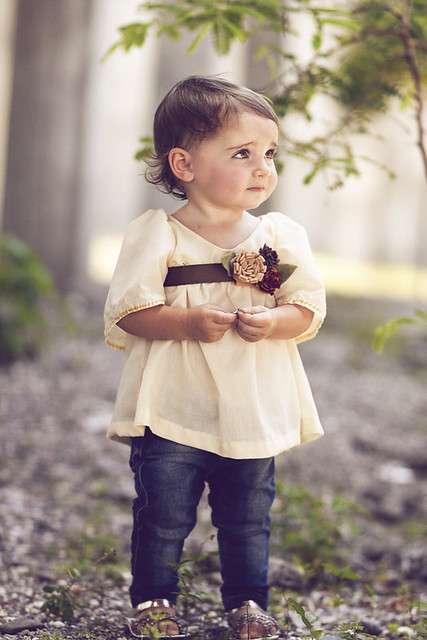
There you have it! I love how light and breezy it is because as you can tell by Evie's sweat hair it is getting HOT here.

I really think the belt makes it super cute and thought if I had a wedding or something to go to I would just add more length to the tunic and make a belt with matching colors to the wedding party and taddah super adorable wedding party dress!
But for now it is a fine walk around and eat rocks off the super dirty ground shirt ha!
While I was doing the little photo shoot two local boys came over and tried to make Evie smile. I thought it was super cute, Evie wasn't so sure and dashed away when I tried to get a picture of her with one little boy
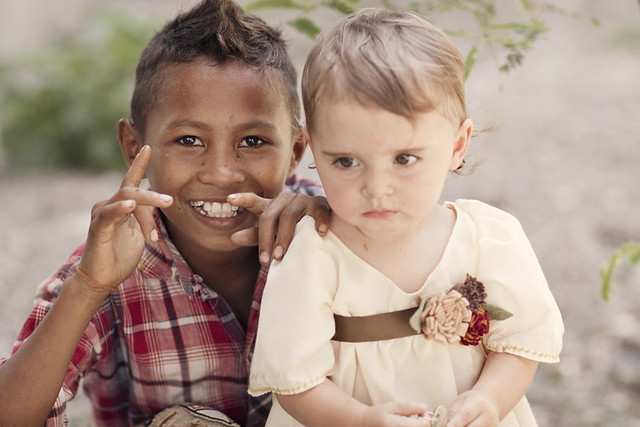
I love how most of the local boys wear their hair in cool hair styles. Our friend told us it is because you can get gel here super cheap. I just love that they take so much pride in the way they look and that they found a way to do it in their budget :)
Cheers!
Kelly


umm yeah love it, I want the dress version ASAP....
ReplyDelete:) Amanda
OH KELLY I AM SO IN LOVE WITH THIS!!!
ReplyDeleteThat is gorgeous! I love this!
ReplyDeleteIs there a bb5.pfd file that has the other half of the sleeve pattern? I could only find sleeve b.
ReplyDeleteThis is beautiful! Thank you for the tutorial and the pattern! I love how you used the belt with the top. I saw that belt yesterday on her site and went gaga over it. Happy Autumn!
ReplyDeleteToo cute! I'm giving you an award tomorrow at naptimecrafters.blogspot.com
ReplyDeleteThat top is so cute, as is your daughter!
ReplyDeleteHi, I'm new, just added you to my reader. What a sweet top! I have a little one just younger than your daughter. I might have to try this one for her.
ReplyDeleteI'm new to your blog too. I just fell in love with this top. My 1 year old daughter's name is Genevieve, but we call her Evie as well. I have to make this top for her! Did you also make the belt?
ReplyDeleteThat's stunning and I love the way you styled it! I'll be linking. It took me forever to get to this post because I could not tear myself away from your Bustling City dress. I love it sooooo much! It's unbelievably gorgeous!
ReplyDeleteThank you so much for this pattern and tutorial. I am so excited to make it for my little one on the way. Is there a page 5 of the pattern?
ReplyDeleteYes, I was going to clarify the missing #5 pattern page as well . Does the pattern print out to the actual size or do I need to enlarge it? The sweetie in the pictures looks maybe 18 months? Is that the finished sized pattern? Sorry for the incessant questions!!
ReplyDeleteI absolutely adore this!! It's so beautiful!! Thanks for sharing! I'll be featuring it on my blog sometime this month. :) little-inspirations.blogspot.com
ReplyDeleteI was wondering the size of the pattern as well. I can't wait to make this for my daughter. So cute.
ReplyDeleteHi! I just made this top today. If you'd like to see my version, it's on flickr here: http://www.flickr.com/photos/50407559@N00/5358106074/
ReplyDeleteI wanted to make the pattern in the original size first before I enlarge it for my 3-year-old. Luckily, I have a friend with a daughter who will be just the right size this summer ;-)
Thanks so much for the pattern and tutorial!
lovely! lovely! lovely! lovely!
ReplyDeletehappy Easter!
Viviana
http://www.fantasiacreando.blogspot.com
This is beautiful! I am new to your blog and this is the first pattern of yours I have used. I am SO excited! I made it in a white cotton for my 18 month old girl and she looks darling in it. I haven't made a belt yet but will. I used a ribbon and tied a bow in the back and that looks so sweet too! Just finished it, like a few minutes ago! :) I will email a pic when I get some pics of her in it. Thank you so much for being so kind to share your patterns free here. I will be making more of this too a bit longer for some cute dresses. Its just so easy to not to. :)
ReplyDeleteCan I know how to make the flower for the top? Thank you
ReplyDeleteHello,
ReplyDeleteBali Girls are beautiful and exotic. Their skin is a rich chocolate colour and personalities are spontaneous and outgoing. Bali Girls like confident men and underneath the innocent looks, gentle nature and shyness they are extremely keen for a man to be interested, flirtatious and wanting to get to know them.
Bali Girls
This top is absolutley beautiful. I was wondering what size the pattern it. I am having trouble telling based on the pictures of your daughter. I really want to make this for my daughter but I don't want it to be too small. Thank you.
ReplyDeleteI realized that my email may not be linked to the account I used to post my comment(I don't really know how to do that) Anyway I was wondering about the size of the pattern. eewhitney(at)gmail(dot)com
ReplyDeleteis the pattern still available? I would love to try making it. when I click on the link it says the folder is set to private. thanks
ReplyDeletepatterns not abailable :(( pls help
ReplyDelete