What you need:
A Tea Towel (these are longer and lighter then dish drying towels and usually cuter, like THIS one that I covet)
A spool of ribbon
Scissors
Sewing Machine (if you go the sewing method)
First I will do the barely sewing method and then the no sew. I chose to use on of the locally made Tias. They are hand woven and are soooo cool. They come in thousands of colors and can be made to have names etc. embroidered in them. They are given as gifts of gratitude or honor at events. My hubby has been wracking up a lot of these and I was at a loss what to do with them so I was grateful to find something fun!
Grab your ribbon and cut a long enough strip to go from one top edge of your tea towel to the other. Keep in mind this is for a kiddo so we don't want it to terribly long or else the apron will sag down really far.
Now cut two long strips for the sides. I decided to finish all the edges of my ribbon (including the part attached to the top of the tea towel) just to give it a little more sturdiness. You could use fray check but I have to save that for when I REALLY need it. Simply fold over the ends of your ribbon twice and sew it down.
Now go a head and attach the ribbon to the two top edges of the tea towel and one ribbon on either side of the towel about 3/4 of the way up. Voila you are done! Seriously how cool is that? Alright now for the no sew. I actually REALLY like the way this one looks when it is done. Grab your spool of thread and pull about 3/4 of the ribbon off. Lay your tea towel on a flat surface. Find the center of your ribbon and place it about five inches above the center of the top of your tea towel. Now you are going to take each tail of ribbon and tie a knot around either edge of the tea towel:
When you are done you should have something like this:
Now flip over your tea towel and Criss cross apple sauce your ribbon in the back
Then bring it around front and tie a bow.
Presto! A cute little no sew apron! When it is on the back should look something like this:
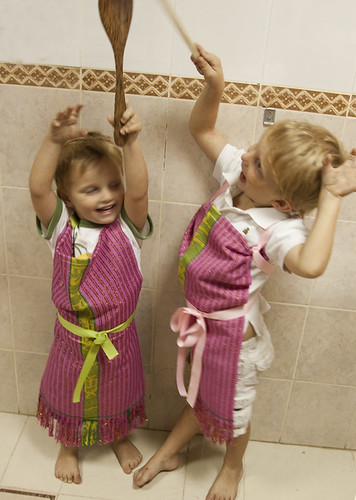
The boys were laughing so hard at wearing pink aprons I couldn't get a good picture. Now I think I will make some Americana ones to tout our American pride :) Hope you love how easy these are and make lots for your kiddos.
Cheers!
Kelly


i lurk, so i thought it was about time to leave a(nother?) comment. just wanted to let you know that i'm thoroughly enjoying your blog. not just the innovative sewing projects, but your writing style and the bits about where you live too. hope your girl feels better soon!
ReplyDeleteThese are great.. I LOVE them...easy enough to do and with five girls well I think these will come in handy:))) I LOVE, LOVE your blog btw!!!!
ReplyDeletewhat?? your kids aren't gorgeous little models all the time??? i would have been fooled. :) i love the candid shots of your kids too and i love following your blog! you are inspiring to this novice sewer! thanks for all the great tutorials!
ReplyDeleteWow, That was easy. I am definitely going to try this.
ReplyDeleteif you want a quick and easy way to seal the ribbon without fray check, or folding it over, just run the cut edge over a match or lighter for a second. it melts the cut ends together without burning the ribbon. :)
ReplyDelete