


The Summers Eve Dress, pattern to be found HERE. (I am totally lame and was thinking, "aw man summer is coming to a close it is Summers Eve".... totally named it that, published the pattern and then realized Eve means the night before right? So ignore my silliness ha!) The dress above is a variation of this dress which is SOOOOOOO simple. I will sort of combine the two in this tutorial and hopefully it isn't to confusing. :) As always please email me with Q's. I was so grateful one of my fantastic readers emailed me and let me know there was a problem downloading one page of the pattern so I am working on fixing that. I always appreciate it!
What you need for easy version for a 2T dress:
1/2 yard fun fabric for bodice top
1/2 yard coordinating fabric for dress bottom
Remnants of either for LONG bow
Elastic
Safety pin
Scissors
Sewing Machine
What you need for more involved older girl dress (Haven, pictured above is 7)
3/4 yard fabric for skirt
1/2 yard corresponding fabric for top (more if you like it to be the same color as the top)
1/3 yard fabric for Bow/ Waist band if you would like it to be different from top
I also added an extra contrasting dark, longer skirt, that pokes out the bottom under the printed skirt fabric. I used about a half a yard.
Elastic
Scissors
Safety Pin
If you would like to do a nice simple dress go a head and print out the pattern and cut it out as is. If you would like the larger size you can open the pattern and using the top pieces and sleeve pieces simply enlarge them either on a copy machine or on your computer in an editing program. Discard the bottom dress portion. Once you have your pattern enlarged I made a line four inches up from the bottom all the way across the dress top. I then cut on the line making myself a waist band (Sorry about this extra step I should remake the pattern) Now that you have your pieces cut out your dress tops from the fabric you have chosen. Once you are all organized take ONE bodice top piece and one sleeve. Line them up so that the edges match (in the picture I didn't line them up perfectly so that you would be able to see them :))

Now you are going to sew from the top of the arch all the way to the end. (Do not sew the straight down portion). Now repeat on the other side. When you are done you should have something resembling this:

Now you are going to take your second dress top piece and attach it the exact same way so that when you are done you have something that looks like this:

Now we are going to make pockets for our elastic. On the straight edge of your sleeve fold over just like you would when you are hemming.

Repeat this process on the other sleeve and then around the entire neck line, leaving a a little space unsewn on the neckline where you can slide your elastic in. Once you have made your little pockets thread your elastic through using a safety pin (the length of elastic depends on the size of your bubs arms and head)

Once threaded through, sew the elastic together and let it slide back up into the pocket. For the sleeves I then turn right sides together and sew closed the little pocket. Also place right sides together and sew up the little side seam. On the neck I just sew shut the little space I had left. Now your top is done! The next step is only if you want to do the more advanced dress. Take your finished top and gather stitch the bottom:

I live big long tails until I can line it up to the dress bottom and make it fit perfectly. For both dresses you are going to make long ties that will be attached on either side of the dress. I didn't include a pattern for these because the width and length is totally up to you. Mine are about 2 inches wide and super long (21 inches) because I like nice sizable bows. It is totally up to you. To make them simply cut two long straight lengths of fabric (get funky with the ends if you are brave). Place right sides together and sew up either side and along the bottom.

Use the open end to flip them inside out, and of course I always press but that is because I am a fanatic ha! Once you have created the bows if you are doing the simple dress you are almost done! (Sorry I don;t have pictures for this part but it is super easy) Simply place your skirt bottom right sides together, now slide the ribbons/ ties in between the two pieces placing them at a location you like (I put them about 1/2 an inch down from the top, just enough room to attach the dress bottom to the top). Once they are in place sew up the sides making sure to back and forth over your ribbons. Now hem up the bottom. Now you are going to connect the top to the bottom. Turn your top inside out and slide it over your dress bottom (which is right side out) this makes them right sides together. Now line up the raw edges and any seams, now sew all the way around. Flip the top up and taddah! Little girls Summers Eve dress!

(I had to piece fabric together to make mine ha!)
Now at this point if you are making the more advanced dress we are going ot make a gathered waistband. Take the two strips of fabric you made and place them right sides together. Take the ribbons/ ties you made and slide them up in between the fabric on either side:

Now sew up the sides making sure to back and forth over your ties. Turn it right side out and do a gathering stitch along the top and bottom:

Set both your top and waistband aside. Take the material you have selected for the dress bottom. The length of the dress is up to you. I wanted it to be a tea length. You can also make it as fluffy as you want by using more fabric and gathering it more and vice versa. I also liked the idea of adding a dark contrasting fabric that was longer underneath. I made this the same width but about 3 inches longer:

Once you have the length and width you desire (Mine was one big rectangle) fold the fabric so that right sides are together and sew up the back seam. Then I did a rather large hem (it seems like girls this age get taller fast!)

Once you have your little "circle" made sew a gathering stitch across the top of the skirt. Now repeat the entire process with your second contrasting fabric. Now gather each skirt slightly. Slide the darker skirt up under the main skirt matching up the back seams and increasing or decreasing your gather so they fit perfectly with each other. (I added a layer of toile for volume but in the end didn't like it and took it out so disregard it in the picture ha!)

Take the waistband you created and turn it inside out and slide it over the top of the skirt, matching up the raw edges (the two pieces should now be right sides together). PIn all the way around if you like.

Now sew all the way around the raw edge. When you are done flip your waistband up:

Now take the top you made and rest it on top of the waistband. Adjust your gathers until they will fit together nicely. Once again turn the top inside out so that you can slide it over and make the two pieces right sides together. Sew all the way around the top connecting the two nicely. YOU ARE DONE! WHOOOOO HOOOO!!!!
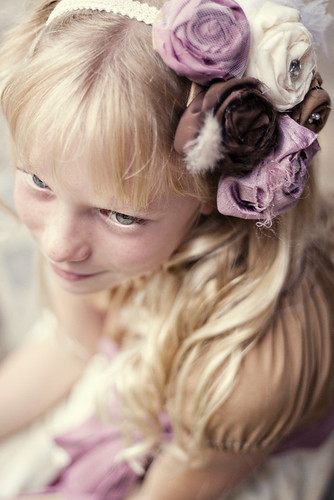
I loved the colors in the dress and wanted to make sure Haven had an amazing headband to go with it so I whipped up this one:

She told her mom she had always dreamed about a dress like this! How cute is THAT!
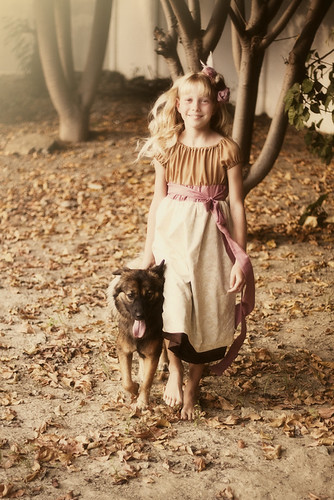
She really wanted her best friend Bolo her puppy in the pictures.
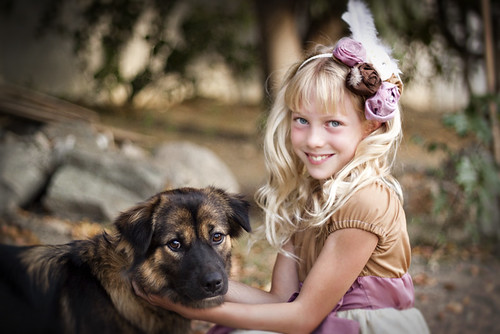
It was fun having both of them. What is great is that she could still totally play in this dress. You know swing from her tree

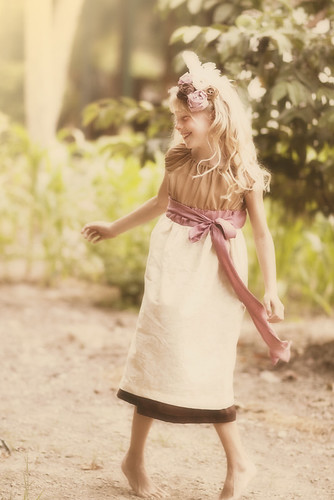
and she told me her favorite thing to do was twirl
I am in love with her hairband and toying with the idea of making myself one, they are so easy I don't know why I am putting it off ha!

So there you are, FINALLY the tutorial! Hope you have a blast making it!
Cheers,
Kelly


Sew Cute!!! Thanks!
ReplyDeleteThat is an adorable dress, I would love to be able to make something like that for Avery- maybe the time she is as old as the little girl in the picture I will! (My baby is six months old lol)
ReplyDeleteIt is fabulous- I would even rock the grown up version.
LOVE IT
ReplyDeleteAmanda
Everything about this is all shades of sweet! The dress, the headband, and the photographs. You are amazing!
ReplyDeletelove love love! and what if you want to make it in big girl size:) I think i might have to try to largen it, it's just perfically whimsical for our beach vaca and with two boys the girlier my wardrobe the better
ReplyDeleteI love it!
ReplyDeleteCould you do a tutorial for the headband? I love it!
Wow! This is so, so fantastic! Hug thank-you for this gorgeous dress. I'll be spreading the word.
ReplyDeleteAmazing, as usual!!! Love the dress, love the headband, LOVE the photos! You are fabulous!!!!
ReplyDeleteHow did you make the headband?
ReplyDeleteTechnically it is a Summers Eve Dress - as you are currently in Timor. As with myself in Australia we are heading out of Winter and into Spring/Summer.
ReplyDeleteCan you post a pattern for the size 7 dress?? That's exactly the size I need to make for my daughter and that would be SO CUTE!! Or if you had any hints for how much I had to enlarge the 2T pattern?? I get confused with the math... :)
ReplyDeleteThanks so much, you did AMAZING on this dress! And the headband is INCREDIBLE!
Just found your blog and absolutely love it! Very original premise.
ReplyDeleteYour patterns are unbelievably pretty , but even more amazing are the photographs
ReplyDelete