


What you will need:
1/2 yard fabric
Scissors
Elastic
2 Buttons
Thread
Needle
(possibly velcro)
I am trying to figure out the best way to upload some of the pattern pieces I make but until then I thought I would give some measurements. As long as you promise you will check that they will work for your bubs before you start sewing :) Agreed.
Your main pattern piece should look something like this:

Now usually I just fold my paper in half but in this case the back slopes more gradually than the front and then they meet up at the end

In the end my measurements were as follows:

Those measurements are: thirteen and one half, two and one half, nineteen
Next I cut 8 rectangles roughly about 1/2 the size of the longest edge, about 9 inches. These are the bands at the bottom so be sure to measure your bubs little thunder thighs before cutting. These fit Evie perfectly, to a little snug. She won't be wearing them to long. Once you have your pieces cut out, place right sides together and sew up the slopes. I drug out my serger but a zig zag will do the trick

Now right sides together line up the seems you just made front to back. They should look a little like shorts now. Go a head and seam over the top making sure to leave enough space and a little hole for your elastic. They should look something like this:

Apparently if you need a pair of hot pants you could use this pattern for that ha! You know how you fold pants when you want to make a nice seem down the middle? Fold the shorts like that so you find the middle of the outside portion of the leg (I am so sorry that is a horrible way to describe it) Once you have found the middle cut a little slit about an inch in. Fold back and seem it up so that you have a little triangle

Do the same thing on the other leg. Now shirr up on both sides of the triangle

Now for the bands. Separate them into pairs of two. Take two sets and cut about a half an inch off. These will be your front bands. The back bands need to be longer so they can come around to the front. Sew all along the top and down only one side.

Turn them right side out. I REALLY suggest pressing them at this point it makes the next steps so so so much easier. I even wished I had done a better job of pressing them but thus is life and naps are only so long ha! Take both the front pieces and slide them up over your front shirred portion of the leg. Make sure your squared end is nice and snug up over the edge, you may have some extra in the back but don't worry.

Starting at the top right top stitch all the way around the band. No we are going to do a similar thing to the back. This time move the squared portion forward so you have a tab. This is the part that will go around and show on the front.

Once again top stitch all the way around the tab. When you are finished they should look something like this:

(I pinned the tabs forward so you could see what I am goin for) Turn your knickerbockers inside out and line up the (for a lack of better word) crotch portion. Sew from one side to the other.

Woo hoo you are almost done. Go back up to your waist band and attach a safety pin to the amount of elastic you measured around your cuties waist. Feed it all the way through.

Sew the elastic together and release it so it goes back into the pocket. Close the little opening you made to feed it through. Here is where things went awry for me. In Timor there is an old man who sells buttons he has made right outside the fabric store. I asked him for two of his medium sized buttons but he insisted on the big buttons. I didn't want to argue since neither of us could actually SPEAK to the other. Unfortunately the were HUGE and there was no way I could make a button hole for them to fit through without ruining the shorts. So, I cheated. I sewed the buttons on and then used iron on velcro instead of a button hole. This actually turned out awesome and much easier to get on and off, but I felt sort of like a slacker and I had to fess up.
She did pull on the buttons though and opened them up, I think she just wanted to give those thunder thighs a breather though
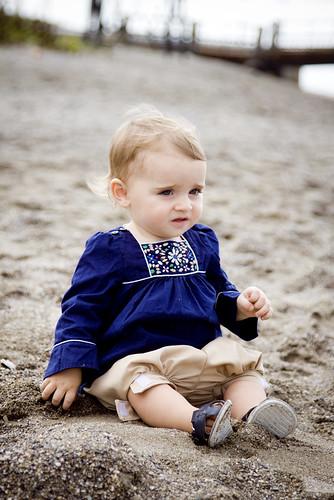
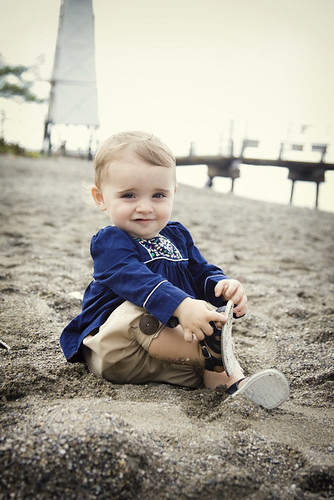
There you have them, cute little knickerbockers! I think I am going to make another pair for her in the next size up. I was thinking that on Fridays I would do a "weekend project" these are projects that either take a bit more time and concentration or a trip to a store or two. My first weekend project is going to be my chalkboard bucket.
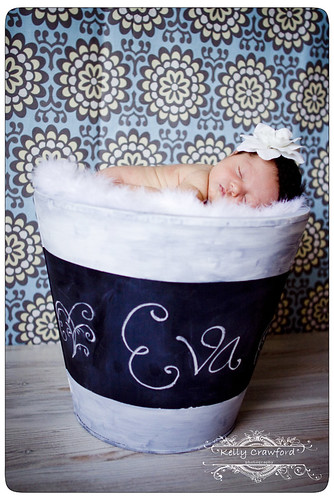
I made this last year and LOVE it. I use it for tons of stuff and it is soooo easy, but it does take a trip to a home depot (or your garage) and maybe Ikea if you have one close by. Can't wait to show you how to do it!
Cheers
Kelly


i really love the shorts. thanks for a new idea for my little ones!
ReplyDeleteThis are adorable! I love them with that blouse.
ReplyDeleteTotally making these! Well...totally making all of these for my girls! Love the simple chic style for little girls!
ReplyDeleteSo cute! She looks so adorabe in those....makes me just want to eat her :) Great job, those are really so cute!
ReplyDelete