


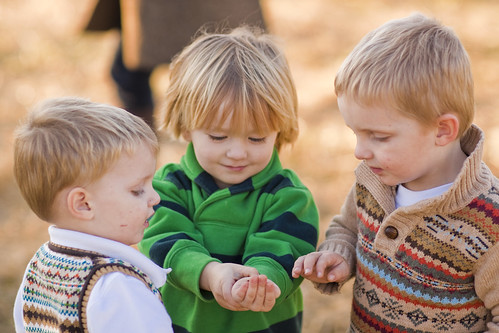
(Atticus showing Sawyer and Finn a caterpillar they found at the farm, in said sweatshirt).
While I was at the CRAZY clothes market here in Dili looking for a plain grey sweatshirt I found a Daddy sized one in Blue and Green. It had a yuck yellow label on it but I figured I could get rid of it.

Now that I had the sweatshirt I had to figure it out and it is totally as easy as I thought it would be!
What you need:
An old (or new, I would totally just head to Walmart and grab a 3 dollar grey sweatshirt if I could) Large sweatshirt
Sewing Machine
Button (Optional)
I grabbed one of Finn's sweatshirts to size down the new one. (This one also had a cowl and TOTALLY helped me figure this out). I lad it right up next to one side and cut the other

I used the sweatshirt as a guide for the arm hole then cut straight across on the neck to about the mid point. Then I folded it over so that I could make sure both sides were exactly the same.

You will end up with something like this:

You should have a nice chunk of unused fabric. I cut it so that it was a nice long piece and laid where I intended to sew it just to make sure I had plenty.

*** The Key*** Make SURE that your cuties head is going to fit through the size hole you are going to make with the cowl neck. You want it to be wide and some what stretchy. I unpicked the arms in order to save as much fabric as I could. Then I sized them down by cutting off a good four inches

I still had some extra fabric and thought a pocket is always fun to have on a hoodie and Finn is always carrying around some sort of treasure so I used the pattern from the Shabby Evie tutorial and made a pouch.

I attached it now while it was east to maneuver. In a very out of character action I did not iron it before attaching it ha!

Since one side is already all finished you only have to do one side woo ho!

When you are done you should have something like this:

Now take your piece for your cowl and lay it as you want it to look. I lined mine up with the stripes and then trimmed it so that it would lay nicely

Once you have trimmed it, turn right sides together and sew all the way around the outside edge. I decided I wanted a button and button loop so at this point I pinned a loop of the extra fabric from the old neck portion of the sweatshirt, into place. When you are done flip it right side out and topstitch what you just sewed (this gives it a really nice professional and finished look). I am so sorry I don't know where the picture went for this and it is a pretty crucial step. You will need to cut your neck line almost to a square. The sides should be a little more than 90 degrees though. Now that your cowl neck is nice and finished, find the center of your piece and the center of the neck and pin them right sides together. Now pin all the way around until the cowl pieces overlap in the front.

I did it one side at a time so I could make sure they over lap nicely. Once you have done one side again topstitch over what you just sewed

Once you are all done you should have something that looks like this:

Hmmmm makes a cute vest! But we keep going :) Make sure make sure make sure it will fit on your cuties noggin'. Now on to the easy part. Turn your sweat shirt inside out. Keeping the arm pieces right side out tuck them up into the sweatshirt and line up the side seams. Pin them right sides together all the way around.

All you need to do now is attach a button. (If you decided to add that embellishment) That is it! Isn't that so easy and so cute!

I am resisting the urge to make a ton more. It is a rare occasion we even wear a sweatshirt here. I made it for our little friend Mace but at the birthday party today there was just too much commotion to get a picture. When Sawyer saw it he asked why he didn't get a new sweatshirt. So, when I went to the secondhand market this morning I found this awesome piratey sweatshirt. It was a little to big, and had a hood...

Turns out having a hood is PERFECT. You can use the fabric from the hood and just turn that into the cowl neck. Sawyer requested that his look more like a cape... um okay? hee hee. I tried to take a picture of the neckline on this but it is kind of hard to see since it is so dark:

Sawyer, loves it! He plotted out locations on the globe to terrorize.

I couldn't get him to hold still long enough to get a decent picture but I really love how it turned out. Piratey yet classy? Who knew those could go together.

Have a lovely weekend and I hope lots of fun sweatshirts are made... I mean fall is only 2 months away right?
Cheers,
Kelly


Wow what a great tutorial! I have a girl and hate her in sweatshirts, but I love the neckline, and I am going to make this for her (I think a girl could rock this look too). You are incredibly talented and I am in awe of your projects.
ReplyDeleteLOVE it! What great tutorials you're posting. Thanks so much.
ReplyDeleteThis is really cute, and you are right, fall is only two months away!! Holy toledo where has the time gone!
ReplyDeleteYou are just amazing! Your boys are so handsome :)! Good Job Momma!
ReplyDeleteI LOVE them...with 3 little boys running around I think this one is going to be worth a try....I really love the pirate one....My two younger boys would be fighting over it...=)
ReplyDeleteThis is so cute. thanks so much for a boy tutorial. They seem to be few and far between. Now if only I didn't live in TX. Maybe I'll try it in T-shirt weight.
ReplyDeleteThanks
Ruth of Hammer & Thread
I can't wait for fall in Ohio just because of this. I'm a little excited.
ReplyDeleteJust made this today for my little munchkin. Thank you so much! It took a few to figure out the neckline part but I got it done. Thank you again for sharing!
ReplyDelete