


What you need
Two small pieces of fabric
One long piece of fabric
One really small piece of fabric
Sewing Machine
Needle and Thread
Paper Clip
Some bow tie pasta to munch on an get you in a dashing mood.
First you will need your long piece of fabric. We are going to make the exact same neck piece as the tie so you can follow the instructions for that HERE. (Very quick review: cut a long strip, fold over raw edges on all sides, tucking ends in, topstitch from top right all the way around to bottom right, attach velcro or sizing clips and voila!)

Next you will need to cut two rectangles of fabric, one smaller than the other. I decided I wanted a solid and pattern but you can do any fun combination you like, or the same, its your bow tie :) I cut my rectangles too large in retrospect but hey you gotta roll with it right?

Fold your large piece hamburger style, so that it is right sides together. Sew all the way around leaving a little pocket so that you can turn it inside out. Do the same with your smaller rectangle. Of course I pressed mine before topstitching all the way around making sure the opening gets sewed closed.

Now we need to get them into that cute bow tie shape. I grabbed a paper clip and kept it handy. First I took the larger rectangle and squeezed the middle until I got the desired shape. I clipped it with the paper clip so that it would stay in place while I did a little hand stitching to keep it in shape.

Then I did the same thing to the smaller rectangle. Then I took the smaller one and nestled it in where I wanted it in the larger. Then I just did to little hand stitches to hold it in place.

Now I grabbed my littlest piece of fabric and did the same as the neck band tucking in the raw sides and sewing it shut. (don't worry about the ends)

I take that and wrap it around the two bows. Using your zipper foot I squeeze it nice and tight and back and forth sew it shut.

Next I attach a safety pin to one of the ends of my neck piece and feed it through where I just sewed. Woo hoo! You have a bow tie!

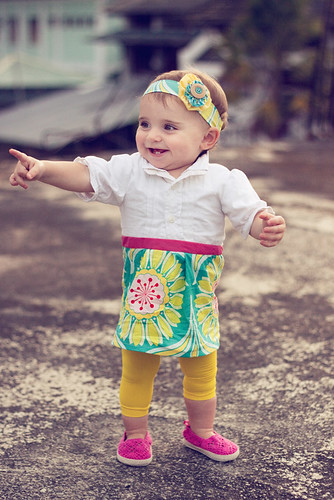
Now good luck having your little one keep it on ha!!! Next up Evie's headband!! I could just eat her up, and by the looks of those thighs I would be full ha!
Next week when we are done with boy week I will do a tutorial on Evie's birthday dress. I LOVE it and it is totally easy!
Cheers
Kelly


holy crap could she get any cuter?
ReplyDeleteThey are both so adorable!!!! I kinda enjoy the oversized bow on Finn...it makes for some fun photographs!!!
ReplyDeleteI RANDOMLY came across this blog!! Seriously, my sisters friend from Arkansas emailed her with a link to this. My sister recognized you (from your pictures). haha. This is such a great idea AND you are so talented. Love the green tie. I am sad to say that it took me 2 hours just to sew a patch on Ryan's scout shirt the other night. :-(
ReplyDeleteI think the "huge" bow tie is way cute! The only thing I would change (maybe the size for others)... but I would have sewn down both sides of the little pink piece... I am weird about having it match on both sides.
ReplyDeleteShe is way cute!!