


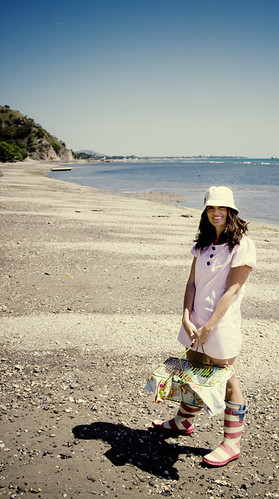
**Disclaimer** This dress is Bootie short, I mean WAY to short for anything other than going to the beach. I made another and added about six inches and a belt and love wearing it for everyday outings. If you would prefer to have something for everyday use just slap on those extra inches :)
We go to the beach ALOT here in Dili. I love having something light and breezy that covers up the suit, dries quickly and can be shoved in a bag while we are swimming. To me swim cover ups are like PJ's I just hate paying money for them. I thought you might feel the same so here is my little cover up! You can find the pattern HERE or as always on my ever growing list of patterns HERE.
What you will need:
About two yards of fabric (depending on your desired length)
The pattern you printed out
Scissors
Pins
Sewing Machine
Needle and Thread
Five Large Buttons (I covered mine in matching Blue with white polka dots and LOVE how they turned out)
Alright so once you have all your pieces cut out (make sure to heat up that iron I love so much) grab your two pocket pieces

I decided I wanted three little pintucks in mine to give them some volume. I pinned them all down but didn't sew them down

Now take the rectangle you cut out for the top of the pocket and fold it in half wrong sides together, now pin it to the top of the pocket and sew across making sure to attach all three layers

Now grab the front of your dress and pin your pocket to the location you desire and topstitch it on making sure to leave the top portion unsown.

I did this once without the button already attached and once with

I guess it was a titch easier to put the button on before but not a big deal, and that is if you even want buttons, no one says you have too :) Now go a head and grab the two back pieces of your dress. Lay them right sides together and sew up the middle. Now flip it over and topstitch from top to bottom what you just sewed. (you technically don't have to do this, you could cut the back on the fold but I feel like this gives the dress a little more definition and makes it looks less "bag" like)

Now take your front and back pieces and place them right sides together and sew up the sides, and while you are at it sew the shoulder pieces together on either side. Easy enough. You can hem up the bottom now if you like or save it for later, just make sure to do it sometime ha! I wanted to add a few pleats of pintucks to the top of the neck line. I decided three per side would be good. I grabbed little sections about 1/2 an inch wide at the top and folded them so they were wrong sides together. I started at the top and sewed diagonally until I met the fold I had made. I did three on the left and then ironed them down. I left a little space for our button piece and did three more. (I didn't iron these ones down so that you could see them better in the picture)

I did not worry about topstitching these, but you could if you want. Now take your front button piece and iron down the edges all the way around. Then attach it to the middle of the front of your dress. Leave a little bit of an overhang at the top and do not worry about sewing it to the neck line.

Take the back neck piece and place it right sides together to the back of your dress. Stitch from one side to other.

Now grab your 2 front neck pieces. Place them right sides together and sew the smaller portions together. Open up what you just created and pin it to the front of the dress. Sew all the way across. Now put right sides together and either end and sew it to the back neck piece.

Now flip the whole thing inside the dress and topstitch all the way around. Woo hoo almost done! You can sew your buttons on now or when everything else is done it is totally up to you.
Last big step. Grab your two sleeve pieces. You are going to shirr up the straight bottom of the large sleeve so that it lines up or is the same size as the smaller sleeve, then pin them right sides together and sew it up. It will look like this when you are done (if you open it up)

Now you are going to shirr across the curve of the large sleeve so that you can gather it up again to match the smaller. Once you have done that you are going to fold it up so that the curved part of the smaller match's the curved part of the larger. The bottom should look like this:

(the little bird beak type shape should make it nice and even)
Now at this point you can pin all the way around if it helps you but you don't have to.

Place the ends of the sleeve right sides together and sew them up

Now turn your dress inside out. Keep your sleeve right side out and slide it up through the dress. Line up the seam of sleeve with the seam of the dress. Now pin the sleeve all the way around making sure to get all three layers.

Now sew all the way around, checking every little bit that you are getting all three layers. Turn your dress right side out and you are all done!

(Being a photographer you would think I could pose better-- but no) Now head on out to the pool or beach and wow your friends with your amazing seamstress abilities!
Cheers
Kelly


this is too cute...I will definitely be adding those inches ;)
ReplyDeleteUmmmm. love this :)
ReplyDeleteI am late to the game, but I love love love love your wellies! They are fabulous with your beachy dress!
ReplyDeleteI have a question.. can this be sleeveless with bias tape? I downloaded the pdf haven't checked it out yet. I am in TX and its just HOT here but I would love to add the inches and wear it all the time!
ReplyDeleteWhat size is this tunic? What size are you? Love the tute, would love to make one!
ReplyDelete