Friday, July 30, 2010

Bonjour Evette! A Little Girls Dolly Tutorial

dollymerryroundproof
Did you watch the video? Were you as completely smitten as I was? Oh my gosh I am so in love with the Kiki and Coco dolls. We are heading to Rome and Egypt in a few weeks and I thought wow, I really want to imitate this with Evie. The dolls can be found HERE at Tiny Concept, an Australian based handmade toy company. I am crazy about their dolls but no way I could afford the price. So, where did that leave me? Oh yah! Totally psyched to make my own. I have been wanting to make Evie something she can keep forever, clothes, bows etc only last so long. This was the perfect inspiration for me and I thought maybe other mommies would like to make one for their darlings, so here you are mes amies, I present The Bonjour Evette Doll. Pattern found HERE
What you need:
Print our the Evette pattern
Scissors
Muslin, Linen or fabric of your choice for her body
A felt Square in the color of your choice for her hair
Thread of your choice color for her eyes
Pink thread for her mouth
Square of fabric for the Pantaloons
Length of lace or other embellishment for around her pantaloons
Fabric to make a mini-pillow case dress
Lots of fun embellishment fabrics, ribbons, fringes etc
Ribbon to tie up dress
Stuffing/ Fluff
Sewing machine
Needle
Patience HA!
Turn on Sabrina and lets get going!

Thursday, July 29, 2010

You picked my favorite too!

The winner of the Cone of Twine is.................
Screen shot 2010-07-29 at 11.55.21 PM
Amy Woodruff said...

Oooooo the Carribean!!! I wrap all my sold items in brown craft paper and tie them up with string. But it's the boring plain kitchen string. This would look MUCH better! Love it!!

I also LOVE the Caribbean, although I am on such a yellow kick these days! Please shoot me an email with your address so it can be sent on its way! Congratulations, I hope you get lots of fun projects made out of it! So, it is midnight here in Timor and there is no way I am going to bed any time soon. You know why? I am working on a project right now that I absolutely positively can't put down. I am in LOVE with it. It is Evie's birthday present from me and lets just say I know she will have it forever. Wondering what it is yet? Watch THIS video (that I am CRAZY about) and see if you can figure it our, and YES I have a pattern coming for you for it ekkkkkkk! Are you excited?


Wednesday, July 28, 2010

Stopping Traffic: Little Girls Birthday Dress Tutorial

_MG_9295proof
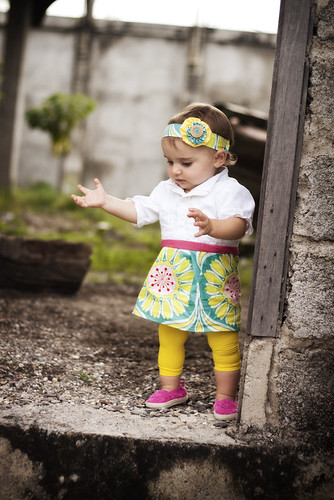
I am still reeling from the fantastic whirlwind it was being featured on Luv In The Mommyhood. Thank you so much new friends I am so glad to have you! And thank you Shannon one more time for your awesome, way too flattering, post. I wanted to make sure to get some more of the preparations for Evie's party up before we head out of town this weekend. So, could Evie's leggings get any more electric! Ha! Add in those hot pink shoes and she could literally stop traffic. They are of course from my favorite leggings store We Love Colors, I just love their variety. Any color I need guaranteed they have it (this is totally unsolicited, they are that cool hee hee). So, this is Evie's first birthday dress. It was so fun and pretty simple to make. It is actually a refashion of sorts out of one of the boys old dress shirts, so there is no pattern but you can totally still do it yourself. I wanted to mimic the dress that I am wearing in the header of the blog but just shrink it down to baby size ;) When you are done be sure to follow THIS tutorial so you can get a matching head band like hers.
What you need:
A hand me down dress shirt (or new, totally up to you) in a few sizes larger then usually worn
1/4 yard fabric (or more if you need a larger size) for the "skirt" portion
An 1/8 of a yard of fabric for the mid-section
Elastic thread (can be found at your local fabric stores)
Sewing machine
Scissors
Straight Pins

Tuesday, July 27, 2010

Sunshine, Daisies, Bottom Mellow: A Mommy Dress Tutorial

Bmellowdress1bproof
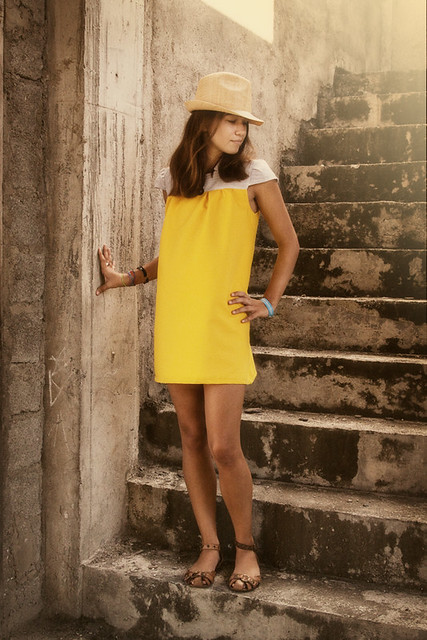
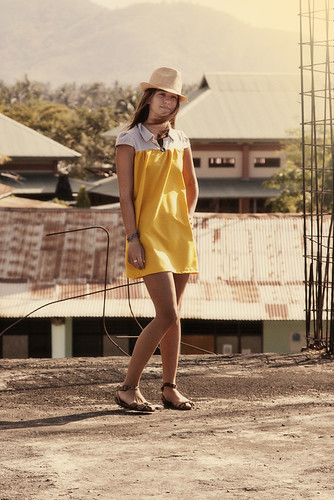
Since I made Evie a new fabulous dress for her party (tutorial to come) I thought it only fitting I make one for myself. My inspiration as always came from Anthropology (love their stuff hate their prices ergggg) and my addiction for the color combination of yellow and grey. (Keep in mind my lovely model is a good 4 inches taller then me ha!)
Bmellowdress14proof
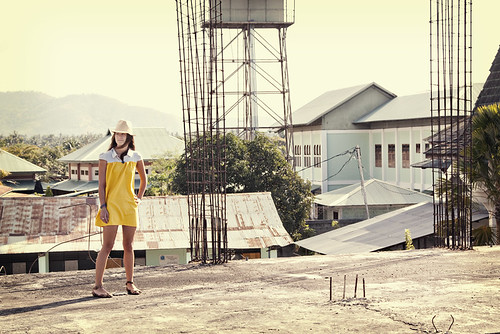
To further help direct me in designing a new dress I have been talking with Shannon from Luv in the Mommyhood, she is so awesome, the type of mommy you can be yourself around and not worry if an "I almost lost it yesterday" slips into the conversation because guaranteed she has a hilarious story to top yours! I about fell off my chair giggling when she did a post about someone going potty on her couch. I have been blog stalking her for it seems like forever and finally got up the courage to contact her when I started No Mans Land. She was sooooo sweet and patient with me walking me through the whole process of being "featured" (I just got chills) on Luv in the Mommyhood. I love these amazing blogs who are willing to take time to spotlight a newbie who has no real idea what she is doing ha! After kicking around a few ideas she requested a dress that us post baby mommies could wear to hide that oh so awesome mommy muffin that hangs around so rudely post baby (yes Evie is a year and mine has not disappeared ugh). I happen to be going to the second hand (or twelfth hand) market that afternoon and found a "vintage" grey striped mens shirt. I decided to use the fabric for a much better purpose! I had some yellow fabric I had picked up a few weeks ago and when I laid them next to each other I was in love! So without further ado the Sunshine, Daisies Bottom Mellow Dress.
Bmellowdress3proof
What you need:
BMellow pattern found HERE
Half a yard fabric for the top
3/4 yard fabric for the bottom
One Button
Sewing Machine
Scissors
Straight Pins
I must apologize profusely for the first pictures. I messed up a tad so for the first step make sure to read the step not just look at the picture.
Print out and cut out all your pattern pieces. Make sure to cut the "skirt" portion of your dress to be as long as you like. Also this is made to have pleats, if you don't like pleats or REALLY like pleats increase or decrease the width to your liking. Now take both your front bodice pieces and your bodice support pieces. Lay down the bodice piece right side facing you. Align the bodice support right side DOWN with the center of the bodice piece (the center of the dress). Sew JUST up the middle to attach them to each other. Now flip the bodice around so that wrong sides are facing each other and topstitch what you just sewed.
bmtut1
(DO NOT sew the top like you see in this picture, I had to unpick it all later ha!)
Repeat on other bodice piece. Now take your back bodice piece and we are going to attach the two front bodice pieces to it at the shoulder. (Don't mind that my stripe fabric is crazy old and thus frays like there is no tomorrow)
bmtut2
(See how I had to unpick what I had done, so silly of me) Now take your two collar pieces and place them right sides together (I am really into big collars so if you want to tone this one down that is understandable) Starting at the left corner sew up, all the way across and down leaving the longest side raw. Flip the collar out so right sides are facing you and topstitch what you just sewed, folding over the little bit at the end.
BM5tut
Now we are going to attach the sleeve. Go a head and hem it up to your liking. Now gather a little bit at the top just enough to give it some shape :) Now pin right sides together sleeve to dress
BM6tut
Sew acros making sure to back and forth and make it nice and sturdy. (You have to pull this dress off over your head and it seems like this part takes a beating) Repeat on the other side. Ohhh it is shaping up nicely!
BMtut7
Now for the super easy part. Grab your skirt bottom and fold it in half. Lay it right next to your bodice. Now we are going to make little pleats on both sides until it match's up with the bodice.
BMtut9
Now you are going to attach it to the bodice. Place right sides together and pin if you like. For the center of the bodice make the front portion where they meet overlap ever so slightly. Sew around either serging or zig zagging after you straight stitch. Flip the whole dress right side out and topstitch over what you just sewed. At this point you can attach a button where the bodice meets or just leave it plain. You are so close! All you have to do now is hem up the arm holes
BMtut10
Now hem it up the bottom to your liking! You are all done!
Bmellowdress9proof
Now go strut your stuff. No one will ever notice you don't have abs of steel! I can't wait to wear mine to Evie's party.
Cheers!
Kelly
PS that Fedora was a present for my B-day a few weeks back from my girlfriends here in Dili. I am trying to work up the courage to wear it at the party, I think I can I think I can ha!


Why is A Raven Like a Writing Desk? Tea Time Sandwich holder tutorial

Birthdays are BIG events at our house (much to the hubster's wallet's dismay) First birthdays are even bigger deals and Evie's is this week. I decided for Abby I wanted to do a color theme and went with turquoise and yellow with a touch of pink. It is essentially based around Heather Baileys Pop Garden line. The adults are getting to eat BBQ Pulled pork sandwiches (we try to do VERY Americanized food at our events) but I knew the younger crowd would want something a little more palatable. Since we do have picky palates in this household I thought PB&J might be the best idea, and it meets my stipulation of being very American. I didn't just want to throw a bunch of messy sandwich's on the table though and thus the Tea Time Sandwich holder was born.
pbjbox'sproof
I created a template so you can simply print it out and start creating! It can be found HERE.
What you Need:
Tea Time Sandwich holder pattern
Scissors
Cute paper
Cello tape
Put on Alice in wonderland for the kiddos to get every one in a tea time mood.

Monday, July 26, 2010

Tied with a Bow- Of TWINE!

I absolutely love simple, classic looking wrapping. (You know: minimum effort maximum cute ha!) Add to that ridiculously easy to use and you have the gorgeous bakers twine available at The Twinery. It honestly makes everything look good! Add a little personalized printed out tag and BAM you look like a pro!
100_8437-1
What is fabulous is the twinery is offering Sewing In No Mans Land readers 25% off for the next week! I was floored when they let me know the percentage off. All you have to do is enter SEWING25 at check out. That is a great deal!
20100724_7143
How does this get even sweeter? If you leave a comment letting me know what color is your favorite and what you would use it for you will be entered into a drawing to pick any ONE entire cone of your choice or a sample pack! I know!!! So awesome! You have to hop to it though because the giveaway ends Thursday morning. Thank you to The Twinery for giving us such a great deal!
In other news Genevieve turns one this week! I cannot hardly believe it! I have been planning a huge party for her and am dying to show you some of the awesome, super easy party ideas I have come up with! Later today (once I can get the PDF files to upload, silly internet) I will be sharing a printable to make adorable tea time sandwich holders:
pbjbox'sproof
Cheers!
Kelly

Get ready to lick your lips... or whipe them rather

We have three winners!! Using random.org these are the winners:

First place:
Screen shot 2010-07-26 at 10.06.29 AM


Tracie and Jessica said...


Oh my goodness gracious Kelly these are adorable. Totally not lame at all. So far my favorite post is Shabby Evie dress. I've got 2 little girls and I love me some Shabby Apple! But I do read EVERY post and love when I sign on in the morning to a new post from you! Seriously I can't believe you found REAL burberry fabric that is one amazing find! Can't wait to see more girly projects!

Love and Hugs, Jess

Congrats Jess! Whoo hoo! Thank you so much for the kind words!

Second Place:
Screen shot 2010-07-26 at 9.45.52 AM

I have been following your blog for a couple weeks, though this is my first comment. I just want to say that I've saved several of your inspiring projects. I especially love the little girl ones, since I have two daughters. Thanks!
http://spontaneousday.blogspot.com

Congrats and fabulous blog!!

Ladies, please drop me an email so I can post your prize! Our mail only goes out on Tuesdays so if you get it to my by tonight I will have them in the mail tomorrow! Thank you so much for all the kind kind words I really appreciate them and the suggestions for the future. If you didn't win don't worry because I have something AWESOME lined up for tomorrow! I am sooooooooooooooo excited about it! Please please come back and check it out, I promise you won't regret it!

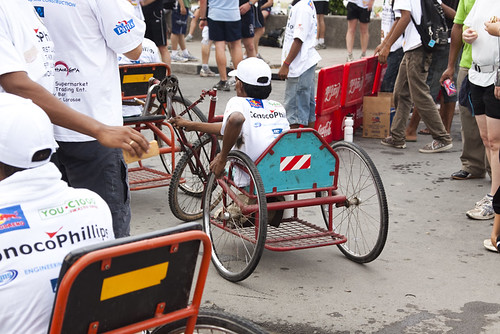
I also wanted to put a little inspiration out there to stretch yourself further then you think you can. Yesterday I participated in the First Lady Cup 5K. It is a fundraiser that is held each year and the proceeds go to local orphanages and children's funds. The hubster is in Jakarta currently so I was on my own with the 3 Bubs. I really wanted to participate though and support Kirsty, (the first Lady) in her efforst. I bit the bullet and did the race with the boys in the double stroller and Evie in the Bjorn. It was amazing! Along the way I was passed up by several locals in their makeshift wheel chairs
5k9
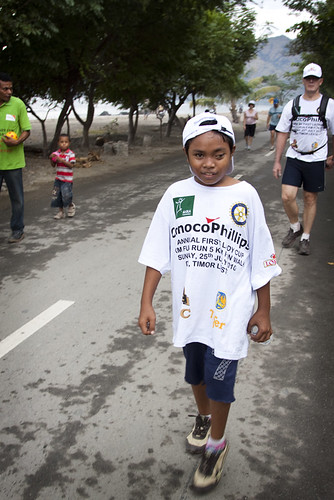
and this little guy was so excited when I asked if I could take his picture
5k2proof
Sawyer kept urging me on saying "Mom you have to go faster or we won't get a trophy" ha! I just want you to know that you can always be part of something larger then yourself if you just look for the opportunities. I know most of the readers of this blog have children, if you are like me you want to raise them to be as conscientious of the world around them as possible. To be compationate and giving to those less fortunate. We have been blessed to raise our kids for two years in an environment where opportunities for service are around every corner, but even in the states there are plenty of options. When Sawyer was a baby I would walk with him in the wagon to the old folks home on the corner by our house. He brought so much joy to the people there just by smiling at them. It doesn't have to be big, you don't have to move mountains, just move yourself! Put those creative juices to good use!
5K11proof
(myself the cuties and the First Lady)
Cheers!
Kelly

Saturday, July 24, 2010

A Lil' Birdie told me: Children's Shirt Pattern

WOW!!! Oh my goodness, I totally I thought I would have 1 or 2 people enter and in the end I was planning on just sending both those people the prize ha! When I originally posted the give away I thought, maybe I should pack it in, I don't think anyone is actually liking what I am doing. So thank you so much for all your comments. I just want to let you know how much they mean to me. I really started this blog to try and feel connected even though I am in such a remote area. I absolutely treasure each comment you make, it makes me feel a little closer to home. I have been agonizing over the fact that only one person will win, I actually don't like games like that, I feel like I am personally hurting 34 peoples feelings. So I decided there would be 3 prizes, that way I feel a little better ha! First person randomly selected gets the same thing as before, the second and third people selected will also get 4 napkins and 25 of these fabulous burberry looking tart/cupcake holders I found. Is that okay? Can't wait for tomorrow! Now on to the tutorial!
Do you have a little square of fabric that is super cute but you have no idea what to do with? Are you going to a baby shower in a half and hour and totally spaced a gift, or have plenty of time but don't want to give something run of the mill? Do just want to be creative and make something easy? This is perfect for you!
lilbirdie7
I originally made this for my amazing BFF in crafting Elizabeth when she found out she was having a baby girl. This was before I was preggy with Evie and I loved any excuse to make girly things. I must have made her a dozen of those bitty booties. (Super cute ones to I might add) Since I have had Evie I have been meaning to make one for her but hadn't gotten around to it. I am so bummed I waited, she could have been wearing these all year. I LOVE them. It meets my moto of minimal fabric maximum cute. I found these pictures on Martha Stewart.com years ago and they were being used for a decoupage project. I thought hmmm I can think of something WAY cuter for those! I've made it super easy to use them by already making the templates into PDF's, they can be found and downloaded HERE and will also be on my patterns list HERE. Never fear if you have a little boy there are also ones for hippos, whales, dogs etc. The one we will be doing today is the single bird. I have also made the double birds talking and think it is crazy cute. (At the end I will show you a little bonus project you can do with these templates)
What you need
A cut out template of your choice (if you want to change the size you can totally enlarge them with a copier)
Scissors
2 Fabric pieces (one small, one tiny)
1 button
1 little square of either wonder under or interfacing
Sewing machine
Needle and thread
A onsie or t-shirt of your choice
Download "Put Your Records On" to get you in the birdie mood

Friday, July 23, 2010

{Timor to You} GIVEAWAY

This week has been a crazy one. While scouring the two fabric stores in town for anything fun I found this huge bolt of what looked like Burberry fabric. Then when I pulled it out and rolled some I found that it had the typical Burberry plaid on one half the meter and what looked like official Burberry lining on the other half. I called my one and only crafty friend on the island and asked her about it and she confirmed that since companies have fabrics made up in Indonesia and Japan we often get random bolts of designer fabric. Which explains why there was a small pile at the other store of really pretty plain fabric labeled Banana Republic, I thought that was weird too ha! I bought a meter to take it home and check it out. I sat there staring at it for a while trying to decide what I wanted to make. I have actually never in my life bought anything Burberry, way out of my price range, but my sister Felicity does wear the perfume does that count for something? :)
Well, every Thursdays I make oversized cupcakes for our Community Liason Officer to sell to Embassy employees to try and raise money to fix the roof on the orphanage I am always referring too. I usually take a picture of them and we email it out as advertising right before I bring them. This week I wanted a cute cloth napkin to fold under the cupcake but own none. Here is where the Burberry comes in :) I used both sides and some vintage balinese lace I bought last time I was there and taddah! Cute little serving napkin:
cupcakenapkin
This totally set me off making more of these little serving napkins (tutorial to come). Now for the giveaway. Instead of a weekend project I thought every now and then it would be fun to send a little bit of Timor to readers. Just a little something I love from here. This week it is a set of Six of the Burberry napkins (keep in mind these are edged in super vintage lace so if you don't like things looking a little rustic then this probably isn't something you would like, I just don't want someone to win and be super disappointed and curse me all over the bloggosphere) and with it 50 of my favorite cupcake liners made right here in Timor
cupcakewrapper
What is great about these is you can just line them up on a cookie sheet and cooke a TON of cupcakes all at once! They do turn a little dark after baking but I think they are so cute. Okay so I am not good at being all tricky or fancy so all you have to do to enter is leave a comment, um maybe your fav tutorial so far? Or something you would like to see done in the future? Whatever you would like really. It will stay open until Monday morning my time so I believe Sunday night for most of the reading world. Hope this isn't a super lame giveaway, but hey it's my first ever it's okay to be lame when you are new right? Ha!
Cheers
Kelly

Wednesday, July 21, 2010

Beach Picnic Dress

_MG_9741proof
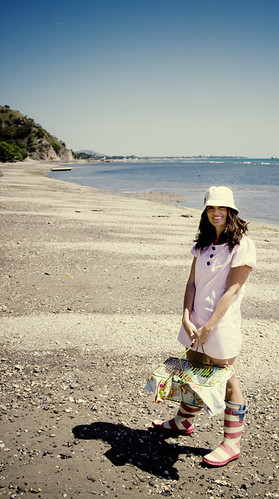
**Disclaimer** This dress is Bootie short, I mean WAY to short for anything other than going to the beach. I made another and added about six inches and a belt and love wearing it for everyday outings. If you would prefer to have something for everyday use just slap on those extra inches :)
We go to the beach ALOT here in Dili. I love having something light and breezy that covers up the suit, dries quickly and can be shoved in a bag while we are swimming. To me swim cover ups are like PJ's I just hate paying money for them. I thought you might feel the same so here is my little cover up! You can find the pattern HERE or as always on my ever growing list of patterns HERE.
What you will need:
About two yards of fabric (depending on your desired length)
The pattern you printed out
Scissors
Pins
Sewing Machine
Needle and Thread
Five Large Buttons (I covered mine in matching Blue with white polka dots and LOVE how they turned out)

Tuesday, July 20, 2010

Add some spark to your rain boots

While I finish up the Beach Picnic dress pattern I thought I would share a super quick fun little thing I did this weekend. It rains ALOT here in Dili. I have a great pair of rain boots but I felt like they were plain (something odd for me) I didn't want to put something super permanent on them because I liked that they could go with lots of outfits and they cost an arm and a leg so there was no way I was cutting, sewing etc. I came up with a quick fun easy solution, velcro on embellishments.
_MG_9746
They are so fast and easy and I think they look pretty cute.
_MG_9751

Monday, July 19, 2010

{I am Freaking out!} Free Patterns for my tutorials

******UPDATE**********
An updated pattern list will now be found on the "Patterns" page, see you there!
Alright, I have some BIG news! All weekend I read and worked and figured it out... I know how hard it is to sew with out a pattern so guess what? I totally figured out how to make digital patterns this weekend and will be offering them to download as PDF files with each tutorial! (As long as it isn't a refashion... I think that is pretty common sense though ha!) For now I want these pattern pieces to be FREE because I think there is a need for people to have access to fun patterns no matter where they are in the world. Plus I started this blog to feel more connected, not as a monetary endeavor. Please feel free to make whatever you like with them to sell, give away, keep forever.... The only thing I ask is you do not sell the pattern pieces themselves, those remain my property. I know there is no real way of stopping this so I am just asking on your honor. Every time I make a new pattern you can find it here. The list will simply continue to grow! Keep in mind that unfortunately these patterns are made for my kiddos, or me so they might only work sometimes as a guide or you may have to use a copier to enlarge them to get the size you want. Oh my goodness I am just too excited. Let me know what you think and if you encounter any hiccups. I am slowly getting caught up and hopefully will have everything I have done available by the end of the week. I am trying to make everything print nicely on 8.5 by 11's. Some patterns will require several pages (and possibly use all your ink hee hee sorry about that). Hope this helps you to make exactly what you see here in your own home :)
SUPER CHEERS!
Kelly

Saturday, July 17, 2010

Looking Like A Big Boy: Toddler Cowl Neck Sweatshirt Tutorial

This project was one I have been working through in my head each night while I am trying to fall asleep. I knew it could be so simple if I could just get it right. The first hurdle I had was to find a sweatshirt. We put the majority of our winter clothes in storage when we came to Timor (It is winter here right now and I am sweating to the oldies in flip flops and shorts). We handed down all of Sawyer's winter clothes (Finn would not see a winter were he would need them AND fit in them) to our favorite little friends Atticus. There was one "sweatshirt" in particular that was my absolute favorite. It was a cowl neck sweatshirt and was blue and green.
boys
(Atticus showing Sawyer and Finn a caterpillar they found at the farm, in said sweatshirt).
While I was at the CRAZY clothes market here in Dili looking for a plain grey sweatshirt I found a Daddy sized one in Blue and Green. It had a yuck yellow label on it but I figured I could get rid of it.
cowl1
Now that I had the sweatshirt I had to figure it out and it is totally as easy as I thought it would be!
What you need:
An old (or new, I would totally just head to Walmart and grab a 3 dollar grey sweatshirt if I could) Large sweatshirt
Sewing Machine
Button (Optional)
Needle and Thread

Friday, July 16, 2010

If you have a little boy....

You are going to LOVE this! I am going crazy I am so excited about this tutorial. I looked all over the web and didn't find another one like it (woo hoo for originality!) All you need to have ready is an old sweatshirt and you will end up with this:
cowlneckteaser
Thats right this is completely home made!!! I am so in love with it! I promise to get right to the tutorial as soon as I finish the photo shoot with it tomorrow morning :) Now go find a great old sweatshirt to use!

Thursday, July 15, 2010

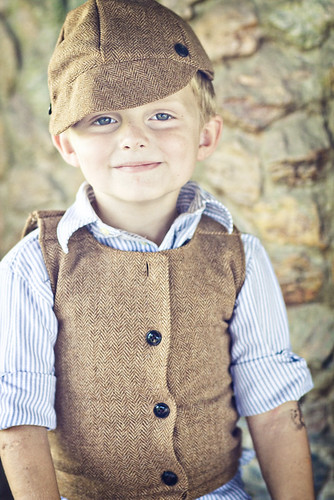
Good Show Watson! Little boy vest and newsboy hat tutorial

vestproof1
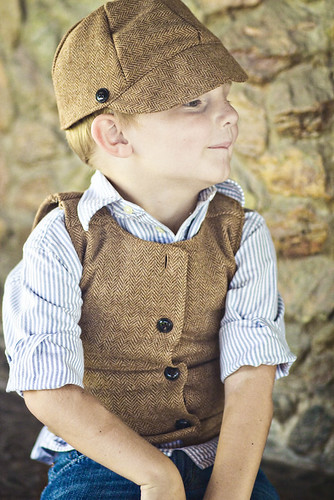
**Disclaimer** This vest and hat were made for Finn my soon to be 3 year old. He would totally wear it for me but HATES to have his picture taken. I told him I would give him a special treat if he would let me take his picture, he came back with "I'm gunna play in my room". HA! So poor Sawyer is stuffed into it. I thought "Hey, they are only 16 months apart no biggie right?" Oh and don't mind the arm tattoos, it was Dino day at camp and he refuses to wash them off. They've got to come off eventually right? RIGHT?

A while ago I inherited a large tweed skirt. It was to big for me but was from a nice store and I am a sucker for tweed so I wanted to size it down. I had just received my serger and thought BAM! I am going to knock this out in seconds. Well in seconds I had sewn right side to wrong side and lost a chunk of the skirt in the process. I was so frustrated I folded it up and shoved it in one of my fabric drawers. I found it the other day and thought I have GOT to make something with this (because nothing says tweed like 90 degree heat, right?) I was working on some of the balls for the Mercy visitors when Sawyer came a long and put one on his head and showed me his "hat" this gave me an idea. If you cut the ball pattern in half you could totally make a hat! I was a little apprehensive because I had tried to make a hat a few years ago and it did not end up too pretty. It was supposed to be for me but ended up on Finn:
finn
Don't get me wrong super cute, just when you are going for an adult hat it wasn't exactly a triumph ;) But I think I got it this time... of course it is for a three year old so maybe I can only make small hats? Well I had all this great fabric and cherry on top it all had built in lining!!! I figured well lets see how far we can make it go.
What we will make today: A vest with matching hat and a little bonus for you mommies, because sometimes it is fun to be matchy matchy!
What you need:
An old button up skirt
A small section of stiff interfacing
Sewing machine
Scissors
Needle and Thread
The Ball pattern found HERE
Some mustaches on a stick to get you in the mystery solving, tweed wearing, hat donning mood.

First I wanted to say thanks!

I am sooo excited to share the crazy easiest tutorial for this little outfit out of an old skirt:
vestproof2
(It cost me Free Fitty Free, as my sisters and I say)
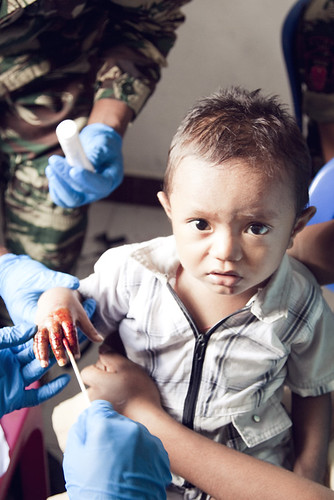
But first I wanted to say a couple thank you's! First to Tanyia for giving me the Sunshine Award on her blog the other day. I was gobsmacked that you would even consider me enough to put me with the other bloggers you mentioned. Since I am new to this whole blogging arena I didn't know there were friendly awards like this. That totally made my day! Next I want to show you some pictures I took recently and say a big big thank you to all the tax payers in the states. (This is NOT a political commentary and I DO NOT intend to ever mention or discuss politics on this blog) I know it totally stinks seeing a big 'ole chunk come out of your check each time but just pretend like that whole chunk comes to things like the Medcap in Patauru here in Dili. Let me back pedal a little. In order to be good neighbors the Embassy here in Dili had doctors from a US ship set up a medical clinic in the neighborhood that is behind the Embassy compound. Anyone could come and receive medical attention or just have their children looked at.
_MG_7716proof
This cute little girl was being checked due to malnutrition (I would say 90% of the local children here are malnourished
This little guy had put his hand in boiling water and was able to have it cleaned, bandaged and receive some pain medication.
_MG_7784proof
This adorable bubs they thought was bleeding from his ears and couldn't hear. The doctors were able to clean them all out and help him hear.
_MG_7792proof
When children left they took with them armfuls of disposable diapers, vitamins and formula
_MG_7719proof
I just wanted to say a thank you to all of you because, YOU made this possible. I am so blessed to see the amazing projects our government is involved in. I have daily reminders how amazing our soldiers are and how tender they can be with little toddlers. So pat yourself on the back and sleep well tonight knowing you made the world a better place!
Cheers!
Kelly

Wednesday, July 14, 2010

Yo-Yo! What's on your noggin? Little girl Headband Tutorial

_MG_9286proof
I am a big fan of Heather Bailey fabric. It is a weakness I am slowly getting over. When I was parusing her blog one day I came across THIS tutorial for "yo-yo's". She suggests all sorts of uses for them but I thought they would make a pretty cute headband for the little miss. They are so much fun and would be a perfect craft for little girls because they have a little hand sewing and a little sewing machine sewing. Plus they are super fast and you can use scraps of cute fabric, my kind of project!! I will go over the making of the yo-yo's rather briefly because her instructions are sooooo much better, it would be like crayons vs. oil paints, but the headband part in more detail.
What you need
A needle and thread
Two round "items" one larger then the other
One piece of fabric long enough to go around the head of the person who will be wearing it
A small length of thin elastic
A button (or more its up to you)
Sewing machine
Scissors
Anything else I forgot but mention along the way ha!
Wham's "Wake me Up before you go go" to get you in the yo-yo mood :)

Tuesday, July 13, 2010

Because Boys can wear Bows: Little Bow Tie Tutorial

_MG_9265proof
Disclaimer: I made Finn's bow tie HUGE. I mean way bigger then it should be, I highly suggest toning it down a bit unless you are a crazy person like me :) I would probably make the outer bow the size of Finn's inner bow. Okay, I am sure there are lots of these tutorials out there so we will make it a quick one so we can squeeze in the head band during boys week.
What you need
Two small pieces of fabric
One long piece of fabric
One really small piece of fabric
Sewing Machine
Needle and Thread
Paper Clip
Some bow tie pasta to munch on an get you in a dashing mood.
Lets go!

Monday, July 12, 2010

All Tied Up: Little Tie and Bow Tie Tutorial

I am sure there are several of these on the web and crafty blogs but I really think this is the easiest way to make a good looking tie that actually looks like it has been tied, even though it is not :)
_MG_9256proof
What you will need:
Your sewing machine (unless you are wicked cool old school and sew by hand)
A long strip of super funky fun fabric
A little square of velcro (both sides) either sew on or iron on
Paper, pen measuring tape for pattern
That is it! How cool is that!

Saturday, July 10, 2010

Don't you look dapper?

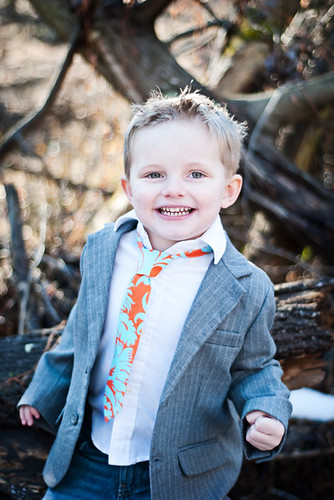
I feel like there is a gapping hole where sewing for boys is concerned. I am not saying I am going to fill it, although I have been racking my brain since the day Sawyer was born for different things to make for him. I thought this up coming week we could try a few boy items. The first being cute ties and bow ties. Before we left for Timor we had family pictures taken. (My photographer friend Elizabeth and I swapped sessions). We both wanted to have our families look stellar (who doesn't) but add a little of our crafty flavor to the pics. Sawyer ended up with this tie:
sam2proof
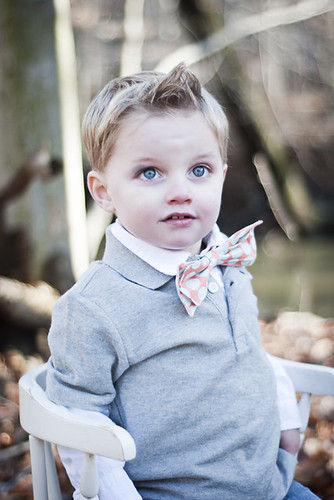
Finn with this bow tie:
liam1proof
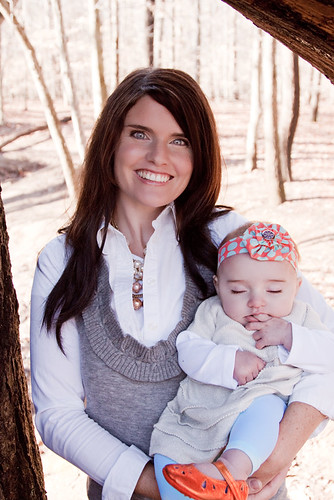
And Genevieve with this head band
abby2honeyproof
Even though it was FREEZING cold and Evie fell asleep half way through:
momabby2proof
I think they turned out fun and very personalized... although possibly pretty trendy ha!
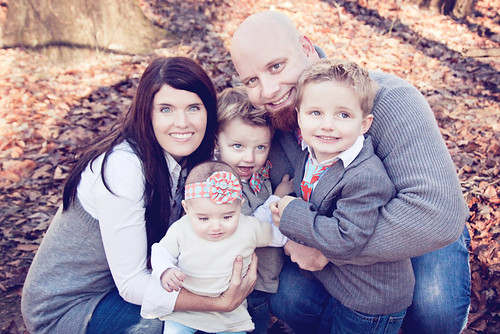
family2honeyproof
(This was honestly the best shot, my hat goes off to anyone who can get ALL their cuties looking at the camera at the same time, but I think this pretty accurately captures our family haa!) I have been itching to do another shoot with all three kiddos, they grow soooo fast. So I was thinking maybe I could do a tutorial showing how to make all three items? Then if you have your own family pics coming up you could try it out? I will work on it this weekend and see what you guys think on Monday :)
Cheers
Kelly

Friday, July 9, 2010

It's Raining Buckets

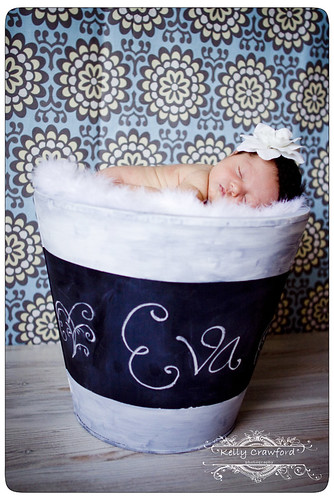
bucketfullblog2
Literally! The torrential rain here in Timor has most of us in a panic trying to figure out ways to help the locals who are basically being washed away. I think we are going to launch a major blanket distribution project this weekend. Maybe I will use my bucket to hold them? (Okay TOTALLY lame segue) This bucket is fantastic in it's versatility though. I first got the idea last year when my mom gave me a cute little basket that had a tiny little chalk board on the front, it had the word "books" painted on it to look like it had been written in chalk. I thought how much I would like to be able to change what it said to suit what I needed. I originally went to Ikea with the intention of buying a cheap basket and then heading to the dollar store to buy a cheap chalk board. Walking through the textile department I couldn't find a basket I liked so I meandered through their garden department. If you have never been to Ikea, wow, you have got to go, and eat lunch while you are there, and stick your kids in the supervised play place so you can browse in silence and stand in awe of the cheap prices. ANYWAY, the garden department is the last section before check out. If you would like the exact same bucket you will find it along the wall in this section. Originally it was the shiny galvanized metal. There were 3 sizes and this one is the medium. Really you can use whatever you like, I know they also have terrecotta ones in similar shapes and sizes. Now that you have a novel of a background for one little project lets hop to it! (I am sorry I had to use one of the buckets I already made for pictures, I don't have the resources here to make them, I hope it isn't confusing)
What you need:
One container, size of your choosing
One can spray on primer
One can spray on chalkboard paint
Some white paint
A cup of water
A paint brush or sponge (depending on the finish you are going for)
Painters tape
Some paper
A well ventilated area. (I did this on our balcony in DC and I don't think our neighbors were all that appreciative ha!)

Softie Toys


(Image curtsey of the purl bee)
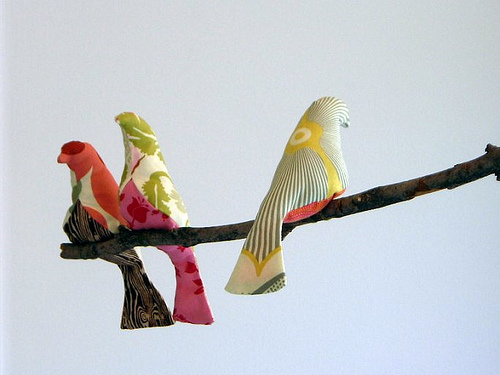
Thank you so much for the suggestions on what to make the kids. I have decided to go with three items just so I don't kill myself from sewing monotony and so the kids can actually choose a toy. Thank you Suz for the ball link I think those will be perfect and use very little patterned fabric woo hoo! I also decided to make more of the birds that I used to make Evie's bird-mobile from the tutorial at Spool. Right after I started gathering items together to start making them I received an email from Nicola suggesting the same tutorial so I think we have a winner.
2489740467_d49993a652
the last toy I think I will make is a stuffed crocodile. They are considered very sacred here (you should have seen the hundreds of people outside our house when one swam past a few weeks ago). If I end up making it at all resemble a crocodile I will make sure to post some steps :)
I just wanted to say thank you for the help and suggestions now let the sewing marathon begin!

Related Posts Plugin for WordPress, Blogger...