


Of course we have to continue Evie's wardrobe (there are just a few more items ha!). I have been waiting and waiting to do this project for Color My Summer over at Kojo Designs! I have to say this has absolutely been one of my favorite series to be a part of. Stopping by every day instantly brightens my day, literally, my screen gets so bright ha! I adore Kristen and Jordan, their emails never fail to make me laugh out loud. They were so much fun to "compete" with on Project Run and Play and oh my goodness were their designs fantastic. When they emailed and asked me to take part in Color My Summer I was thrilled! Somehow I got super lucky and snagged the color Red. When I went to Jakarta there was a tiered ruffled dress that I was dying to recreate and this was the perfect excuse to come up with the Baby in Red top.
I am thrilled with how it turned out and how easy it was to make! I thought it would be a perfect little top to share on the summery and color filled Kojo Designs.
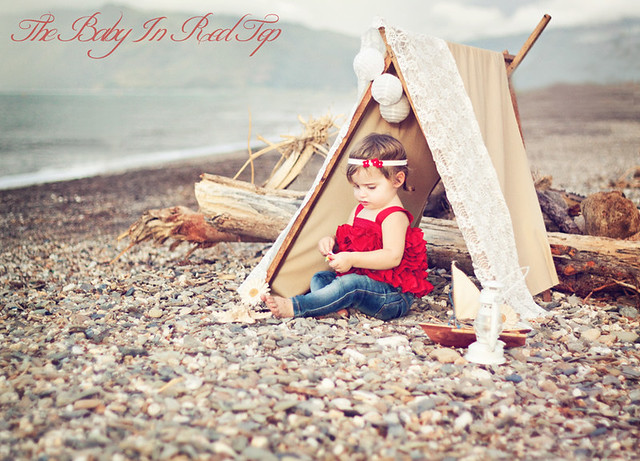
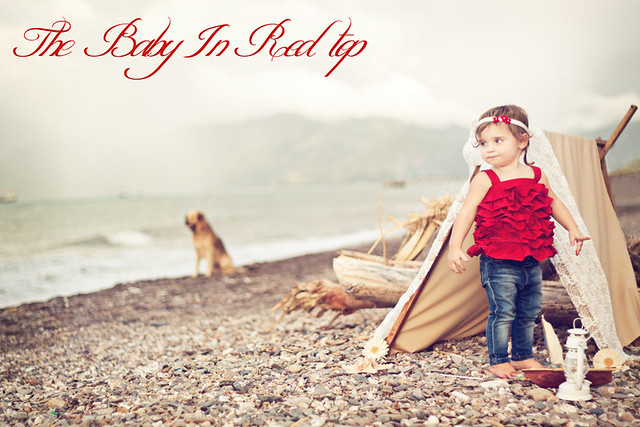
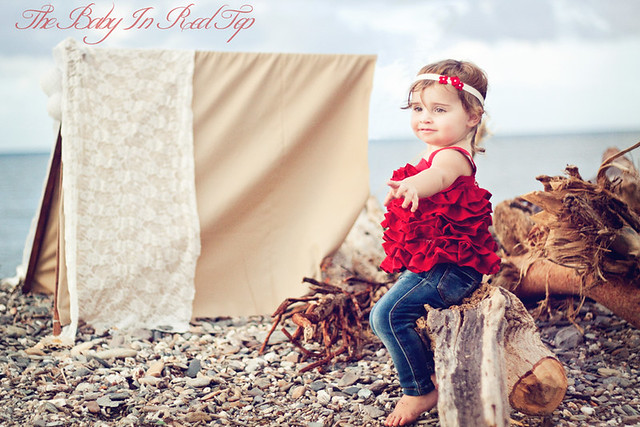
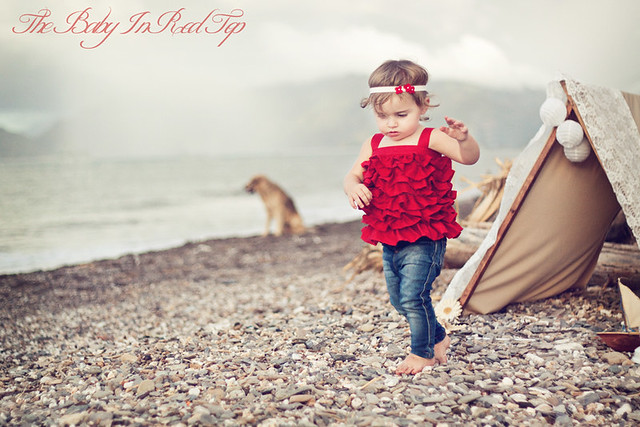
Since I was so close to the finale I wanted to make sure I did a super cool photo shoot. I built a little A Frame Tent and we headed to the rocky beach to fake a little girlie camp out
I loved the contrast of Evie's sea of ruffles and the grey sky. She was even good about wearing the little headband I made out of twill tape and little felt flowers. The back has a tiny strip of elastic so it is super comfy.
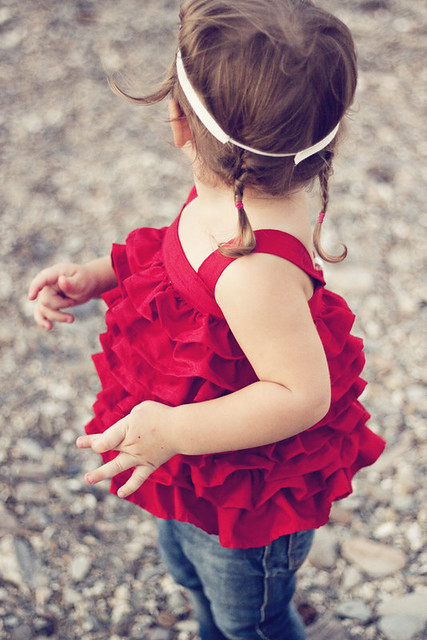
The top has a single button closer so it is easy on easy off.
I am absolutely making more of these in fun bright colors and have even thought about making one in rainbow color, how cute would that be? Now grab your munchkin and your measuring tape and lets get to work!
 At this point I got my straps and neck band ready. I ironed over both long edges of the strips then folded them over again length wise and iron them. Topstitch the straps closed but leave the neck band open.

(I serged the ends of the straps but you don't have to) Now set these aside, we'll come back to them :)
Now comes a bit of monotony. You are going to hem and ruffle all those loooooonnnng strips of fabric.
If you serged one side then hem the other. Once hemmed stitch a gathering stitch the length of the strip on the opposite side of the hem. Repeat this for all of your ruffle strips.

Now take your main rectangle and hem the bottom. I wanted to make sure I topstitched my ruffles on nice and straight so I took a ruler and some fabric chalk and drew nice straight guide lines. This is totally optional but I think it helps :)

Pin your first ruffle on the right side of your fabric just on top of the hem you sewed earlier.

Topstitch it in place. Now repeat this process with all your ruffles with the top of the one you sewed previously being covered by the bottom of the next. Repeat until you have all your ruffles to the top.

Once you are done grab the neckband piece you ironed earlier. Slide the top of your tiered ruffles up in between the two ironed edges of your neckband. Pin in place and then topstitch


Now grab your two straps that you created earlier and pin them in place.

Your all done!!!! Now YOU:
go make a cute little ruffle top! Thanks Kristen and Jordan for including me in Color My Summer I have absolutely LOVED all the posts!

I am thrilled with how it turned out and how easy it was to make! I thought it would be a perfect little top to share on the summery and color filled Kojo Designs.
Since I was so close to the finale I wanted to make sure I did a super cool photo shoot. I built a little A Frame Tent and we headed to the rocky beach to fake a little girlie camp out
I loved the contrast of Evie's sea of ruffles and the grey sky. She was even good about wearing the little headband I made out of twill tape and little felt flowers. The back has a tiny strip of elastic so it is super comfy.
The top has a single button closer so it is easy on easy off.
I am absolutely making more of these in fun bright colors and have even thought about making one in rainbow color, how cute would that be? Now grab your munchkin and your measuring tape and lets get to work!
What you will need
1/2 yards cotton fabric
Tiny piece of Elastic
Button
Sewing Machine
Scissors
Measuring tape
The first thing you will need to do is measure your cutie. First measure around their "bust" for a lack of better word. Measure right up under their armpits all the way around. When you get your number make sure to add at least 2 inches for seams and wiggly room. This is going to be how wide your main rectangle is going to be and how long you need to make your 'neckline band' piece. Now measure where the center of their collar bone down to where you want the top to hit. Again add some for hemming etc. This is going to be how long your main rectangle is going to be. Now the last measurement you need is for your straps. measuring from the top of the front of your munchkins arm puts across the shoulder and back to the top of the armpits in the back. Now that you have all your measurements lets cut some fabric! You will need a main rectangle. Cut this using the two main measurements you took. I made mine flare out just a bit at the bottom since Evie has a fun little pot belly. Next lets cut the neck band. This should be long enough to go all the way around the main rectangle. How wide it is depends on how chunky you want the band to be. I cut mine so it was 4 inches wide. Next use your measurement for your straps and cut two straps as long as your measurement and again as wide as you would like them to be. Again mine were 4 inches. With the fabric that remains you are going to cut ALOT of long strips of fabric. Mine were as long as I could make them and 3 inches wide. I ended up using 8 strips. I serged one raw edge of all of the strips.
(I serged the ends of the straps but you don't have to) Now set these aside, we'll come back to them :)
Now comes a bit of monotony. You are going to hem and ruffle all those loooooonnnng strips of fabric.
If you serged one side then hem the other. Once hemmed stitch a gathering stitch the length of the strip on the opposite side of the hem. Repeat this for all of your ruffle strips.
Now take your main rectangle and hem the bottom. I wanted to make sure I topstitched my ruffles on nice and straight so I took a ruler and some fabric chalk and drew nice straight guide lines. This is totally optional but I think it helps :)
Pin your first ruffle on the right side of your fabric just on top of the hem you sewed earlier.
Topstitch it in place. Now repeat this process with all your ruffles with the top of the one you sewed previously being covered by the bottom of the next. Repeat until you have all your ruffles to the top.
Once you are done grab the neckband piece you ironed earlier. Slide the top of your tiered ruffles up in between the two ironed edges of your neckband. Pin in place and then topstitch
Now grab your two straps that you created earlier and pin them in place.
Your all done!!!! Now YOU:
go make a cute little ruffle top! Thanks Kristen and Jordan for including me in Color My Summer I have absolutely LOVED all the posts!


Oh my, I am so in love with this it is unreal!!! The photo shoot is amazing, your daughter is gorgeous, and that shirt...gasp!
ReplyDeleteI agree 100% with you about the color my summer series, it has been by far one of my favorites! Every time there is a new post I get so excited for what pop of color I will see next! Love your contribution!
oh my goodness this is ADORABLE!
ReplyDeleteIt is ridiculous how cute your little Girl is! I am so in love with your blog I just want to lock myself in my sewing room and not leave until I have created everything. However doesn't really work with a 2 yr. Old! Yesterday we made the "eat me alive" top...and I love it...I can not wait to make this!! Thanks so much for all the awesome tutorials!
ReplyDeleteI LOVE this!!
ReplyDeletewhat a great top ! so fun !!!
ReplyDeletemy sister in law sent my little 2 year old a similar top for her birthday from H&M in Poland. its made of something soft and synthetic and the ruffles are alternating layers of the body fabric along with a very sweet soft tulle. the back between the shoulders has elastic (kind of like flat front pants) and i just love it. ive wanted to make another but just wasnt sure how it would look in a cotton- now i know! great job. and thanks for figuring out the step by step for me! :)
ReplyDeleteSOOO ADORABLE! I really, really love this one!!!
ReplyDeleteJaw-dropping GORGEOUS!!
ReplyDeleteSo very adorable! I really love this, Kelly!
ReplyDeleteBeautiful! I can see a mommy and baby set in this.
ReplyDeleteI was actually speechless... This is the cutest top I have ever seen absolutely perfect! The photo shoot is beyond words! She is going to love looking back on all of these fun shoots she got to be in when she gets older :) You are amazing!
ReplyDeleteKelly...You never cease to amaze me. Thank you so much for being apart of the series!
ReplyDeleteGa-Ga-Gorgeous! And your photo shoot is amazing!!! Can't wait to try it :)
ReplyDeleteTHIS is going on my to do list....with 5 girls, this is perfect and EASY to whip out.
ReplyDeleteso cute! thanks for the tutorial. God bless!
ReplyDeleteTotally gorgeous! I will be making one soon!
ReplyDelete~JamieS@ Scattered Thoughts of a Crafty Mom
This is totally reduculously cute! Good call with the red, love it!!
ReplyDeleteWOW! This is definitely on my "I have to make this as soon as humanly possible" list! And I'm thinking both of my girls will get one...and maybe even me! So super cute and I LOVE the bright red! Thanks for sharing!
ReplyDeleteThat is so adorable! I think you are an amazing seamstress.
ReplyDeleteThat is an adorably fantastic top! I can't wait to make some for my nieces! And yes to the rainbow one, how fun!
ReplyDeleteI love this top and the little tent is adorable, I love that you put lace on it.
ReplyDeleteI have a pattern for a very similar dress, but yours is much simpler, no hand sewing involved.
i love love love this. i will be making this ASAP with some wonderful robert kaufman chambray i have lots of it. thank you for posting this tutorial!
ReplyDeleteIt is so adorable. Everything about this. The top, the shoot, what a great post. Cute!
ReplyDeleteFirst, I love the top and wish I had a little girl to make it for right now. I am bookmarking for the future. Second, your daughter is too stinking cute. And third, your photographs are so beautiful.
ReplyDeleteAMAZING! Oh, how I wish I had a little girl! I'd be excited to see some of the items you've made yourself and the boys as well!
ReplyDeleteI am pretty much in love with this top! I can't wait to make it for my little girl. This may be a weird question but I also LOVE those pants! Where did you get them?
ReplyDeleteGreat Job! :)
Kelly, how DO you find the time to do all of this with three wee ones and being pregnant? And I really need you to stop making my "Must Make For Emeline" list so long. I have shoes to make! So gorgeous, as always.
ReplyDeleteOh this is absolutely adorable Kelly. And gorgeous photos. That red just pops right out. Love it all!
ReplyDeletethis is so adorable!!! I want to make one for me! :) Love the photos and that tent!! :)
ReplyDeleteJust curious about her jeans they are stinkin cute! Of course I also love the top!
ReplyDeleteOh man...I love all your little girl patterns..but this one is over the top! LOVE it!
ReplyDeleteSuper cute! How in the world do you get her to sit still enough to braid her hair? Bribery? Duct tape?
ReplyDeleteSOME SERIOUS GORGEOUS PICTURES. It's a guarantee I'll be making this for my daughter this summer! I made something similar in a lazy way for a quick photo shoot!
ReplyDeletehttp://cuegly.blogspot.com/2011/04/ruffle-soda-shop-girl-tutorial.html
It's absolutely gorgeaous!
ReplyDeleteLoooove this top! Amazzze! I also love the jeans, please share where you got them, thanks!!! :)
ReplyDeleteI am also sooo curious about where you got the jeans. they are so cute.
ReplyDeleteCute,cute, cute! You did a great job on this; can't wait to try it out!!
ReplyDeleteohmagosh! i'm dying over this adorbale top! it's fabulous! amazing job girl!
ReplyDeleteWow! Those ruffles are awesome! Your daughter is so cute! I love these photos. :)
ReplyDeleteSew cute!!! I think I need to make one of these for my niece or someone!!! Maybe even for me! :) Thanks for sharing...looks like a great tutorial that I will be happy to try out soon!
ReplyDeleteFriends! Thank you so much for all the comments! I am sooooo glad you love it as much as I do. I thought wow, something so simple and it turned out fab! Evie's jeans are, as usual, from Zara kids. If you are able to purchase a pair (if you live in Europe or the middle east) their sizes run very large. These are 12-18 months and Evie will be 2 next month and they just now fit her perfect.
ReplyDeleteSo excited to try this tutorial!!!! How fun & cute!
ReplyDeletehow did you make the tent??
ReplyDeletesuper cute!!
ReplyDeleteI love this tutorial!!!! Do you know what measurements to do the rectangle for a 3 month old? I'm 4 days over due now and want to keep myself busy. I just don't know how big to make it. Please let me know! jessydrew@yahoo.com
ReplyDeleteI use your tutorial to make my daughter ruffles top..thanks..
ReplyDeletehttp://mana-mananadia.blogspot.com/2011/08/ruffle-top.html
Just love it and want to try it. Thanks :-)
ReplyDeleteLOVE it!
ReplyDeleteso.. was it suppose to be 1 1/2 yards of fabric? because there is no way I was going to make one of these with only a 1/2 yard. :( I hope they have more of the same fabric when I go back!
ReplyDeleteSO cute!!!
ReplyDeleteI featured this tutorial in my "Top Ten CRAFTS I loved this week".
ReplyDeleteIt's soooo cute!!!
Thanks!
http://cosiendoycriando.blogspot.com/
I made this for my daughter for a portrait session. It turned out so cute!
ReplyDeleteYou can see pictures of it here: http://adventuringsmiths.blogspot.com/2011/11/kiddo-photos.html
Hello Kelly, amazing work design you have there.
ReplyDeleteJust storm your blog as I started sewing for kiddies. The tutorial image is no longer available, can you please help with it?
Thanks, as I await your response.
Hey Kelly! I know this was made awhile ago, I really hope you get this message. I am attempting to make this shirt. How did you do the flare at the bottom? How did you know how much to add on?
ReplyDelete