


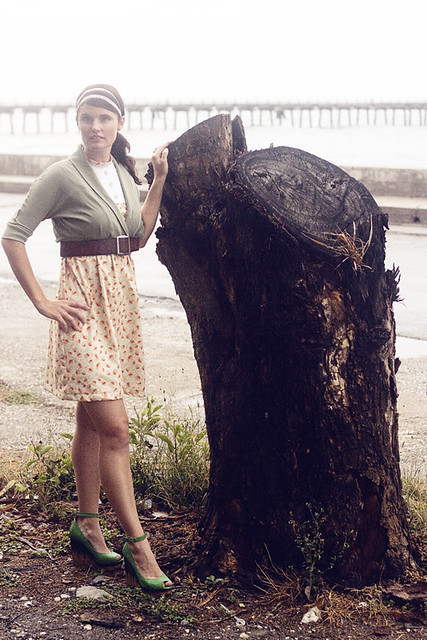
I was totally inspired and rearing to go. Not to mention I am making 4 local little girls skirts out of it! They are all sisters, twin 8 year olds, a 6 year old and a 3 year old. They go to church every Sunday like the good Catholics they are and thought they needed some church skirts. Their kind mom promised to let me take pictures when I am done! Thank you thank you Teresa it is GORGEOUS fabric! I am thinking I should give the dress to their mom so she can match her girls but I had to take some pics in it first ha! Today and tomorrow we will be making two different dresses with only 1 white t-shirt (You will have enough shirt material to make a third dress if you like of the same sort) The first is a bib dress or what I call the Crunch Crunch Dress. I have been seeing these all over the web for fall and I am VERY jealous that you can layer them with chunk y sweaters and wooly knee highs and boots. My boots and sweaters are all in storage so I had to make-due with what I had. Also once again I made this booty short for some unknown reason. Luckily I did a HUGE hem so I went home and unpicked it making it to my knee so I can actually where it out and about ha! (It seems that Peep Toes are all the rage and I thought these green ones were fabulous! Thank you Rachel!) We only took a quick pic because it was LASHING rain! I was actually put in contact with a Timorese girl who will be modeling for me from now on so I can have some fun photographing what I make for moms! ANYHOO:
You can download the pattern HERE.
What you will need:
1.5 yards of fabric
White T-shirt
Buttons or other embellishments if you wish
Sewing Machine
Scissors
Make sure to tape the top pattern pieces together before you cut your fabric. As with many of my patterns you will need to determine the length you want and cut down to that. Once you do have your pattern pieces cut out of your fun fabric, grab your plain white T and we are going to cut the bib. Fold your shirt nicely and evenly in half. Pin your bib pattern right to the fold and as far down on the shirt as you are able. Cut around. This should leave you with two bib pieces, hence the making of two dresses :)

Make sure to save the top of your shirt as we will be using it to make another dress later in the week!

Taking the back of your dress you are going to cut an opening so you will be able to get the dress up and over your noggin.

I actually had to go back and make mine a little longer, so watch for that :) To finish it off we are going to fold it just like we did on the Shabby Evie dress and also attach a small piece of Elastic at the same time

Once you are done sew on a button on the opposite right side of the material for the elastic to loop around and keep the dress top closed. Lay the back aside and take the front piece of your dress. You are going to sew a small gathering stitch across the neckline. Just enough to make it match up nicely to your bib piece.

Now take one of your bib pieces and the front of your dress. (Oh by the way I went a head and embellished the front of my T a little bit, this is totally optional, I added 6 pieces of lace trim and 3 buttons so it looked like this:

Find the middle of your bib and match it up to the middle of the front of the dress, with right sides together. Pin (if you need to) all the way around, and then sew what you just pinned (there will be extra t-shirt material up above, this is supposed to be there). Once you have attached the bib to the front of the dress you are going to attach the front to the back. Turn the dress pieces so they are right sides together and sew all across the shoulder sections. Now connect the dresses further by sewing both sides together, leaving the arm holes open. Flip the entire dress right side out. Now we will attach the sleeves. First you need to finish the edge of the sleeve. I did so by ironing it over and clipping here and there so that it lays nicely

Once you have done this on both sleeves find the center of the sleeve piece and match it up with the center of the shoulder. There should be a blank raw edge where your under arm will be, we will take care of this later. With right sides together pin the sleeve to the shoulder and then sew where you pinned

i went a head and topstitched where I just sewed to make it lay nice and flat but that is optional. Now the last big step. You are going to need to either make some Bias tape out of extra scraps or buy some corresponding solid bias tape. I made my in my sneaky cheaters way by folding the two edges over and then folding it over on itself again:

But you can always google Bias tape to make it the right way :) I made one LONG strip and then just cut what I needed for the two under arm portions and around the neck. Excuse the bad picture but you are going to encase the raw edges in all three locations and then sew down the home made bias tape so you have a nice clean edge. Start the arm sections right where your sleeve ends. Then do the same thins with your neck :) Now hem it (not as huge as I did ha!) and you are done! I think it kind of looks like an old nightgown with out a belt and accessories so I had to put a belt on the mannequin

I wish I could pair it with boots and a chunk sweater... or a long sleeved striped shirt... I can just hear the leaves crunching under my boots, hence the Crunch Crunch Dress. Enjoy!
Cheers
Kelly


VERY cute Kelly!! I've never done anything this pretty from a tee shirt-wow! Inspiring, as always...And can i just say-those green shoes are to die for!
ReplyDeletenatalie
I love that dress! You look fabulous in it. It's inspiring to see such a kind and giving person like yourself.
ReplyDeleteI love it!!
ReplyDeleteI love it sooo much! I would rock it with cowgirl boots and no sweater...it doesn't get very cold here in Tucson!
ReplyDeleteI love this!!!
ReplyDeleteOh this is adorable!!! That fabric is lovely!
ReplyDeleteso sweet! I definitely agree with finding awesome boots to wear with these.
ReplyDeleteKelly, I'm so glad to know that the fabric arrived safely. The dress is adorable, can't wait to see the little girls in their skirts! Thanks for all you do to improve the lives of those around you!
ReplyDeleteif I wore dresses I would have to wear this one! Perfect.
ReplyDeleteSuch a cute dress! I know you didn't need to for this project but if you ever need to salvage one of those old white t shirts with the dang armpit yuckiness I have one word for you...OXYCLEAN. It works miracles, I just totally revamped my entire white shirt wardrobe! ....Though I guess you probably wouldn't have access to it where you are :(
ReplyDeleteI just found your blog and it is amazing. I can't believe your life! It sounds like a movie. I am inpired by your sewing challenge (I just need to do that period!) And I mustMUST know where those todiefor green shoes are from! Are they BCBG? My girlfriend has them in black but I think I need and I do mean need them in green!
ReplyDeletelove, Megan
erickandmegan@yahoo.com
i love this! i can't wait to find the perfect fabric so i can make one myself!
ReplyDeletethanks for sharing!
your blog is GREAT! i've been on it for over an hour!