Showing posts with label Little girls dress tutorial. Show all posts

Monday, July 11, 2011

Reversible Summer Tunic

While things here are still a but crazy house wise (as in lots of bouncing around and a new found appreciation for packing super light ha!) I am glad I had been asked by the lovely ladies at I Candy Handmade to participate in their wicked adorable series of summer sundresses! If you haven't checked out some of the amazing tutorials you need to hope over right NOW and see all the yummy inspiration. I have been mulling the idea for this sundress over in my head forever.
lila3
I would lay down at night and work through how to make it and make it as simple as possible. I wanted it to be reversible and that took some serious thinking.
lucy2proof
By the time I got my hands on a borrowed sewing machine I had it all worked out. I wanted to make them for Ruby and Lola our friends little girls who I have bluntly informed Sawyer and Finn they will be marrying (they also have an adroable little boy for Evie!).
lucy3proof
We have been staying with thtem for the past two weeks and just absolutely adore them. This dress is made in 12 simple steps and needs no pattern! You can switch up the length and wear it as a tunic like Ruby:
lucy5proof
Or lengthen it and make the back the front for a tunic dress like Lola:
lila4
I was so excited to do a photoshoot in front of this "abandoned ice cream trailer" that just showed up magically a few days ago right down the street.
lucy1

It was kind of photographicllly frustrating though because I know a better photographer could do something amazing with it, I just didn't really know how to do it myself. Time for more classes! We had a blast making their over the top headbands.
lil5
Once we got to the farm we were taking the kiddos to that day they came right off ha!
lucy4proof
 Anyway, if you would like to make the tunic simply click below and follow the simple steps.
lucy7proof
If nothing else hop on over to I Candy Handmade and have a feast for your eyes!!

Monday, April 18, 2011

Button Up Bloomers

UPDATE: Pattern link is working wooo hooooooo!!!! 
Ashley is the fantastic lady behind Lil Blue Boo... well she is half the fantastic team, Boo is pretty amazing herself! I had such a great time competing with her during Project Run and Play and was positively thrilled when she asked me to be part of her "What would you make challenge". Ashley asked several bloggers if she could send them some fabric (a kind they usually wouldn't use) and they would have to created something with it. I thought this would be awesome to be a part of and such a fun creative challenge. As readers you then get to enter for a chance to win 2 yards of the very fabric she sent us! I anxiously waited for the package. I received it the day before I left for Singapore and thus spent every night of the trip trying to come up with a cute enough idea for Lil Blue Boo! In the end I came up with an outfit I love, that I hoped fit the requirements to grace Ashley's cute site ic. cute, comfy and doesn't interfere with a child's playing.
_MG_4307_5132 _MG_4338_5163proof
The top is just a simple tie tank but the shorts, I am sooooo excited about the shorts.
_MG_4336_5161
It is kinda hard to see them because of the cute floral design of the fabric but they are all one piece!
_MG_4303_5128
They wrap around the back and then button with four buttons in the front
_MG_4340_5165
Since they are all one piece there are no seams to tug or hems to choke around a little chunky girls thighs,  lots of comfort :)
_MG_4355_5180
Evie, who never wants to wear anything I make, loves these shorts, it was so refreshing to have her help me put something on her :)
_MG_4319_5144proof
She also apparently thought fists full of sand would be refreshing
_MG_4328_5153proof
I wanted to make sure you could make your own comfy summer Button Up Bloomers so I made a pattern and tutorial.
_MG_4374_5198proof
Before I launch into it though I wanted to say thank you to Ashley, this was such a fun challenge and it was great to stretch the creative muscles. I hope you guys like the shorts as well! They are insanely easy, even brand new sewers can make these! I hope you read more and make your own!

Sunday, March 27, 2011

The Butterfly Dress and Headband

This weekend I was REALLY in the mood to make Evie some head bling. I don't know why, she just pulls them off or out seconds after I wrestle them on her. I think it is because her hair no longer resembles a mullet but actually IS one and until we get near a children's hair cutter there is nothing I can do but try and hide it under flowers and bows :) I also spent a lot of time perusing children's clothes sites since her shorts are coming dangerously close to being "bootie" length and we have a cruise to go on in a few months! I got kinda bummed though because everything is sooooo expensive. I hmmed and hawd over ordering Evie  this dress from Elias and Grace that I have been mooning over for a while.
But oh my goodness 50 euro? I decided I would just have to see if I could make one myself. I had some very special fabric sent to me by Jessica over at the Planner and the Procrastinator and the adorable Etsy shop Chirpy Designs that I had been saving and saving and you know dying to use but not wanting to use because then it would be gone? It is called Meadowsweet by Sandi Henderson. Well I busted it out and went to town. I am in love with the dress that came out of it and the resulting headband.
butterflydress5proof
I mixed it up a bit and put the buttons in the front, I thought it was a bit boring without them :) Below you will find a tutorial for the dress and I am thinking I will try to put a pattern up on Monday for those who feel a bit safer sewing with one. If you love the headband, well let me tell you it is soooo easy! 
_MG_3881_4866
For the fabric rosette you can follow my tutorial at the end of THIS blog post. For the gathered flower you can follow the fabulous tutorial found HERE on one of my fav blogs Heart Made. I then totally copied her stacked circle flower from her etsy shop and added my own little felt bow on the end. Felt bows are pretty self explanatory but if you would like a step by step head over to my friend Elizabeth's blog HERE for a tute. I am not going to lie I loved the finished product so much when Evie went to bed I put it on and wore it around for a while. 
butterflydress2proof
I just used really thin elastic hot glued onto the felt as the headband. It is less noticeable then stretchy lace and I thought the headband had enough going on without adding anything else. Her orange leggings are of course from my favorite leggings shop We Love Colors. They really are fabulous and have EVERY color you can imagine. Now funny story, I made the dress during morning nap while daddy taught the boys how to bowl on the Wii (yes my boys don't know how to play Wii a fact I am rather proud of) then I made the headband (two actually the second to debut later) during afternoon nap. I was so excited to have it all done and wanted to take pictures that evening but every time I tried to get the dress on Evie she would throw a MASSIVE fit. I mean lat down and cry onto the tile floor while kicking her legs fit. Then she would go limp as a noodle so I couldn't get any appendages in the appropriate places. It finally got dark and then I just resigned myself to seeing if it actually fit. I tried treats and books and bribes. Finally I said "Evie? Do you want to go to bed or try on your dress?" She looked at me and said "Bed." Then picked up her blankie and walked into her room. Yeah. I was totally sad. This morning though a bribe to go walk on the beach did the trick. She was one happy camper!
butterflydress3proof
It was really nice to be alone on the beach front as well. Sunday mornings are pretty darn peaceful in front of our house. 
Thankfully Daddy came with me to coax out a few smiles
butterflydress1proof
And after only a short walk on the beach Evie didn't even cry when I told her it was time to go in...
butterflydress4proof
 maybe it was because I actually said "Do you want to go home and take off your dress?" That did the trick ha! If you would like to learn how to make the dress simply click below and read more! If not I hope your weekend is as full of beautiful things as ours was!

Sunday, January 30, 2011

Couture Cutie Tutorial and Give A Way

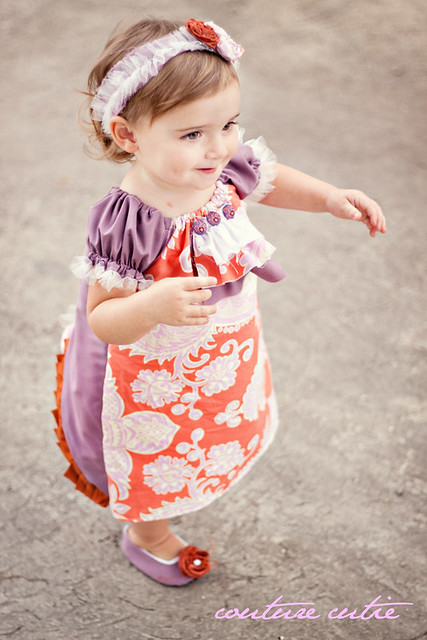
I am excited to share the tutorial on how to make your own Couture Cutie {Mullet Dress}. I have received several emails about buying one and since I don't have a shop I wanted to make sure you can make one for yourself!

In order to make this tutorial I had to make another dress (I was silly and didn't take pictures as I went for the one pictured above). This time I did the front a little different and it is a larger size. Sorry for the rather lame pictures but it is too big for Evie and I didn't have the time to round up a model :)
_MG_2458
The back has the same pleating and bustle, but instead of a rosette I did a pretty blue bow.
_MG_2461
This particular one is up for grabs! All you need to do is hop over to Project Run and Play, check out this weeks competition and vote! Of course I would love if you would vote for my creation but I don't think that is a very good "spirit of competition" to require it :) Once you have voted hop back here and leave a comment letting me know you voted and you will be entered! Easy-peasy 1-2-threasy! 

Now, lets get sewing!!!

Tuesday, January 25, 2011

To Market To Market

Don't get me wrong, I am all for trying to knock off super expensive dresses that I think would be easy to make, but I have received a few requests to try and make a pattern similar to the Village Frock that used to be offered by the Sugar City Shop. I was hesitant because I don't like the idea of taking money away from a mom who came up with a cute idea and worked hard on a pattern. Having said that it has been sold out for over a year (I believe) with little to no signs of it being restocked. So, I thought if nothing else I could try and make one for Evie and see how it goes. Keep in mind I have never seen this pattern (I actually didn't know about it until the first request came in) and I have never seen in person a dress made with this pattern. So, lets just say my first attempt had some major kinks I worked out before I made the pattern. It still turned out pretty cute tough and I had to document my first attempt, no matter how hilariously off it turned out.
_MG_2251_3322
I second guessed myself as I was cutting out the fabric for the neck portion and thought no way was it as wide as I originally thought so I ended up cutting it in half, bad idea, should have stuck with my own pattern ha! I also did not gather it as much as I should have (again a little gun shy). I also made Evie's sleeves shorter then the original because she hates billowy sleeves that hang down. She pulls and pulls on them until I finally take whatever top she is wearing off for her. Anyhow next time (and for the pattern) I will make the gathered portion longer and the straight portion shorter.
marketproof
I also sewed it with a brighter thread so that you can see where I sewed better during the tutorial. I would recommend matching your thread as close as possible to your fabric. Anyhow, before I post the pattern and tutorial I 100% want to know your opinion, do you think this is okay? Or should I just leave it be and we can hope Sugar City restocks the pattern? I REALLY don't want to step on toes or make people up set with my knock offs. So, please leave a kind opinion in the comments (if you have an opinion on the subject hee hee) and we will go from there. Oh and since mine is slightly different I called it the "To Market To Market" frock. Evie liked it okay, when she is happy she sticks out her belly, I take it as her stamp of approval.
_MG_2202_3273
Now I am off to finish my week 3 challenge for Project Run and Play, let me just say I think this competition is giving me an ulcer I am so nervous every week! :) I will be posting a tutorial on how to make the bustled back as soon as the results are posted.

Saturday, January 22, 2011

Frosted Pane Bolero


Before we jump into the bolero tutorial 2 quick things:
1. The beret I made was knitted not crocheted. I feel a little embaressed that I didn't know the difference but what can I say this was my first major project ha! The beret was the only thing I knitted, the bolero was always made out of cotton fabric so unfortunatly the few requests I have recieved for a knitted bolero pattern I won't be able to offer. I have asked my teacher if she could write down the pattern we used for the beret so we will see if she has a chance to do that for us. 
2. The pattern for the Bolero is actually two pieces. I thought I had been able to fit them on one sheet but I was wrong. You can download both pattern pieces HERE. 
_MG_1516_2679proof
This bolero is wonderfully easy and totally versitile. I made mine out of cotton but I am sure you could to it with a stiffer fabric like cordurouy or a soft fabric like velvet. While my ruffle stops are the arms you could make yours longer and have it go all the way around.
_MG_1496_2660proof
I think I am going to make another one in brown. They are just so fun to throw on over things.

_MG_1456_2622proof

Saturday, December 11, 2010

The Swinter Dress

Today I am a guest blogger over at If Life was Like a Cupcake. Amanda, who writes the blog has been a follower since VERY early on and sends the sweetest emails so when she asked I of course said yes! I wanted to do a project that she could make for her two little girls and at the same time reflect my wishing for snow but enjoying going swimming everyday ha! Now a little background, I am a big Phineas and Ferb fan... yeah I know, its a kids show. But it is one of those kids shows that knows adults are often watching and puts in hilarious jokes for us! An episode lately had the kids creating a mash up of summer and winter and calling it {Swinter}. I thought this was such a fun idea and went to work making a dress that could be worn in both summer and winter, the Swinter Dress:
swinter7
The pattern (a very tiny one) can be found HERE and a full tutorial can be found on Amanda's Blog. It is SOOOOOO easy and I think it is just gorgeous on. If you are wearing it during the summer you can wear it sans a t-shirt and sweater:
_MG_9956_1036proof
Evie was soooooooooo grumpy because Finn came out of his room and started yelling "Helloooooooo?" at the top of his lungs way to early and waking everyone up in the process. She was uncharacteristically serious during the shoot
swinterdress2
I thought when a doggy walked past she might crack a smile
swinterdress4
It wasn't until I begged Daddy to come help that she cracked a smile:
swinter6
Then it was off to bed for a very early morning nap ha! I hope you will hop over to If Life Was Like A Cupcake and check out the full tutorial. It really is so simple to whip up. Thanks Amanda for inviting me!

Saturday, November 6, 2010

Strawberry Fields: Little Girls dress tutorial

QUICK NOTE: The Somerset pattern is FINALLY available!!! Click HERE to download it :) 

While we were living in Williamsburg with the hubby attending law school, our best friends Kristen and Wes were in Cleveland with Wes attending dental school. We would take turns visiting each other. On one trip to Cleveland Kristen showed me a few of the dresses she had bought her gorgeous girl from Shabby Apple. When she showed me the Strawberry Patch I said "Oh man we can so make that." We dashed to the fabric store (ahh the good 'ole days when I could {dash} to the fabric store ha!) By the end of the night we had made 3 identical copies of the dress.
IMG_1217
While this is not the exact same dress I made in Cleveland (I simplified it by taking out the center sash) it is along the same lines and I have to say I super heart this dress. It was soooo easy (I know I say that a lot but this is REALLY easy) and only took me about 15 minutes to make! The fabric is from my wonderful friend Jes (who made the most wicked awesome queen of hearts costume I have ever seen HERE) I believe you can purchase it in her Etsy store Chirpy Designs. The leggings are as ever from my favorite We Love Colors, I am telling you if I was somewhere chilly I would have a pair of these in every color, as it is I only have them in half the colors ha! These are my favorite pair and they are actually starting to get some runs, this after 9 months of wear and tear. Anyhooter on to the dress.
IMG_1138
As I mentioned earlier I finally was able to work out some of the kink on Media Fire, so the pattern for the top portion of the dress will be up on Monday after I am able to scan it in (no access to scanner on the weekend but was dying to get this up) I totally free handed it and I am sure you could do just as good of a job :) Just make sure you have a nice long "thin" part before your wider ear looking part so that you can tie a nice knot. Also on the back I made the neck portion a little higher up.
backproof
Sorry the pictures are a bit grainy. My camera has officially given up the ghost so it is all set to be mailed back to the states for repairs. I should start a bet on whether or not it will return in one piece, eeekkkk, fingers crossed.
Once you have all four of your top pattern pieces cut out, place the two front pieces right sides together and sew all around the top. Do not worry about sewing the sides or bottom. Flip the entire thing right side out and topstitch the same thing you just sewed. Once you are done repeat the process with the back pieces. You should now have two nicely finished pieces.
IMG_1098

Tuesday, October 19, 2010

The Yorkshire in {mini}

I am a big fan of Shabby Apple. Love that their dresses are modest and colorful and fun. Not a HUGE fan of how expensive they are but what can you do right? One of my favorites is their Yorkshire dress which you can check out HERE. I admit at times it is super itchy around the neck but totally worth it for fashion right ladies? It is my fav for a few reasons. First it is tweed so it is warm. This is not so great here in Timor but I love it back in the States during fall. Two it is lined. This is huge to me. The other Shabby Apple dresses I own are not lined and when I first received one I was almost irritated at how flimsy it seemed. Having said that, they are made beautifully and wash well. Finally I feel like it is a really classic design so I will be able to get plenty of years of wear out of it. When the time rolled around to do family pictures our whole "theme" was based on this fabric from the lovely Jess's etsy shop Chirpy Designs. There is always one article of clothing that I tend to base everyone else's on. This really helps me to figure out a look. Until I find that one thing I am kind of all over the place. I made Finn a tie from THIS tutorial. I think the color combination of ice blue and olive just beat out my obsession of grey and yellow (it was time for both of us to move on really, the relationship had become unhealthy). Evie really didn't have anything that went (keep in mine this is the night before pictures). I decided to sit down and make her a dress and didn't realize until half way through I was totally just making her a mini version of the Yorkshire! So after that long intro here it is for you, how to make your own girlie girl a Yorkshire in {mini}.
_MG_3478proof
You can find the pattern HERE. Word of warning this pattern was a bit big for Evie. I would say it very well might be perfect for an almost 2 year old who is on the small side, otherwise known as a regular 18 month old haaa!

Thursday, October 7, 2010

Happy Soldier Dress: A yellow tutorial for MADE

I am THRILLED to be a part of MADE's yellow celebration. I have been in heaven checking MADE everyday to see the fabulous, sunny, bright tutorials created by so many fantastic crafters and seamstresses. For my turn I was excited to have an excuse to make a pinafore I had been thinking about since returning from Rome for a little lady I know. I saw these little "military" pinafores all over the place there (or HERE at Zara) and thought "hmmm I bet I could make one" (isn't that always the way with us crafty ladies ha!) So, here it is the Happy Soldier Dress:
_MG_3053proof
The pattern for the Happy Soldier pinafore can be found HERE, it is for size 4T and can easily be enlarged or reduced to meet your needs.

Friday, August 27, 2010

Ruffled Tummy toddler dress tutorial

I don't know about you but I LOVE my one year olds gigantic tummy. It is always so cute sticking way out over her short little legs. I am jealous that hers is considered adorable while mine is a topic of possible plastic surgery ha! Anything to accentuate that tummy in a cute way is great so I came up with this little dress this morning.
_MG_0723proof
You can't see it in that picture very well but there is a cute ribbon that goes around and ties in the back. You can see it in this one a tiny bit
_MG_0704proof

Related Posts Plugin for WordPress, Blogger...