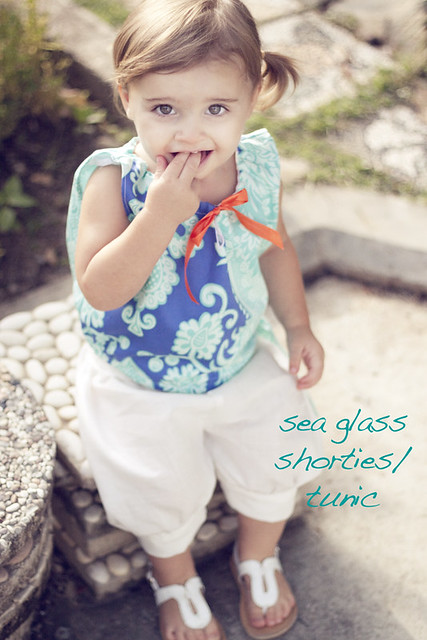
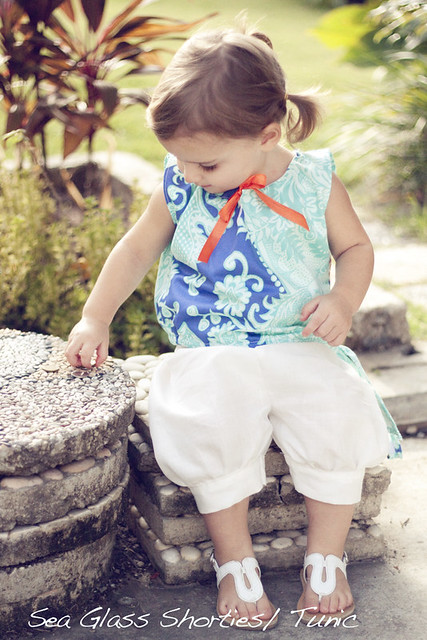
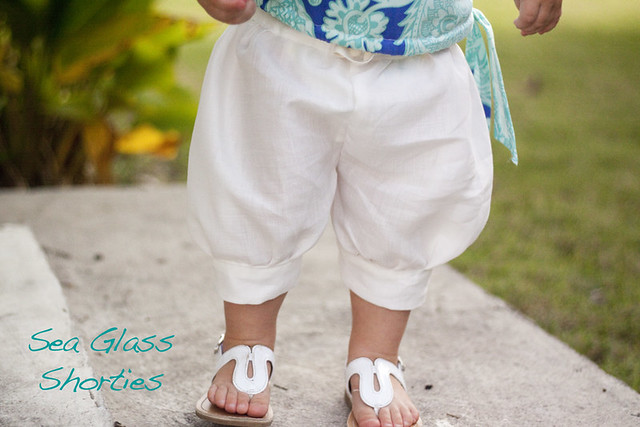
Everywhere I look I am seeing little bloomer/ balloon shorts. I think they are SUPER cute and admit I have bought Evie a pair or two. I wanted a pair that was a bit longer and made out of linen though so I went to work and came up with the Sea Glass Shorties.

I also made Evie's shirt but that is for another post :) Like I said all the shorts I bought Evie were pretty short. I thought it would be cute to have some that hit right below the knee.

You can TOTALLY make yours shorter.

They are super comfy and since they are made out of linen extremely light and breathable.

The waistband is elastic in the back and has a cute little drawstring in the front for easy on and off.

Turn your pants right sides out.

Now we are going to attach the back band. Find the center of the back of your shorts and line it up with the center of your back band. Slide the gathered portion of the shorts up in between the two parts of the back band and pin in place. Pin out from there.

Once you have topstitched it in place, we are going to thread the elastic through.


Now before you attach the front band you have a choice to add drawstrings and or not. If not you can skip this part. Find the center of your front band. Create two button holes on just the front flap of your band on either side of the center. This way you can thread your draw string through (I used twill tape)

Whatever you choose to use as a drawstring you need to have enough that it reaches all the way to one side of the front band. Pin the end of your draw string in place on either side. Now, find the center of the front of your pants and line it up with the center of the front band and pin in place. The front band will fit up and over the back band so that there is a nice finished edge.

Once you have topstitched your band (both across the bottom and on either short edge, to keep it in place over the back band).

They look so comfy I am honestly thinking about making myself a pair :) Maybe with a nice stretchy waistband? Hope your cutie is comfy!


I also made Evie's shirt but that is for another post :) Like I said all the shorts I bought Evie were pretty short. I thought it would be cute to have some that hit right below the knee.

You can TOTALLY make yours shorter.

They are super comfy and since they are made out of linen extremely light and breathable.

The waistband is elastic in the back and has a cute little drawstring in the front for easy on and off.
What you will need
1 meter fabric
A small strip of elastic
Safety pin
Sewing Machine
Scissors
A pair of pants to use as a pattern
Lets get started! Take your pattern pair of pants and fold them in half making sure all your seams are nice and crisp. You need two front panel pieces and two back panel pieces.
Now if we were doing a normal pair of shorts we would follow our pattern pair, but to make the bubble shorts we need a lot more fabric :)
You now need to cut 2 bands, one for the back and one for the front. Both need to be cut with the long edge on the fold. Measure your cuties belly and add at least an inch or two for leeway. You can make them as wide as you like just keep in mind you are going to iron over the raw edges.
(sorry for the dark picture, sewing at night again ha!)
Set these bands aside. Now you are going to make two more bands for the legs. Measure your munchkin at the location you want the bands to hit. Again add a bit for leeway. Again iron over the long raw edges. Do not worry about the short edges. Now set them aside.
Take one front piece and one back piece and line up the straight edges, pin in place. Repeat with the second set. Sew up the straight line connecting the front to the back.
When you are done iron the seams. Now you are going to sew a gathering stitch across the bottom of the leg.
Once you are done grab one of your leg bands. Slide the gathered portion of the leg in between the two flaps of the leg band and pin in place. Topstitch across.
Now fold your shorts so that right sides are together and stitch up the little arch.
Now we are going to stitch together the two pant legs. Match up the center seams and pin out from there.
Turn your pants right sides out.

Now we are going to attach the back band. Find the center of the back of your shorts and line it up with the center of your back band. Slide the gathered portion of the shorts up in between the two parts of the back band and pin in place. Pin out from there.

Once you have topstitched it in place, we are going to thread the elastic through.


Now before you attach the front band you have a choice to add drawstrings and or not. If not you can skip this part. Find the center of your front band. Create two button holes on just the front flap of your band on either side of the center. This way you can thread your draw string through (I used twill tape)

Whatever you choose to use as a drawstring you need to have enough that it reaches all the way to one side of the front band. Pin the end of your draw string in place on either side. Now, find the center of the front of your pants and line it up with the center of the front band and pin in place. The front band will fit up and over the back band so that there is a nice finished edge.

Once you have topstitched your band (both across the bottom and on either short edge, to keep it in place over the back band).

They look so comfy I am honestly thinking about making myself a pair :) Maybe with a nice stretchy waistband? Hope your cutie is comfy!


These are so stinking cute! I love the white! They look so comfortable, it does make me wonder if I could pull them off... or if I am too short hmm choices.
ReplyDeleteVery cute! Thank you for all of your easy to understand tutorials!!
ReplyDeleteWOw! These are so darling! You are so talented! Do you make all of Evie's clothes? Where do you get your fabrics?
ReplyDeleteSo cute!
ReplyDeleteI am so glad I found your blog, thanks for the inspiration.
Elisabeth, Norway
Suuuuuuper cute!!!! I love looking at your stuff (but I 'm still nervous to sew clothes!!) :)
ReplyDeleteI have been wanting to make a pair of these for my daughter. I think I will give it a try. I wonder how they would look as adult shorts? Maybe I should try that too.
ReplyDeletelove (like, love love love). piper jane needs them. she needs one of everything you tutorial, though. :)
ReplyDeletelove
k