I am almost done compiling everything to move forward on the Toe the Line series but while you are waiting......
Also, I left it in the comments but wanted to make sure the people who wanted to know weren't left hangin'. Evie's jeans in the last post were from Zara Kids. If you are able to go to one or order online just keep in mind their sizes run large. Those jeans were 12-18 months, Evie will be two next month and they just now fit perfect. Thanks for all the kind comments about the last post I am right there with you and just LOVE that top! Thanks for all your sweet comments!!!
Also, I left it in the comments but wanted to make sure the people who wanted to know weren't left hangin'. Evie's jeans in the last post were from Zara Kids. If you are able to go to one or order online just keep in mind their sizes run large. Those jeans were 12-18 months, Evie will be two next month and they just now fit perfect. Thanks for all the kind comments about the last post I am right there with you and just LOVE that top! Thanks for all your sweet comments!!!
This dress was not in the plan or on my radar at all but then the other day I was browsing the new little girls dresses at Shabby Apple and I saw this one:
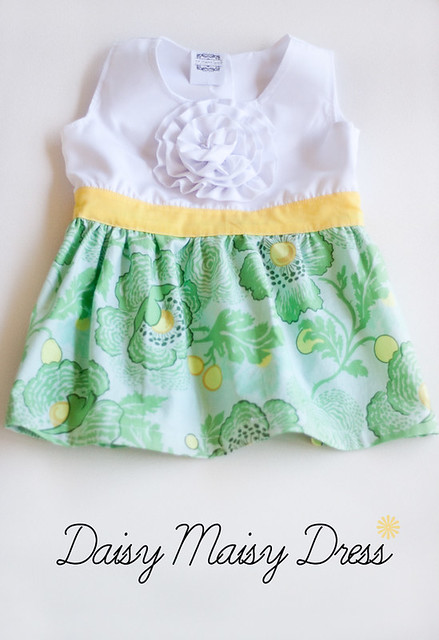
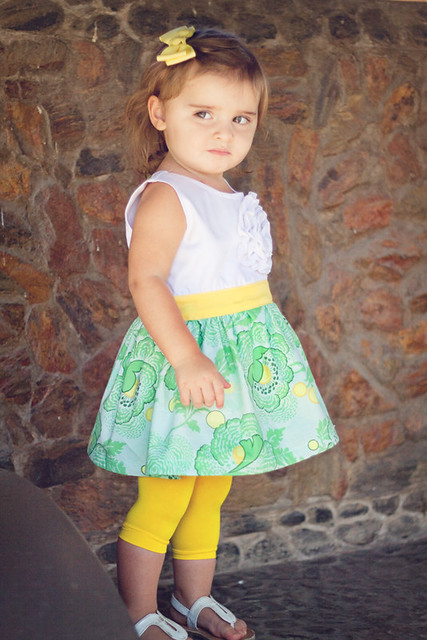
I immediately had to take the challenge to knock it off. And guess what? It is soooooo easy!!! I think I might have to make one for myself ha! (excuse Evie, she was in NO mood to be photographed ha!)
Ironically enough the first one I made was WAY to big for Evie. It ended up fitting Sawyers little friend Carmen like a glove so I would say the pattern you can print out is more of a 4T age range. I made mine without sleeves because I thought it would look super cute with a cardigan this fall and didn't want the bulk under. You could easily add them.
I love how it turned out... even if it meant getting dagger filled looks from Evie
The rosette in the middle was a lot easier then I thought it was going to be, especially if you use a soft suiting cotton/ dress shirting fabric.
I bet you can make it with fabric you have on hand! So instead of $42 it is free!
If you wanna go for a swing and get the pattern just click read more!
What You Will Need
3/4 yard soft white cotton (shirting looks great!)
1/2 yard fun fabric
1/4 yard corresponding fabric for the waist
A small piece of soft interfacing
two buttons
optional elastic
First of all sorry for the super poor quality of these pictures. I started sewing at 10pm not the best itme for light ha!
Once you have cut out your pattern pieces you will need a few more piece that there is not pattern pieces for. First you need to cut a nice looooong 4 inch wide strip of the white fabric. This will be used as the rosette. I like to get mine ready ahead of time so I ironed it in half then I serged the raw edges together. Then I ran a gathering stitch down the non-folded side. After ruffling it up I set it aside. Next I measured my cutie from her "high waist" down to her knee (or where you would like the skirt to hit). How wide it is depends on how fluffy you want the dress to be. The wider it is the fluffier or puffier it will be. I would make mine at least 1.5 times as long as your finished bodice waist. Once you have cut this go a head and set it aside. Your waist band we will cut in a little bit. Alright enough cutting lets sew!Starting with your top front pieces lay them right sides together and pin.
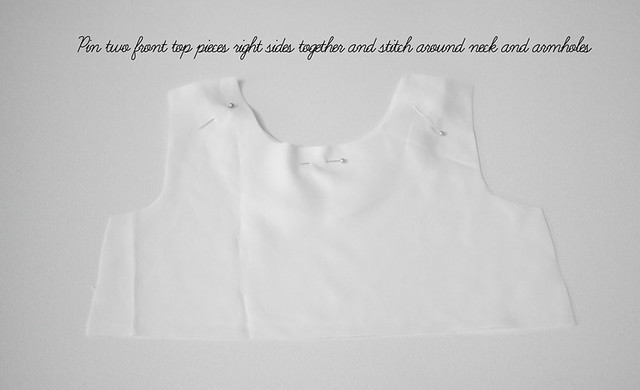
I knew that the rosette would be heavy so I cut some soft interfacing that lined up with the neckline. This is optional but I felt like in the end it was a good idea. Once you have stitched the armholes and neckline turn everything right side out and iron. Now you are going to repeat the process with your four pack pieces. You have two options here, you can create button holes or you can slide two little elastic loops in between the layers of one side. Either way it will look good :)

Again turn them right sides out and iron them.

Now we are going to connect the front to the back. Lay your front piece right sides up. Lay your two bak pieces right sides down and line up the shoulders and sides and pin, then proceed to stitch across the shoulder pieces and on both sides. Once you are done turn everything right side out.

Now that you are done grab your ruffled strip. I started a little to the right of center and pin in place as you go around.
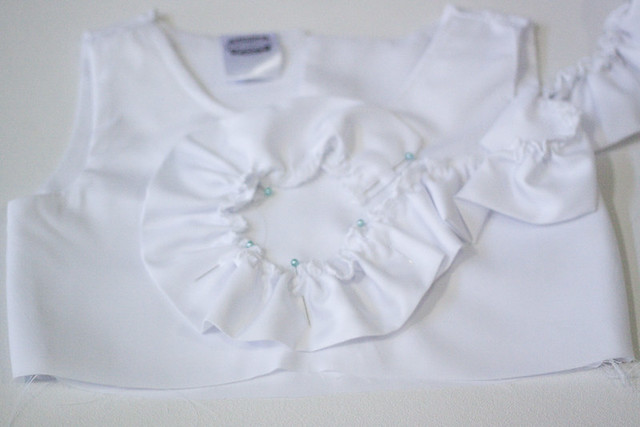
Stitch your first loop and remove pins. Now do a second loop inside the first.
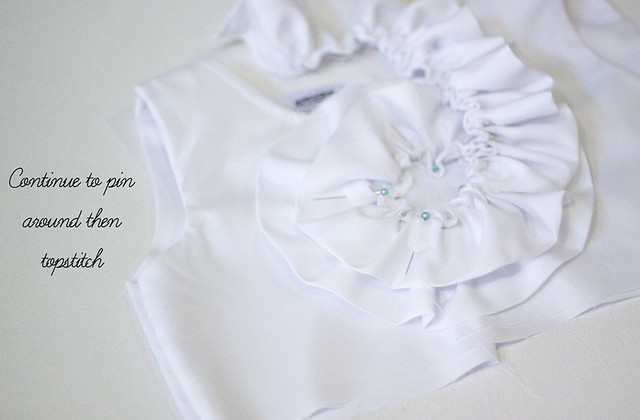
Continue to pin and topstitch until you get towards the end. I then folded the end a bit and hand stitched it into place.

Now we need to make our bands. You will need to cut two wide strips. On my 3T dress I made these nice and wide on Evie's they were about 3 inches. In the end you want two complete circles. I first ironed over the raw edges of the bands.
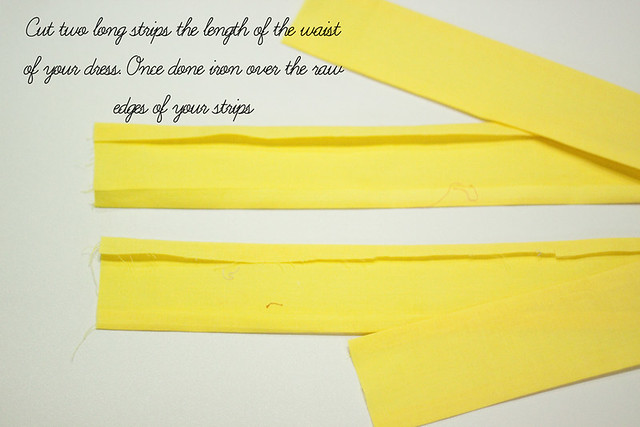
Then I folded each band in half, right sides together so the ends met. I then stitched it into place. Now I had two circles with "finished" edges. The only tricky part is that you want the circle to be the exact same circumference as the waist of the top of your dress. Now, slide one band up over the bottom of the dress top on the outside and the other on the inside and pin into place all the way around. I didn't take a picture and I should have but in the back I overlapped just slightly the bottom of dress top where the two pieces meet. This ensures you will get them both and looks nice :)
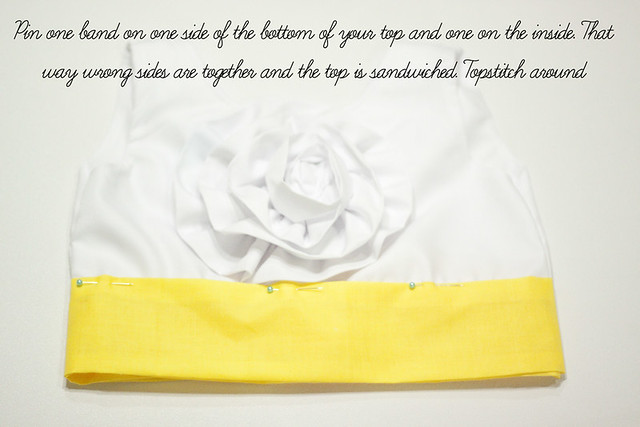
Once you have topstitched around grab the rectangle you created earlier.

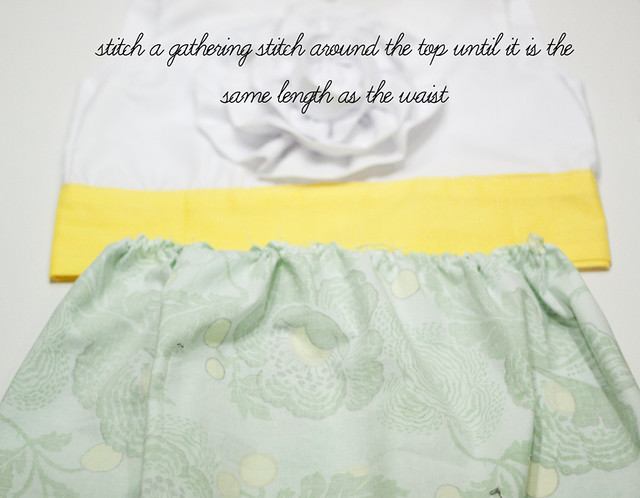

Now all you have left is the hem the bottom and attach your buttons!! (or sew your button holes if you went that route). Super easy right? I am soooo glad the second one fit Evie like a glove, and hopefully, when she is in a better mood I will get some fun pics ha! Have fun making your knockoff!!!




adorable ! great idea & thanks for the tutorial :)
ReplyDeletecute cute cute!!! I love it when inspiration strikes like that!
ReplyDeleteSo cute, and I think little girls look darling when they are grumpy (they might not sound darling, but they look it) :)
ReplyDeleteAdorable!! I have had my eye on the "big girl" version of this one and am hoping to have made myself one by next weekend for a wedding! Great job Kelly!
ReplyDeleteOMG! Can't wait to make this for my daughter!! I am thinking something fun and patriotic for the holiday weekend :) thanks for sharing!!
ReplyDeleteThis is so adorable!! I love it!
ReplyDeleteso lovely!!!!
ReplyDeletethat is adorable!!!!
ReplyDeleteSo pretty! Thank you so much =)
ReplyDeleteJust a quick question before I start on one for my little princess, did you mention the seam allowance at all? Is it 1/2 or 1/4?
ReplyDeleteLovely. I've just ordered some material for my two little girls. I think it would be cute to have a row of little roses like you've done perhaps along the chest (empire line) in a contrasting fabric... I'll have fun planning it out.
ReplyDeleteAndrea
http://dressmakerelves.blogspot.com/
I LOVE this!! I made it for my little girl and love the way it turned out and the tutorial is easy to follow!
ReplyDeleteSo cute! I just saw this on Pinterest. I'm actually the designer for shabby baby, and love your version of it! I actually kind of like your fabric choice better than mine.
ReplyDeletekatie