I am so excited to be sharing this guest tutorial with you today! Since I still am not ready to have sponsors I asked Tara if she would be willing to share with us how to make one of the fabulous creations from her store Birdy Boots where she sells adorable clothes, shoes and toys! She agreed and I am thrilled at what she created for us.
Hi everyone! I’m so excited to be guest posting on Kelly’s blog today! I’ve been reading her blog for quite a while now and am constantly amazed at her tutorials. I run a little boutique on Etsy called Birdy Boots. We carry eco-conscious kids clothing, shoes and wooden toys. I would love it if you’d stop by some time!
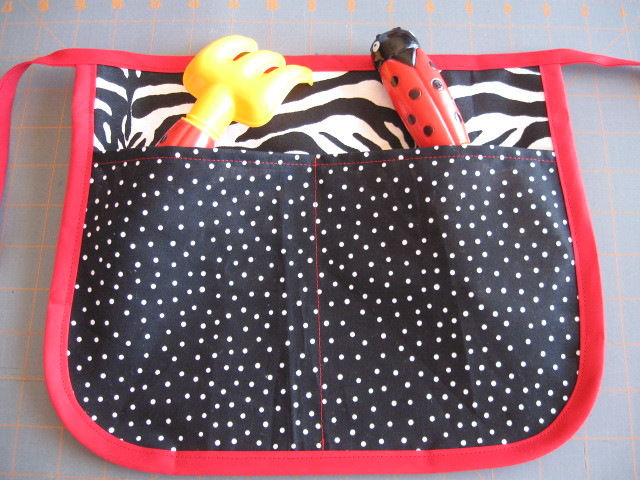
Depending on the number of pockets you are going to make, you can stop here if I you like! I usually add a straight stitch or two to create two or three pockets. To do this, measure out how you want your pockets and mark the lines with a fabric marker or pins. Carefully stitch along the lines, taking care to backstitch at each end for durability.

Hi everyone! I’m so excited to be guest posting on Kelly’s blog today! I’ve been reading her blog for quite a while now and am constantly amazed at her tutorials. I run a little boutique on Etsy called Birdy Boots. We carry eco-conscious kids clothing, shoes and wooden toys. I would love it if you’d stop by some time!
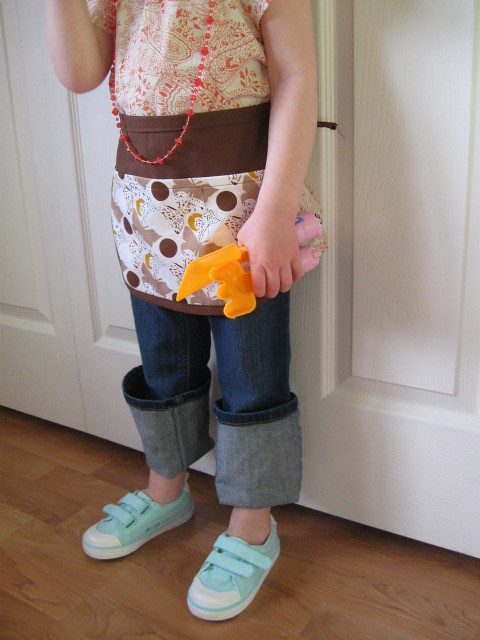
Onto the tutorial…we live in Iowa and it’s still pretty cold here. I’m (patiently) waiting for the weather to warm up so my girls and I can get outside in our garden…And today, I am going to show you how to whip up a cute and durable Child’s Garden Apron!
(I call it a gardening apron, but your little one can use it for lots of reasons – they work great for cooking and cleaning, too! )
It doesn’t take much fabric so it is a great scrap buster project! The size I’ll show you today works great for 2-5 year olds but you can easily modify it for an older child
What you need:
-Sewing machine
-Coordinating thread
-Iron
-2 coordinating fabrics *see tip for choosing fabric below
-Coordinating ½ inch double fold bias tape (pre-packaged or make your own!)
-Ruler or tape measure
-Sharp scissors or rotary blade/cutting mat
-Straight Pins
*Choosing Fabric:
Medium to Heavy-weight Cotton
Home decorator weight fabric
Outdoor upholstery fabric
Denim
Let’s get started!
1. Cutting your fabric and ties:
Cut two (2) lengths of bias tape: one (1) piece 56 inches long and one (1) piece 29 inches long
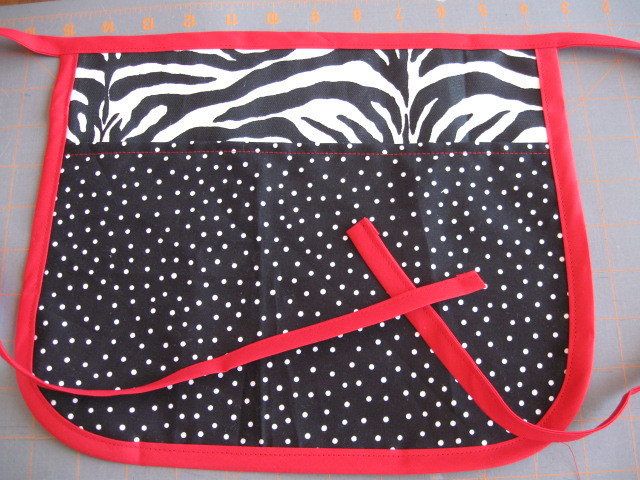
Cut your ‘main’ fabric piece (my zebra print): 11.5 inches by 9.5 inches
Cut your ‘pocket’ fabric piece (my polka dot): 11.5 inches by 7.5 inches 2. Rounding corners
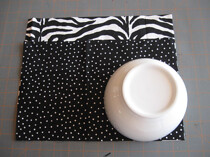
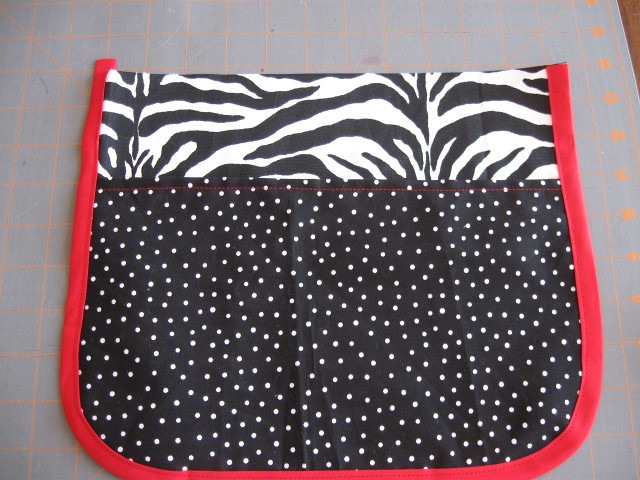
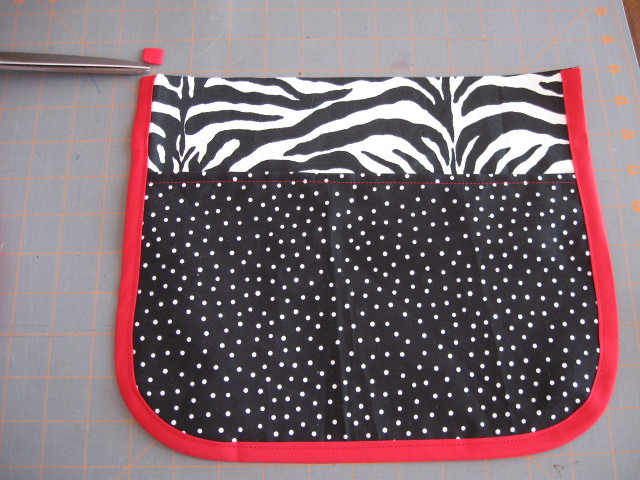
Lay your pieces of fabric with the bottom corners aligned and round the bottom corners slightly. I like to use a bowl or plate to do this but you can also just eyeball it.
3. Finish pocket.
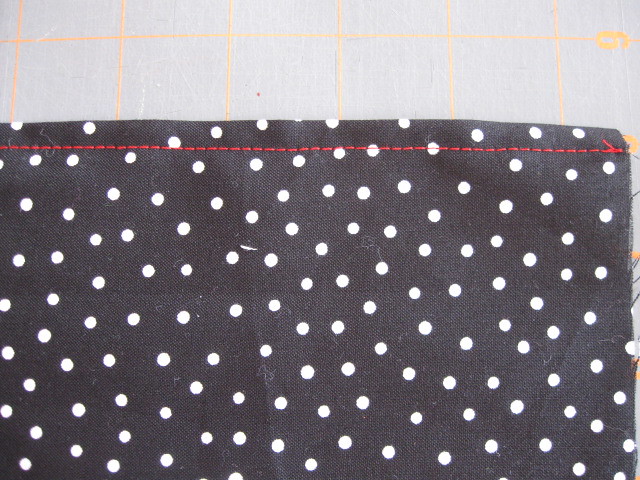
Using your iron, fold down the top (straight edge) of your pocket piece by ¼ of an inch and then by another ¼ of an inch to enclose the raw edges. Carefully sew a finishing stitch along the length of the fabric. 4. Attach bias tape.
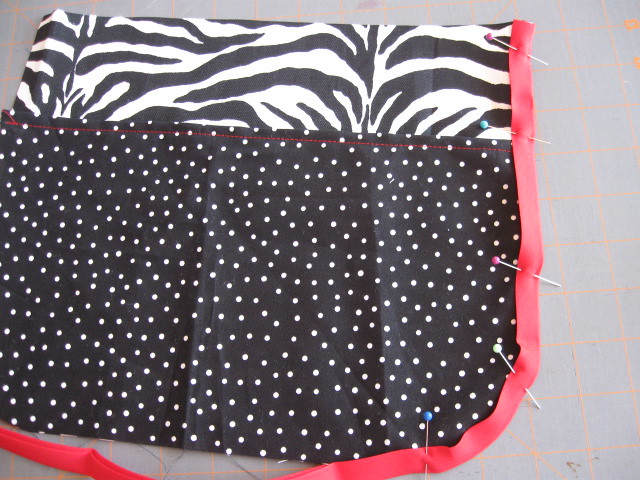
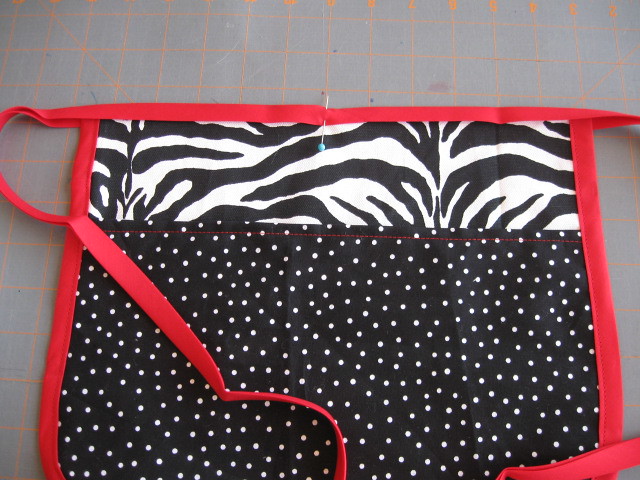
Line up fabric pieces as before and using your shorter length of bias tape, carefully sandwich both fabrics between the bias tape. Pin generously around 3 sides of the apron as shown below.
Now take your longer length of bias tape and find the center. Align it with the center of the top of the apron and pin the bias tape down, sandwiching the fabric as before.
Starting at one end of the bias tape, sew a finishing straight stitch the entire length of the bias tape at the top of the apron. This closes the bias tape and finishes the apron. I like to fold in the ends of the bias tape by a ¼ of an inch so the ends of the tape look more finished and there is no chance they will unravel.

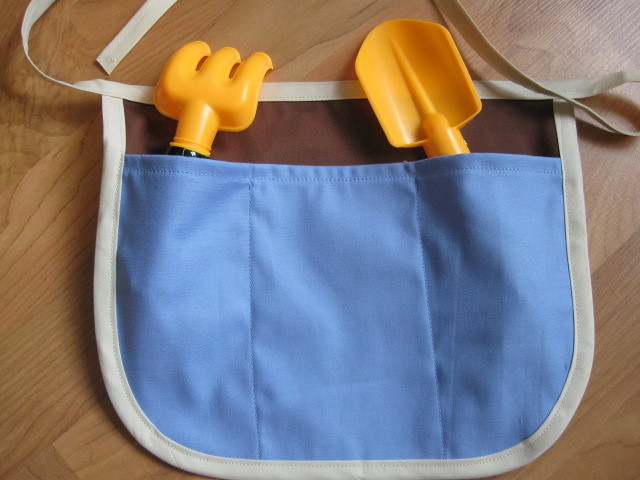
Depending on the number of pockets you are going to make, you can stop here if I you like! I usually add a straight stitch or two to create two or three pockets. To do this, measure out how you want your pockets and mark the lines with a fabric marker or pins. Carefully stitch along the lines, taking care to backstitch at each end for durability.
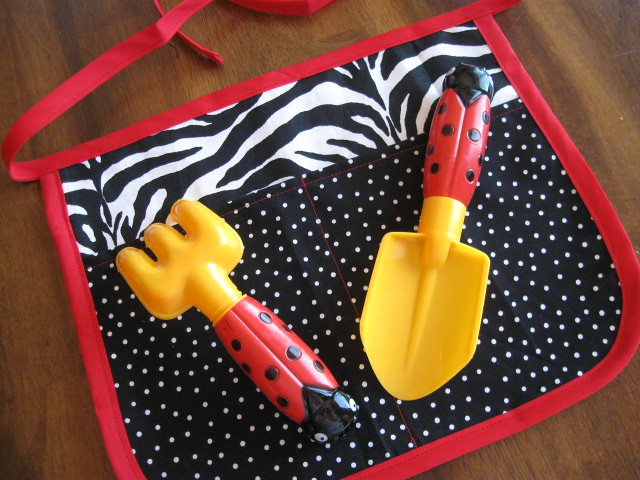
Add a cute set of gardening tools*, put it on your little one and get to work! J
*I found these gardening tools at a dollar store last year but I bet you can pick up a pair about anywhere this time of year.
How cute is that! And totally easy! Thank you so much for sharing with us! Make sure to hop over to Birdy Boots and check out all the adorable items Tara has made!
Oh I can't wait to garden with the cuties! Armed with these aprons and their rubber boots we are unstoppable :)
How cute is that! And totally easy! Thank you so much for sharing with us! Make sure to hop over to Birdy Boots and check out all the adorable items Tara has made!

Oh I can't wait to garden with the cuties! Armed with these aprons and their rubber boots we are unstoppable :)




That is just adorable. I wounder if one of those would help us keep our play tools together?
ReplyDeleteAwesome Picture!!
ReplyDeleteAt FashionPosh.com we carry tops, bottoms, coats, sweaters, dresses, and cardigans of all kinds- Neacklace and Accessories
Awesome Picture!!
ReplyDeleteAt FashionPosh.com we carry tops, bottoms, coats, sweaters, dresses, and cardigans of all kinds- Buy Women Dresses
Very nice post here thanks for it .I always like and such a super contents of these post.Excellent and very cool idea and great content of different kinds of the valuable information's.
ReplyDeleteGroomers Aprons