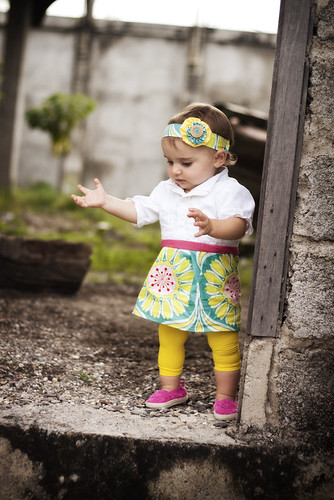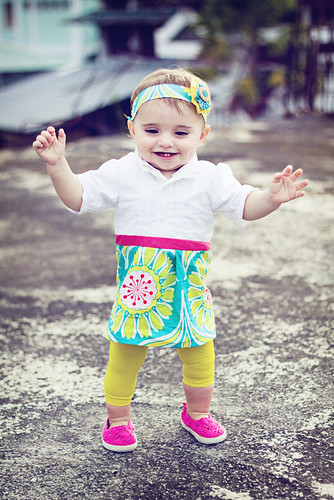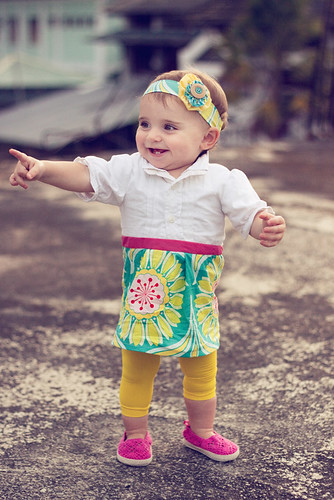
I am still reeling from the fantastic whirlwind it was being featured on Luv In The Mommyhood. Thank you so much new friends I am so glad to have you! And thank you Shannon one more time for your awesome, way too flattering, post. I wanted to make sure to get some more of the preparations for Evie's party up before we head out of town this weekend. So, could Evie's leggings get any more electric! Ha! Add in those hot pink shoes and she could literally stop traffic. They are of course from my favorite leggings store We Love Colors, I just love their variety. Any color I need guaranteed they have it (this is totally unsolicited, they are that cool hee hee). So, this is Evie's first birthday dress. It was so fun and pretty simple to make. It is actually a refashion of sorts out of one of the boys old dress shirts, so there is no pattern but you can totally still do it yourself. I wanted to mimic the dress that I am wearing in the header of the blog but just shrink it down to baby size ;) When you are done be sure to follow THIS tutorial so you can get a matching head band like hers.
What you need:
A hand me down dress shirt (or new, totally up to you) in a few sizes larger then usually worn
1/4 yard fabric (or more if you need a larger size) for the "skirt" portion
An 1/8 of a yard of fabric for the mid-section
Elastic thread (can be found at your local fabric stores)
Sewing machine
Scissors
Okay first things first. We are going to dismantle the boys shirt a little bit. Un pick the sleeves completely from the shirt and set them aside. I decided I didn't want Evie's to have a collar so I simple folded it in and sewed it down (it would look JUST as cute with a collar). Now, to size the shirt down and give it some character we are going to make some pleats. At first I got carried away and made the shirt so small when I tried to put it on Evie she looked like the incredible hulk ha! In the end I did 3 pleats on each side. I personally used a hot hot steamy iron to make my pleats and then just topstitched them down.
When you try on the shirt you will probably need to bring the sides in a little, this is a maybe. If you do make sure to size down your arm holes to match. I also decided I wanted this to be a slightly high-waisted dress so when trying the top on her I also pinned where I wanted to cut the shirt up to and then trimmed it once I had the pleats all correct. Now grab your dismantled sleeve. I wanted short puffy sleeves so I cut them up above the elbow. I hemmed the bottom and then using my elastic thread I shirred it up about an inch up from the bottom. To give them a little puff I gathered them ever so slightly at the top where the sleeve meets the shirt.
Grab the material you set aside for the mid section. Take your top and wrap the fabric around it with right sides together to determine how long it needs to be. Keep in mind you will need to connect the two ends to make it a complete circle so add a little bit to your measurement. Cut it to the correct length. Now decide how wide you want this "belt" area to be (mine was 2 inches after attachment) Once you have it cut down to length and width turn the strip of fabric right sides together ends matching and sew making sure to back and forth, making a complete circle. Turn your top inside out and pin your "belt" to your top making sure it lines up nicely. Now sew all the way around
Now flip what you have right side out and topstitch what you just sewed (I used white thread so that you could see the topstitching better, I would advise matching our thread if you can :))
Take the piece of fabric you have chosen for the bottom of the dress and hem the bottom. Next place right sides together and sew up the side. Turn your skirt inside out and it until it will match perfectly to the top.
Now you are going to follow the exact same steps as with your "belt'" piece. Slide the skirt over the top match the right sides and raw edges together. Sew all the way around, flip it right side out and top stitch the same place and that is it!!
I really love the top on this dress, although looking back if I were to do it perfectly I would unpick the collar and make it look better, but come on the other way is so much easier ha!
Evie says she loves it just the way it is! Now YOU!
Go and have fun making your girly a dress!
Cheers
Kelly


Too Cute!!!
ReplyDeleteOk - I just found you off of some other blog (I can't remember which) and everything you have on here is just AWESOME. I love it! I'm so going to be copying you in the coming months - I especially love your little boy tutorials. Thanks for sharing so much of your creativity!
ReplyDeleteSo love this dress! I'll try one for my daughter (and maybe even myself!)
ReplyDeleteoooh good idea! I am going to try one for me and my 8 year old!!!
ReplyDeleteHahahahaha!! I was just telling my sister about your blog, and the cute dress you did yesterday (the man's shirt with the yellow fab) and then thought, a child's dress in a similar way would be super cute. I'm going to try and make one! And then here you are! Sooooo cute!!! You have taken a lot of guess work out for me :)) THANK YOU!!!!!
ReplyDeleteKelly, this is so amazing! (The WHOLE blog, not just this particular pattern, though I must say I love it too). Wishing you were closer and children had an "off" button.
ReplyDelete